Sealey VS027 User Manual
Vs027.v2, Brake fluid tester, Fig.2 fig.3 fig.4
INSTRUCTIONS FOR:
BRAKE FLUID TESTER
MODEL NO:
VS027.V2
IMPORTANT: PLEASE READ THESE INSTRUCTIONS CAREFULLY. NOTE THE SAFE OPERATIONAL REQUIREMENTS, WARNINGS & CAUTIONS. USE THE
PRODUCT CORRECTLY AND WITH CARE FOR THE PURPOSE FOR WHICH IT IS INTENDED. FAILURE TO DO SO MAY CAUSE DAMAGE AND/OR
PERSONAL INJURY AND WILL INVALIDATE THE WARRANTY. KEEP THESE INSTRUCTIONS SAFE FOR FUTURE USE.
Thank you for purchasing a Sealey product. Manufactured to a high standard, this product will, if used according to these instructions
and properly maintained, give you years of trouble free performance.
1. SAFETY
2. INTRODUCTION
3. SPECIFICATION
4. PREPARATION
1.1 GENERAL SAFETY
DO NOT use the tester to perform a task for which it is not designed.
DO NOT allow untrained persons to use the tester.
DO NOT use whilst under the influence of drugs, alcohol or
intoxicating medication.
Keep children and unauthorised persons away from the work area.
Keep work area clean and tidy and free from unrelated materials.
Ensure the work area has adequate lighting.
After use, clean equipment and store in a cool, dry, child proof area.
WARNING! Brake fluid is flammable - keep away from sources of
ignition, including hot surfaces e.g. exhaust manifold.
1.2. BRAKE FLUID SAFETY
WARNING! Brake fluid will damage paintwork. Any spillage should be
flushed with water immediately.
Always read and comply with the warnings on the brake fluid
container.
Wear eye protection and keep skin contact to a minimum. If brake
fluid enters eyes rinse with plenty of water and seek medical advice.
If swallowed seek medical advice immediately.
Dispose of waste fluid in accordance with local authority regulations.
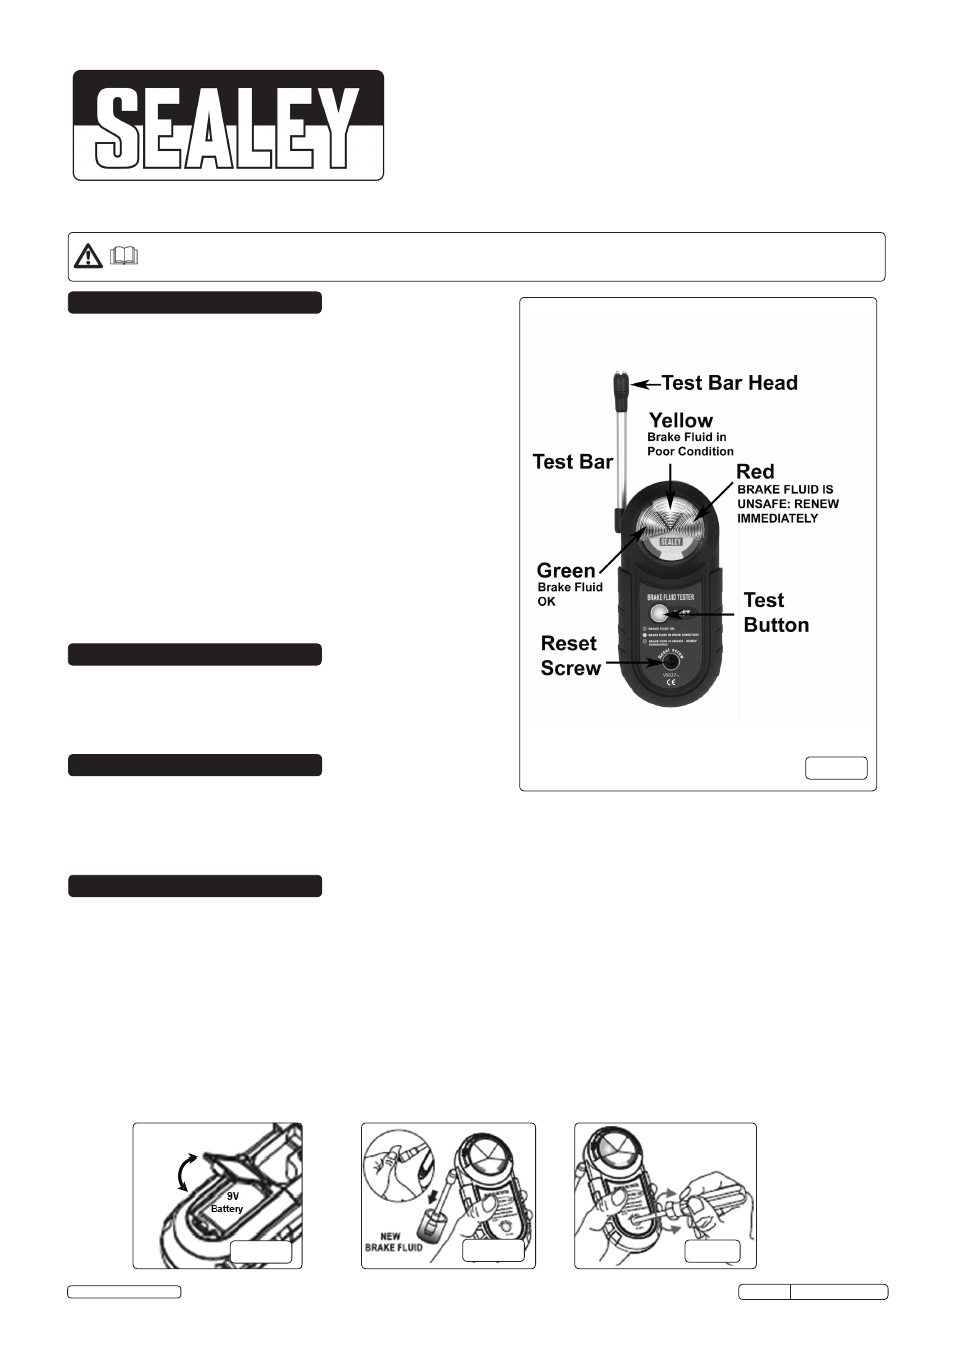
Comparative electrolytic type tester. Checks moisture content of fluid by
resistance to electric current. Easily calibrated using new brake fluid.
Audible test cycle with three LED read-out. Just insert probe and press button
for immediate result. Works on DOT4 and 5.1 specification fluids. Uses 9V
battery (not included).
Model No: . . . . . . . . . . . . . . . . . . . . . . . . . . . . . . . . . . . . .VS027.V2
Moisture Content:
Green: . . . . . . . . . . . . . . . . . . . . . . . . . . . . . . . . . . . . . . . . . . .<0.5%
Yellow: . . . . . . . . . . . . . . . . . . . . . . . . . . . . . . . . . . . . . . . .0.5 - 3.5%
Red: . . . . . . . . . . . . . . . . . . . . . . . . . . . . . . . . . . . . . . . . . . . . .>3.5%
4.1.
Battery Installation/Removal
4.1.1. Open the battery compartment in the rear of the tester (fig.2).
4.1.2. Insert or remove 9V battery (PP3 or equivalent), observing correct polarity.
4.1.3. Close the battery compartment.
4.2. Calibration
4.2.1. Unfold the test bar.
4.2.2. Clean the two probes on the test bar head (fig.3)
4.2.3. Dip the test bar head into a sample of fluid drawn from a container which was previously unopened and sealed (fig.3). This is particularly
important as this fluid will used as the reference against which subsequent samples are compared.
4.2.4. Press and hold the test button and turn the reset screw anticlockwise fully (fig.4). All the LED’s should now be unlit.
4.2.5. Turn the reset screw clockwise until the green LED lights. The calibration procedure is now complete.
fig.2
fig.3
fig.4
VS027.V2 Issue:1 - 25/11/14
Original Language Version
© Jack Sealey Limited
fig.1