Fig.3 fig.4, Fig.2 – Sealey BS2 User Manual
Page 2
BS2.V3 Issue No. 1 - 16/04/09
NOTE: It is our policy to continually improve products and as such we reserve the right to alter data, specifications and
component parts without prior notice.
IMPORTANT: No liability is accepted for incorrect use of product.
WARRANTY: Guarantee is 12 months from purchase date, proof of which will be required for any claim.
INFORMATION: For a copy of our latest catalogue and promotions call us on 01284 757525 and leave your full name
and address, including postcode.
01284 757500
01284 703534
Sole UK Distributor
Sealey Group,
Bury St. Edmunds, Suffolk.
www.sealey.co.uk
We b
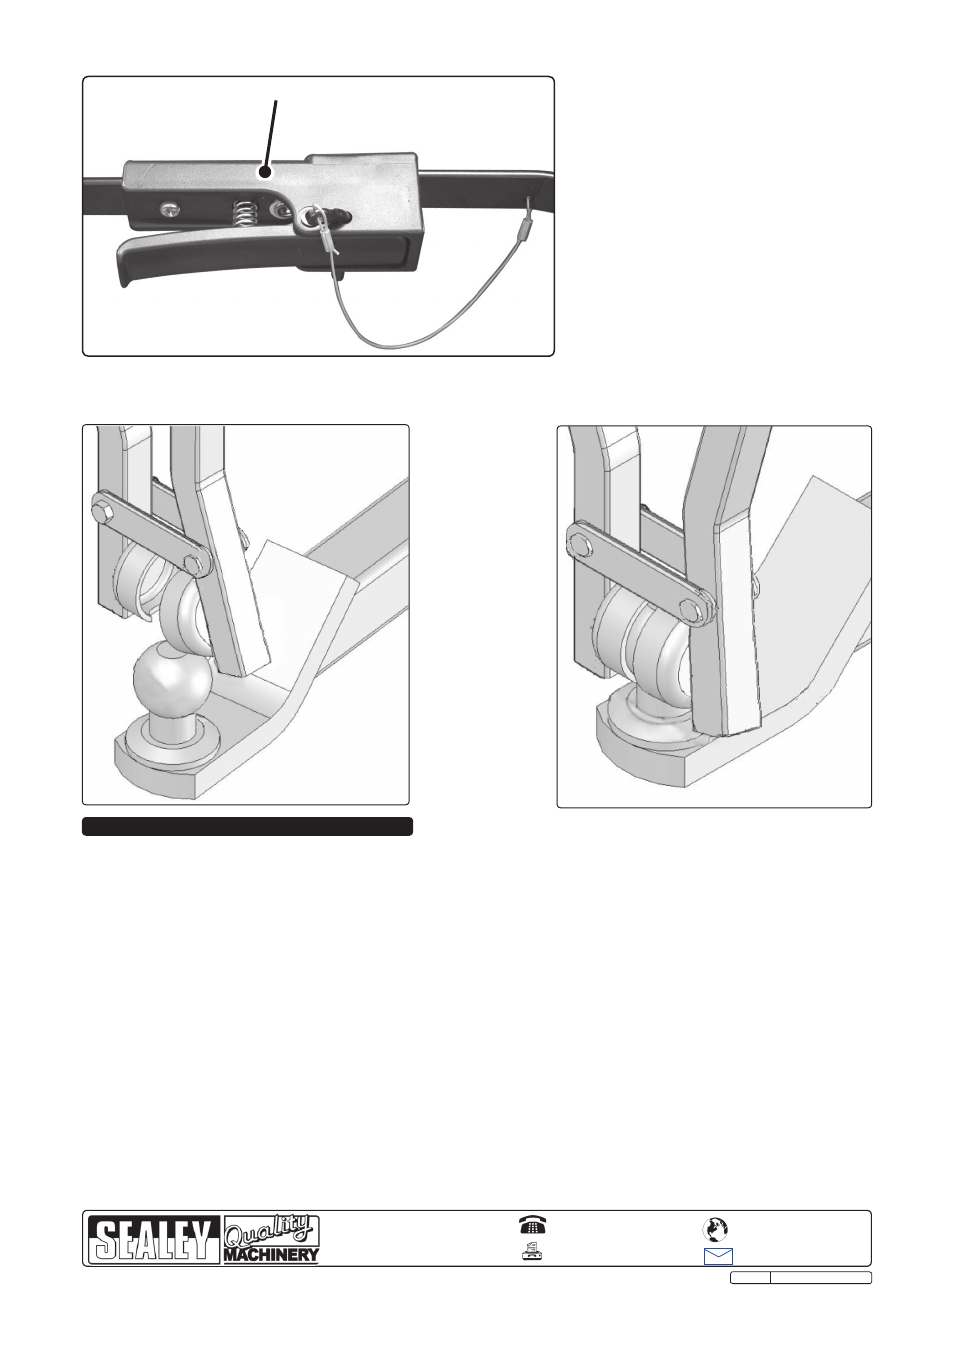
3.7 To remove the carrier, remove the safety locking pin and squeeze the lever on the central locking bar while
pulling the locking bar upwards. The locking bar will now fold upwards releasing the carrier from the
tow ball.
4. LOADING BICYCLES
Fig.3
Fig.4
4.1 When placing cycles on the rack:
Avoid positioning the tyres close to the exhaust.
•
When carrying two cycles, place them in opposite directions on the carrier.
•
Ensure that the cycles are well balanced.
•
4.2 Secure cycles on the carrier using suitable ties (DO NOT use string or elasticated ties).
Ensure that cycles are not in contact with the vehicle bodywork and provide suitable protection to prevent
damage.
4.3 Many modern vehicles are fitted with towing eyes which are suitable for attaching anti-theft cables to
secure the cycles carried.
4.4 When carrying cycles drive with extra care, particularly in high winds or over uneven surfaces.
If your vehicle lights and/or number plate are obscured by your bikes, you are required
BY LAW to
replicate them with an auxiliary lighting kit. Contact your Sealey dealer for our full range of trailer and
lighting board.
Insert Locking Pin central locking bar.
Fig.2