Mic mate ™ pro features – MXL USB Mic Mate Pro User Manual
Page 3
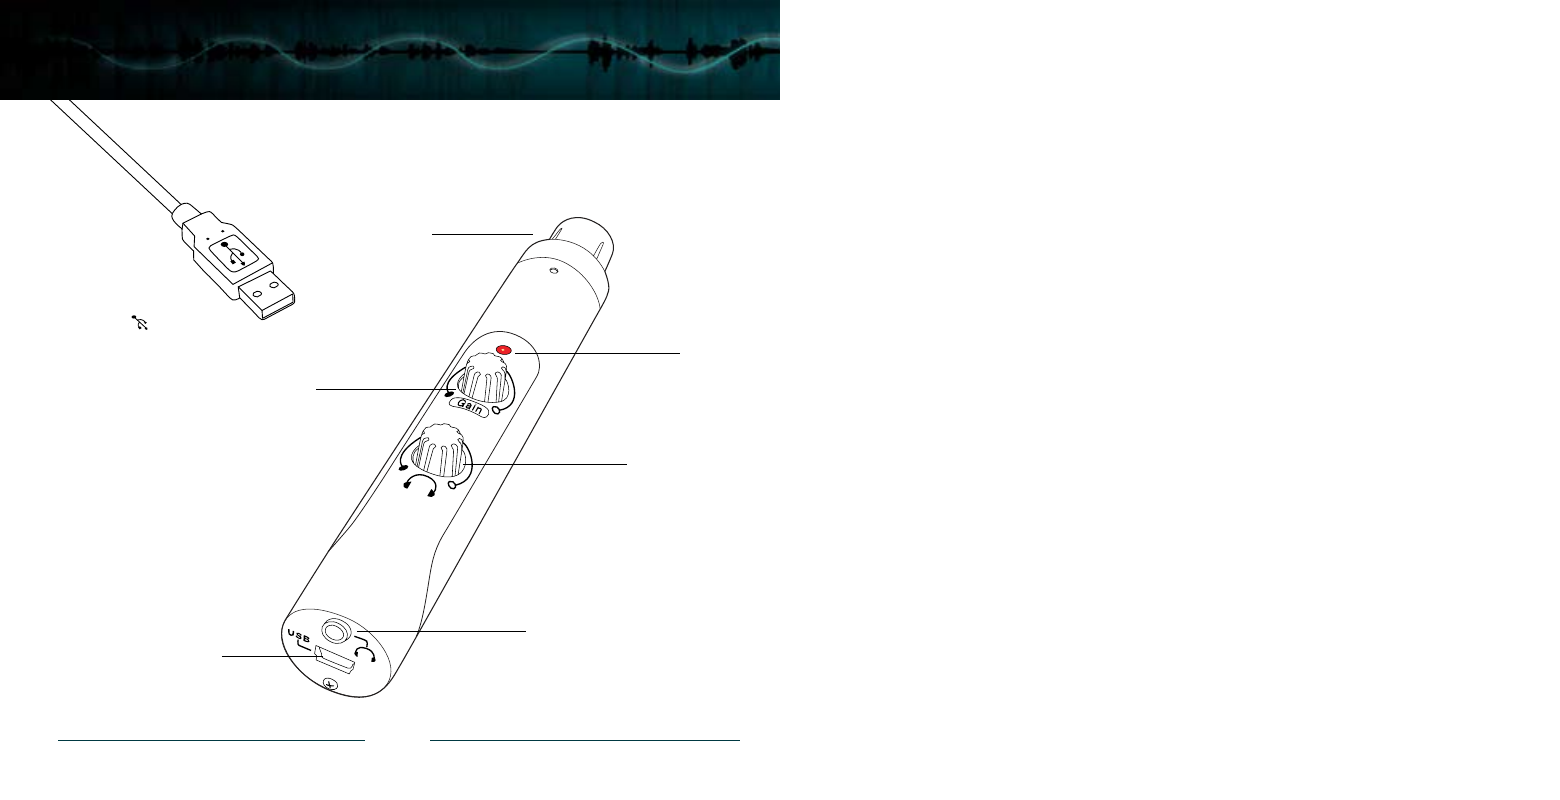
XLR
Connector
LED
Headphone
Volume
1/8” Headphone
Jack
Microphone
Gain
USB
Jack
USB
Cable
3
Mic Mate™ Pro Features
4
XLR Connector: Plug the Mic Mate
™
Pro directly into the bottom of your mic or attach an
XLR microphone cable here.
LED: When the red LED is illuminated it indicates that the Mic Mate
™
Pro is connected to
USB power and functioning correctly.
Microphone Gain: Use this variable knob to control the record level of the microphone into
the computer. This control changes the analog microphone signal before the A/D converter.
Headphone Volume: A variable knob provides an overall volume control for stereo
headphones. Always turn this knob all the way counterclockwise before using the Mic Mate
™
Pro. Slowly bring the volume up while listening to yourself and/or recorded material
to find the correct level. (Note that the output volume control in the computer is separate from
this volume control. Both volumes need to be adjusted for proper monitoring. To learn how to
adjust the computer audio playback level, go to the initial setup instructions for your computer
operating system.)
USB Jack: The small end of the supplied USB cable plugs in here. The microphone is set up
to be compatible with USB 1.1 and 2.0. It is not recommended to plug the Mic Mate
™
Pro
into a hub, as this could potentially limit the power and audio bandwidth the Mic Mate
™
Pro
needs to operate.
Headphone Jack: 1/8-inch stereo headphone jack accepts most headphones. The
maximum headphone volume will vary by manufacturer and model, so care should
always be exercised when plugging in different headphones.