Actuator parts – Marwin Valve UT Series Pneumatic Actuators User Manual
Page 3
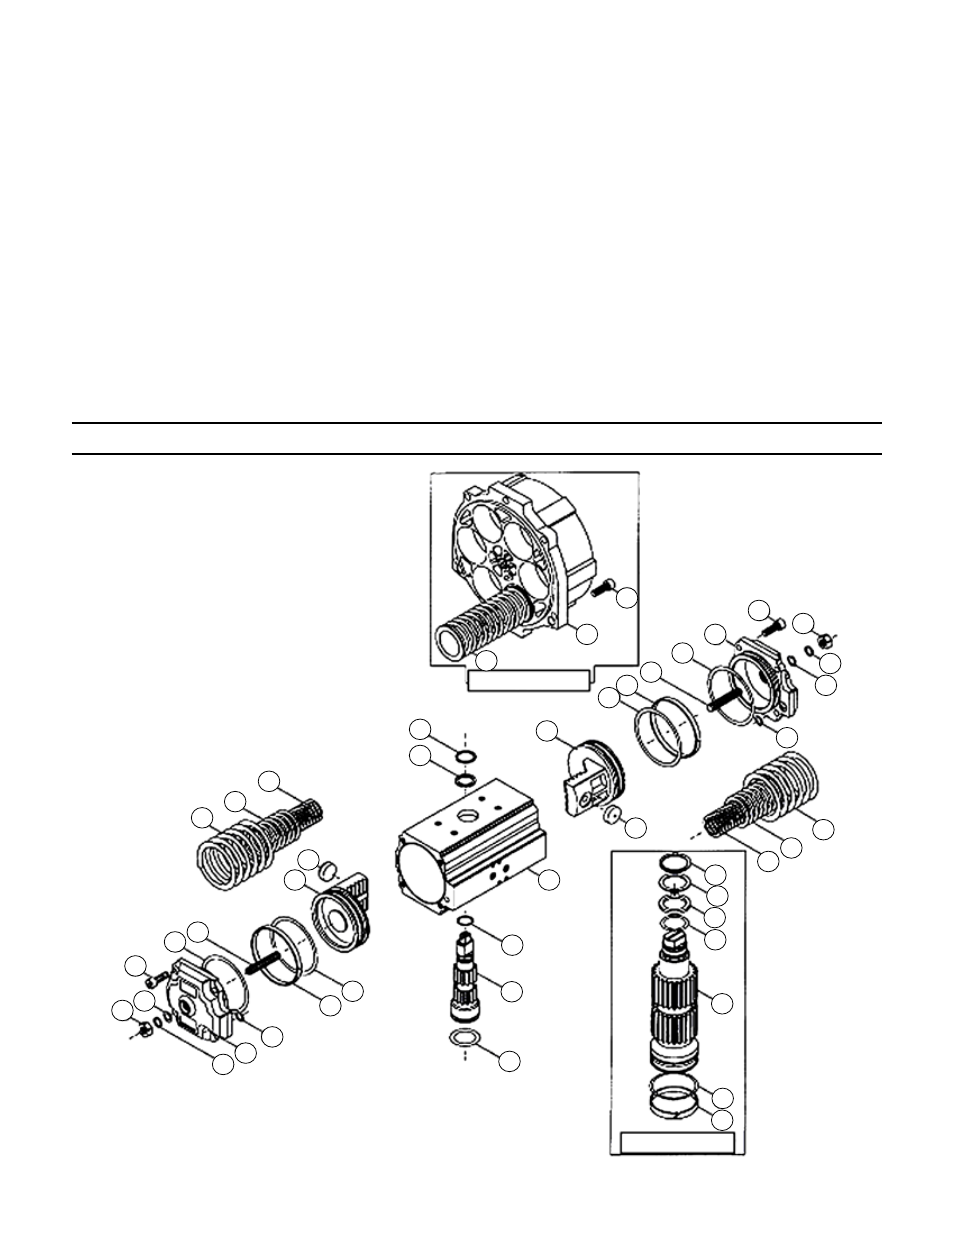
5.
Before starting the disassembly, verify by the stamped marking on the body if the actuator is double acting (DA)
or spring return (SR).
For DOUBLE ACTING actuator:
6.
Slowly remove the end caps screws (20) from each end cap (18,19) using a diagonal pattern.
FOR SPRING RETURN actuator:
7.
Slowly disengage the bolts (20) part way from each end cap (18, 19), to allow the springs to fully uncompress.
Unscrew the botls 0.38" to 0.5" at a time in a diagonal pattern, and repeat the sequence until the springs are
fully compressed.
8.
Rotate the actuator body (1) in a clockwise direction in respect of the pinion (2), so that the pistons (7), pushing
the adjustment screws (14), will eject the end caps (18,19), and that at the end of the rotation the pistons (7)
will be disconnected from the pinion (2).
9.
Take out the pistons (7) from the body (1).
10. Remove pinion snap ring (6) from its place on the pinion (2).
11. Take away the spacer ring (5).
12. Carefully remove the pinion (2) from the body (1).
Actuator Parts
-3-
Note:
UT-0A, UT-6 and UT-7 sizes
have air supply ports arranged
vertically, and require NAMUR
base adaptor 26-00002 to convert
parts to horizontal arrangement
for NAMUR direct mount solenoid
valves.
UT-7
UT-7
6
3
5
25
4
2
3
24
17
10
1
4
2
7
22
15
16
14
21
20
11
13
8
9
22
18
12
6
5
17
16
15
10
7
19
13
20
19
21
14
9
8
12
11
23
20