Fig.12, Fig.13 – Medal Sports WMUS1354812 User Manual
Page 15
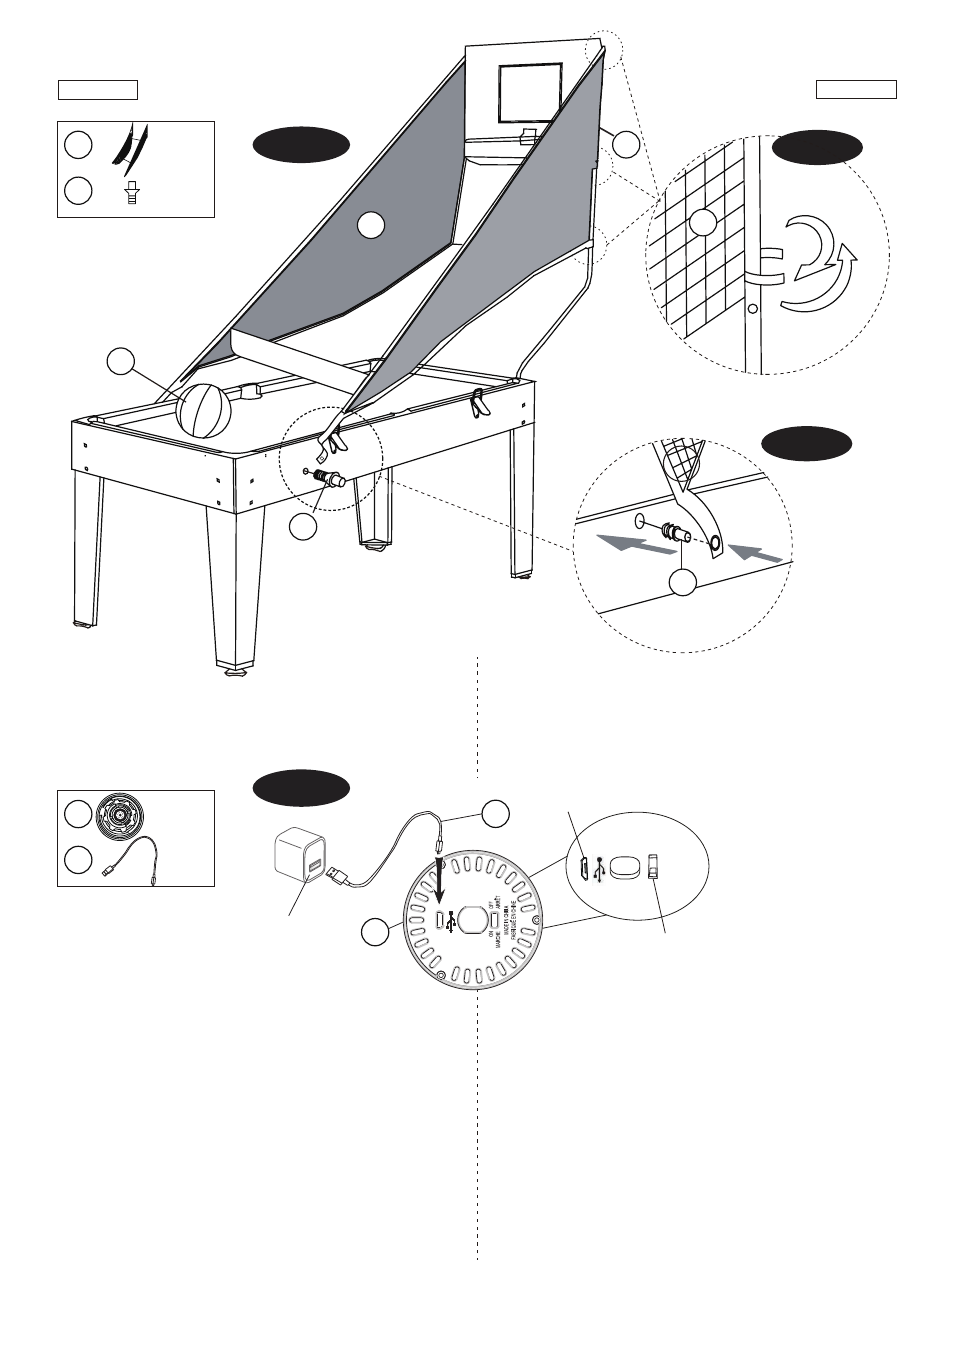
FIG.12
26. Attach the Basketball Return Net (#30) to the Short
Pole (#26) using the Velcro strips. See.FIG. 12A.
Secure the bottom of it to the Billiard Table using two
Rivet Plugs (#35).
See FIG. 12B.
FIG.12
26. Fije la Red de la Devolución del Baloncesto (#30) al
Palo Corto (#26) usando la faja de Velcro.
See.FIG. 12A. Asegure la parte inferior de éste a la
Mesa de Billar usando dos Remaches (#35).
Véa FIG. 12B.
FIG.13
27. Insert
USB Power Cord (#60)
into the USB Power.
28.
Make sure the Hover Puck is turned to the OFF
position. Plug the USB Power Cord (#60) into the back
of the Hover Puck (#20). Allow the Hover Puck to
charge for 60 minutes.
29. To operate the Hover Puck, just turn on the Switch on
the backside of Hover Puck to start. The Hover Puck
will operate for 20-30 minutes when fully charged.
See FIG. 13.
FIG.13
27. Inserte el Cable Eléctrico de USB (#60) a la Computadora.
28. Asegúrese que el
Disco de Flotar
está girado a la posición
OFF. Enchufe el Cable Eléctrico de USB(#60) a la parte
trasera de
Disco de Flotar
(#20). Permita el
Disco de Flotar
carga por 60 minutos. cuando está cargado completamente
el
Disco de Flotar
, la luz de LED cambiará desde ROJO a
VERDE.
29. Para operar el
Disco de Flotar
, solamente gire el Interruptor
sobre la parte trasera del
Disco de Flotar
para arrancar. El
Disco de Flotar
se opera por 20~30 minutos cuando está
completa mente cargado.
Vea la Fig. 13.
www.themdsports.com
1354812
14
(Continúe en la siguiente página.)
(Continued on the next page.)
Español
English
35
X 1
X 2
30
60
X 1
X 1
20
FIG.13
Switch
/ Interruptor
Charge In
/ Entrada de carga
USB Power
/ Potencia de USB
20
60
ON
OFF
MARCHE MADE IN CHINA Fabriqué En Chine
ARRET
FIG.12
FIG.12A
26
30
35
30
35
34
FIG.12B