Fig.1 fig.1a, Fig.1 pocket assembly, Fig.1 montaje de la tronera – Medal Sports SH1454820 User Manual
Page 6
INSTRUCCIONES DE ENSAMBLAJE
ASSEMBLY INSTRUCTIONS:
1. Find a clean, level place to begin the assembly of
your Combo Table. The table will be assembled
upside down and then turned over on its legs once
the assembly completed.This game table is heavy,
and turning it over will require at least two strong
adults.
2. Remove all the parts from the box and verify that you
have all of the listed parts as shown on the parts
identifier below. Carefully cut or tear the four corners
of the box so that the bottom of the box can be used
as your work surface.
1. Encuentre un lugar limpio y nivelado para empezar a
montar su Mesa de Combo. La mesa será montada
con la parte superior guiado hacia abajo y una vez
que el montaje es completado, se le voltea encima de
sus patas. Esta mesa de juego es pesada y para
voltearlo será requerido por lo menos dos adultos.
2. Retire todas las partes desde la caja y verifique que
Ud. tiene todas las piezas como se muestra en el
identificador de las partes como se le indica abajo.
Cuidadosamente corte y arranque las cuatros
esquinas de la caja de manera que la parte inferior de
la caja pueda ser usada como su superficie para el
trabajo.
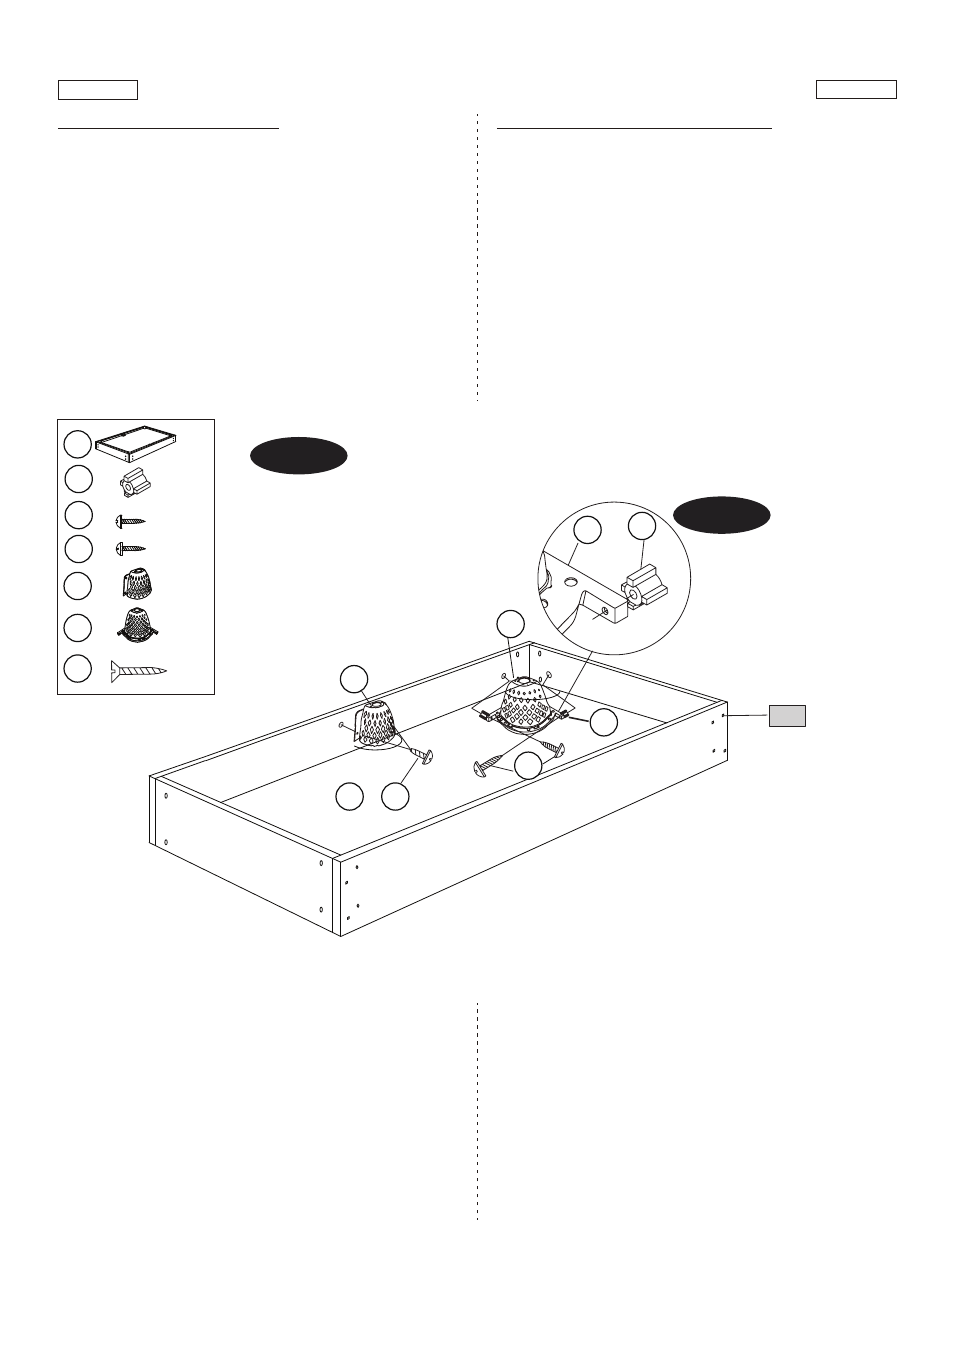
FIG.1 POCKET ASSEMBLY
3. Attach the Side Pocket (#21) to the bottom of Billiard
Mainframe (#1) using two Screws (#18) per Side Pocket.
See FIG. 1.
4. Attach the Corner Pockets (#22) and the Corner Pocket
Blocks (#13) to the Billiard Mainframe (#1) using two
Screws (#14) per Corner Pocket.
See FIG. 1 and 1A.
5. Repeat the steps above for the other pockets.
FIG.1 MONTAJE DE LA TRONERA
3. Asegure la Tronera Lateral (#21) en la parte inferior del
Unidad Principal de Billar (#1) usando dos Tornillos (#18)
por cada Tronera Lateral.
Véa FIG. 1.
4. Asegure la Tronera de la Esquina (#22) y los Bloques de
Tronera de Rincón (#13) en la parte inferior del Unidad
Principal de Billar (#1) usando dos Tornillos (#14) por
cada Tronera de la Esquina.
Véa Fig. 1 y 1A.
5. Repita los pasos anteriores con las otras troneras.
FIG.1
FIG.1A
www.themdsports.com
1454820
5
(Continúe en la siguiente página.)
(Continued on the next page.)
Español
English
1
18
21
22
X 1
X 4
14
X 8
13
X 8
X 2
X 4
P1
X 8
1
P1
21
22
22
13
13
18
14