MINOURA LiveRide LR960 User Manual
Page 2
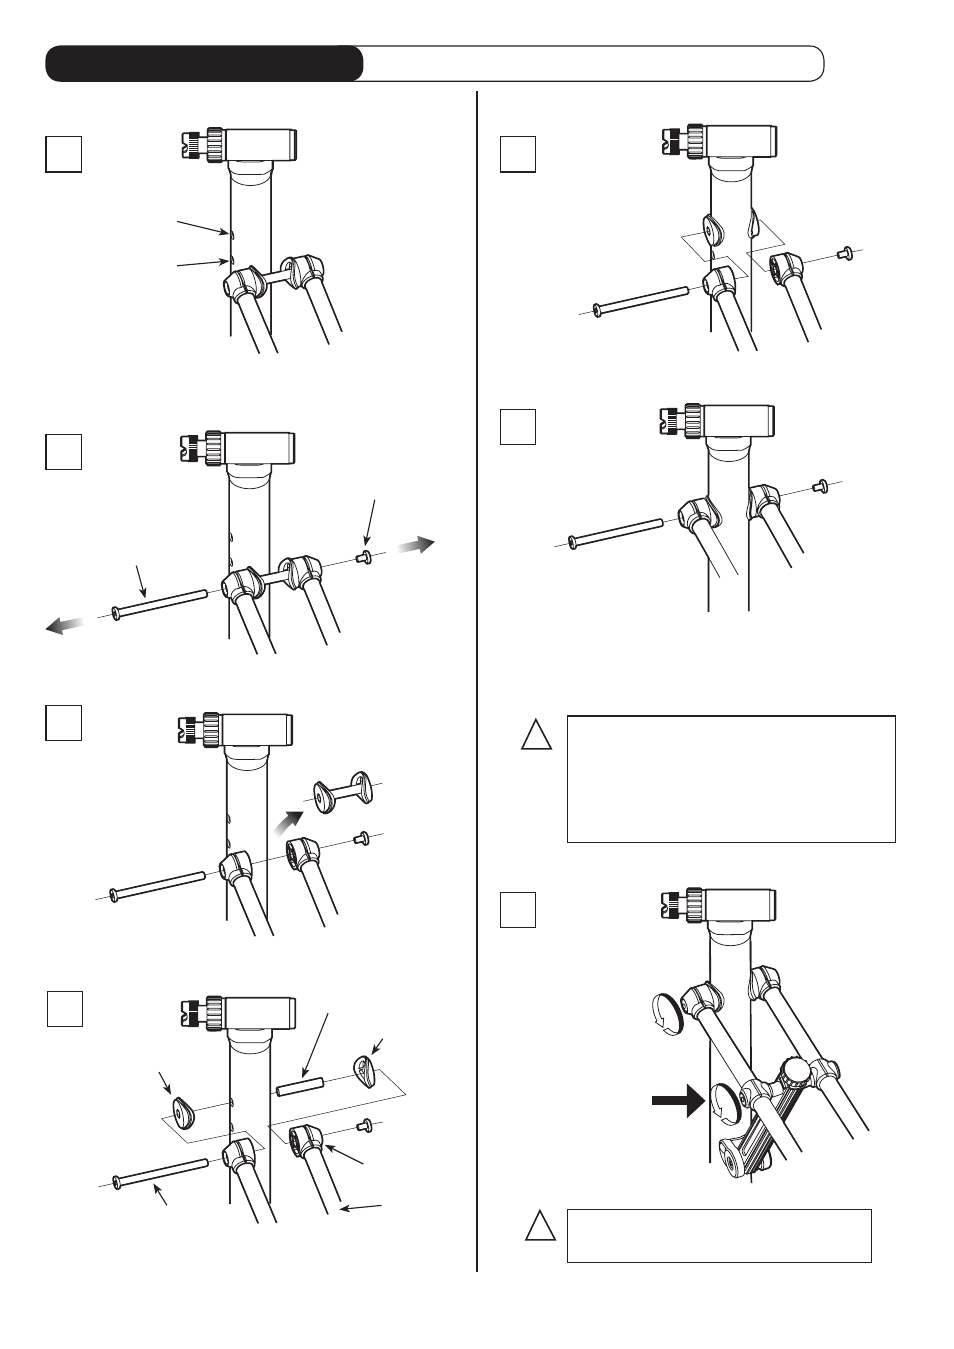
How To Assemble U-Leg
Required Tools: 2 x 5mm Hex Wrench (supplied)
1
2
5
6
3
7
4
for 700C
for 22"~26"
650C
Choose the pivot hole of the U-Leg for your
bike size on the main pillar.
Disassemble the pivot bolt.
Remove the alloy sleeve and plastic washers.
Insert the alloy sleeve into the selected hole,
and put the plastic washers on both sides.
Attach the U-Leg to the main pillar.
Check that the plastic end plugs on the U-Leg are
fully inserted and lined up with the hole.
Then insert the pivot bolt and fully tighten the
screw with using the supplied M5 hex wrenches.
!
You do not need to disassemble
the center guide bolt. Just tighten.
- 2 -
!
Be sure you fully insert the plastic
end plugs to the U-Leg before
putting the pivot bolt through them.
Failure to do so may cause the legs
to be positioned at different heights.
Plastic Washer
Alloy Sleeve
Pivot Bolt
End Plug
U-Leg
Plastic Washer
(Fig. A)
(Fig. B)
(Fig. C)
(Fig. D)
(Fig. E)
(Fig. F)
(Fig. G)
Pivot Bolt
(Nut Side)
Pivot Bolt
(Screw Side)
The center
guide bolt is
intentionally
left loose when
packaged at the
factory.
Tighten it slightly
and check to
see that each leg
moves smoothly.