Side shaking gauge – MINOURA FT-1 Combo User Manual
Page 2
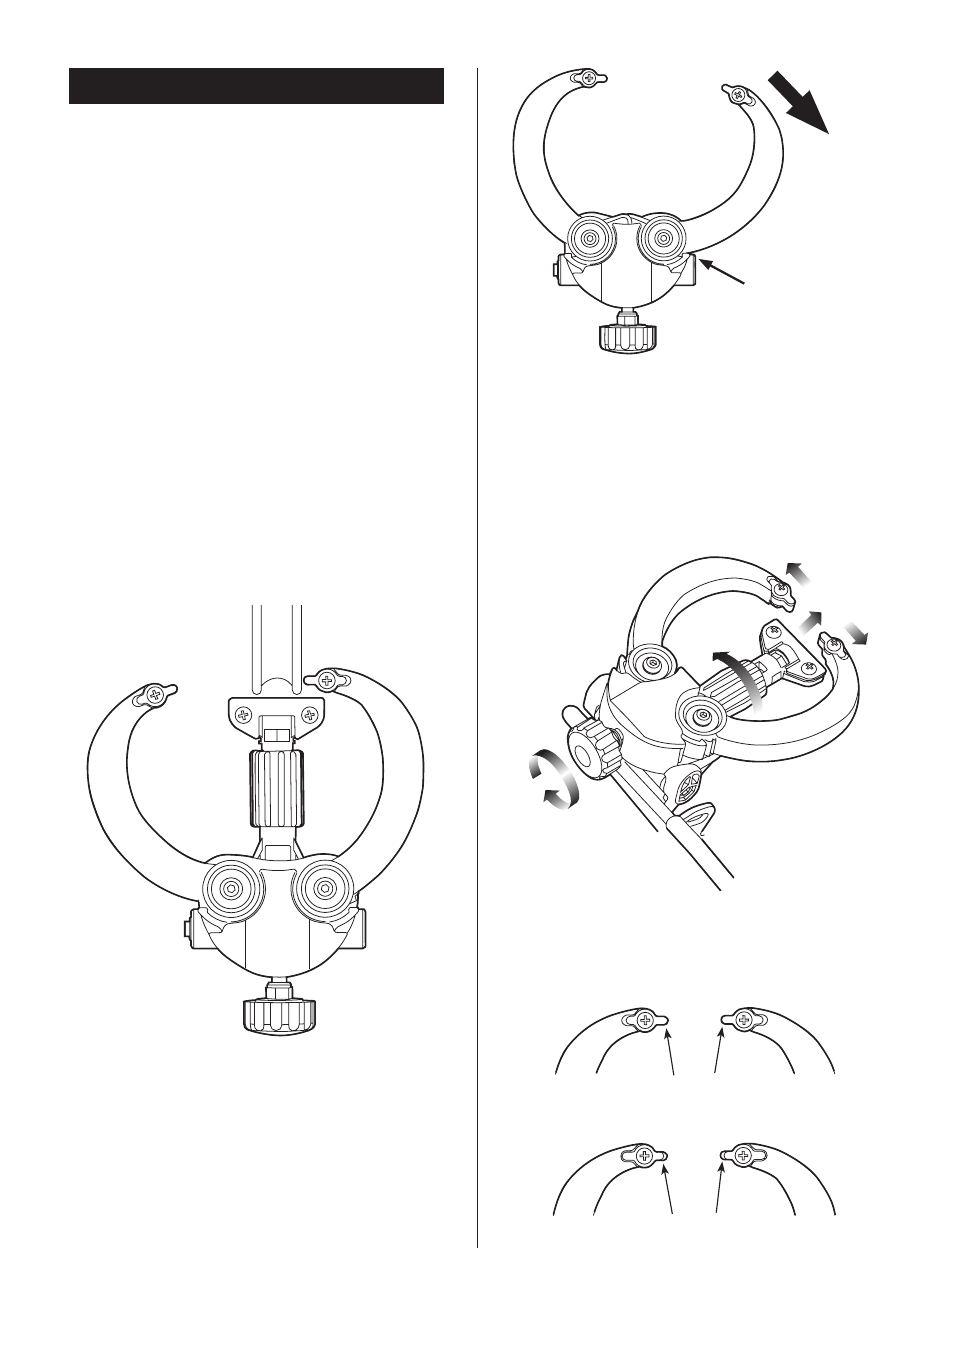
(Fig. C)
(Fig. D)
- 2 -
(Fig. E)
Metal Rim Position
(metal tip is projected)
Carbon Rim Position
(metal tip is retracted)
(Fig. F)
Side Shaking Gauge
Side Shaking Gauge is for checking the horizontal
movement of the wheel.
The purpose of this job is making the distance
(gap) between the rim surface and the brake shoe
equal on all around the wheel in order to expect
greater brake performance.
This job can be accomplished with the tire on or
off the wheel.
Set the wheel on the stand and position the tip of
the Side Shaking Gauge 1 - 2mm away from the
rim surface (do not touch). (see Fig. C)
Rotate the wheel slowly (do not spin fast) and look
at the clearance between the rim surface and the
gauge tip. The gap will change vary and when the
rotating wheel comes in contact with the gauge,
you will hear a scratching sound.
Turn the nipples to make this gap equal on all
around the wheel.
In case that you see the wheel from right hand side
to true the wheel.
On side shaking truing job, you use either right
or left side gauge. You will not use both gauges at
once.
Depends on your dominant eye, use the gauge
arm on your favorite side.
Fig.C shows then case you are dexitral.
Widely open the
arm until it's caught
by the locking ratch
The side shaking gauge arm can be locked in
widely open position.
Hold the arm and move open. When the arm is
caught by the locking ratch, you will feel click.
This is the locking position. (see Fig. D)
Do not force to open more.
To close the arm, push it inward.
Turn the Side Gauge Adjust Knob, then both
arms move together. If the arm is in locked
position, it won't move even you turn the knob.