Multi-Contact MA251 User Manual
Page 7
Advanced Contact Technology
www.multi-contact.com
7 / 12
21
22
19
20
17
18
Changement de la matrice de
sertissage
Exchanging the crimping
inserts
Démontage de la matrice de ser-
tissage
Removing the crimping insert
(ill. 17)
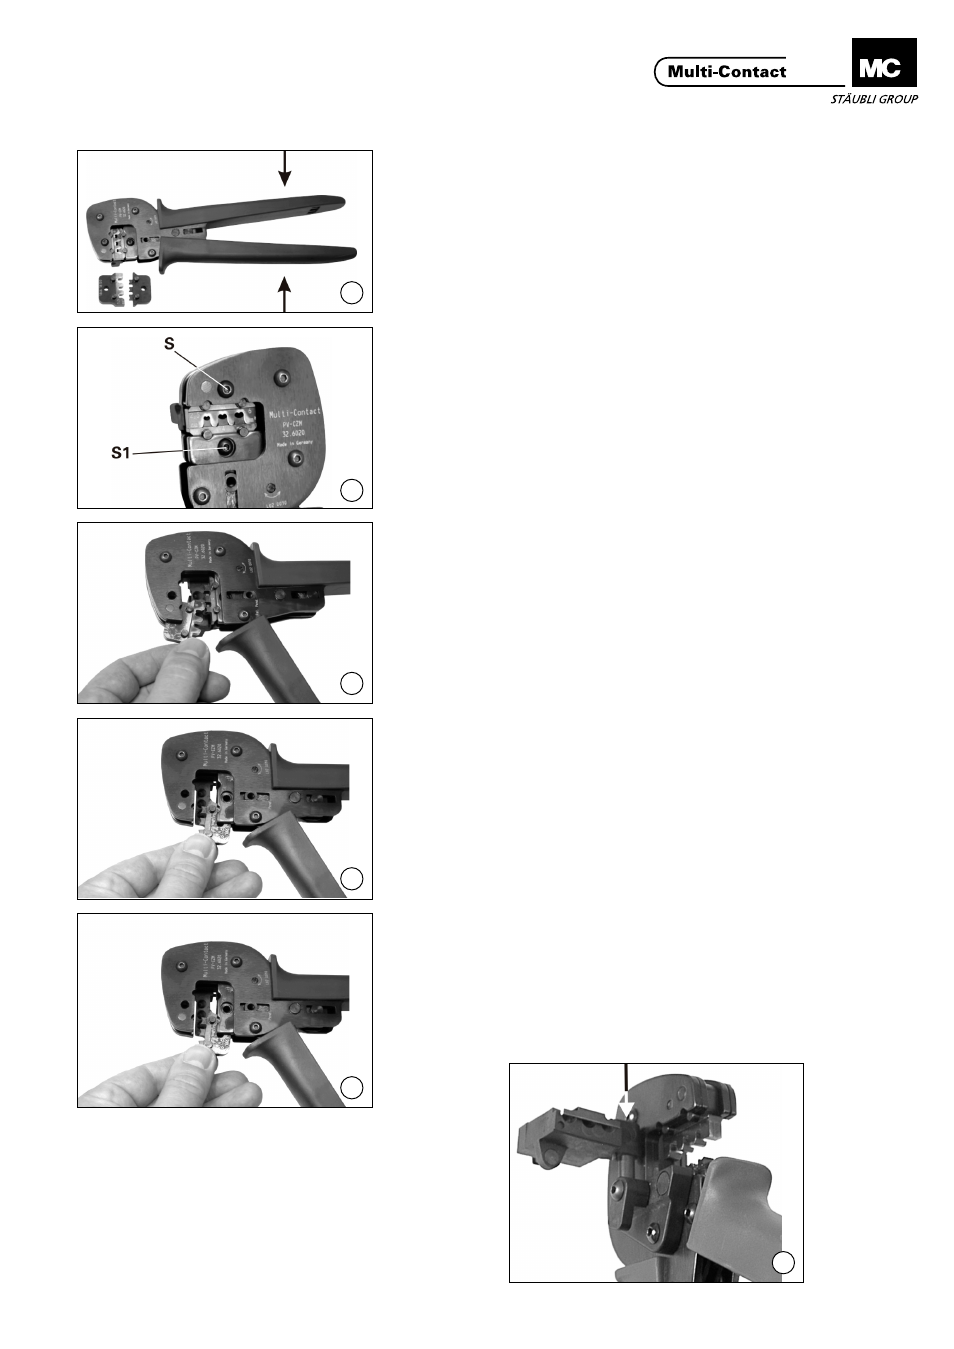
Fermer la pince à sertir
(ill. 17)
Close the crimping tool
(ill. 18)
Dévisser la vis longue S et la vis
courte S1 puis ouvrir la pince à sertir
(serrer à fond puis relâcher).
(ill. 18)
Unscrew both the long S and the
short S1 screw. Open the crimping
tool (press completely together and
release).
(ill. 19)
Extraire la matrice de sertissage supé-
rieure.
(ill. 19)
Remove the upper crimping insert.
(ill. 20)
Extraire la matrice de sertissage infé-
rieure.
(ill. 20)
Remove the lower crimping insert.
Montage de la matrice de sertis-
sage
Fitting the crimping insert
(ill. 21)
Ouvrir la pince à sertir (serrer à fond
puis relâcher). Introduire les deux ma-
trices de sertissage. Le marquage doit
être du même côté que le marquage
de la pince à sertir.
Fermer la pince à sertir. Visser les
deux matrices de sertissage.
(ill.21)
Open the crimping tool (press com-
pletely together and release). Insert
both crimping inserts. The markings
must be on the same side as the
marking on the crimping tool.
Close crimping tool and screw both
crimping inserts tight.
(ill. 22)
Insérer le positionneur dans la goupille
de guidage.
(ill. 22)
Insert locator into the guide pin.