0 operation and assembly instructions, 0 operation and assembly instructions continued – Sandia 6-Quart Raven Backpack Vacuum User Manual
Page 8
(8) Raven 6-Quart Backpack Vacuum
Raven 6-Quart Backpack Vacuum (9)
4.0 Operation and Assembly Instructions
DRY PREPARATION AND OPERATION ONLY! DO NOT ASSEMBLE OR USE
ON WET SURFACES.
This vacuum is equipped with an air-thru motor and is designed for dry pickup only.
Ensure assembly and use of this equipment is only conducted in a dry environment. To
begin, unpack the carton and remove the vacuum and attachments (if purchased with
tools). Always exercise caution when handling the vacuum. Dropping the vacuum could
cause permanent damage to the internal components.
Getting Started:
1. Make sure the on/off switch is in the OFF position.
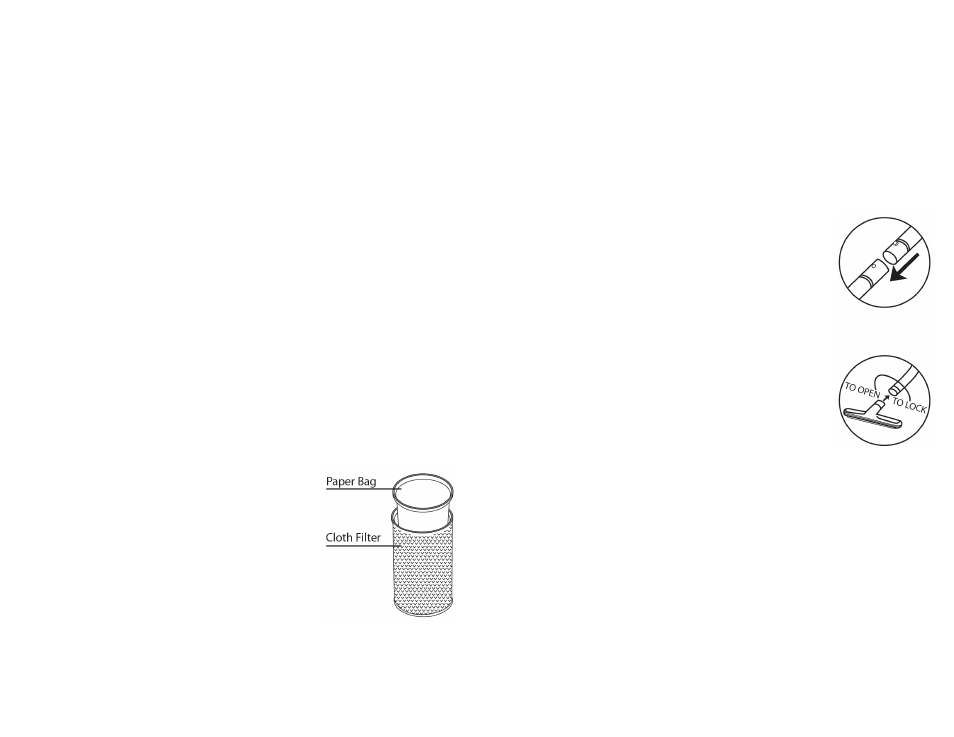
2. Remove the lid and check to ensure you have both a cloth filter bag and paper filter
bag in place. Place the lid back onto the vacuum body, tightening securely. Both bags
must be used at all times. Any damage resulting from the lack of using both bags will
VOID your warranty.
3. Wrap the safety power cord around the molded-in cord wrap on the side of the unit.
Do not tie or loop the pigtail cord with the extension cord.
4. Loosen the shoulder and waist belt straps and slide vacuum onto your back.
5. Connect and tighten the waist belt making sure the majority of the weight is on your
hips and not your shoulders.
6. Adjust the shoulder straps for comfort.
7. Connect the sternum strap for added support and ideal fit.
8. Plug the vacuum into a properly grounded outlet.
9. Turn the unit to the ON position and proceed with vacuuming.
10. Always store vacuum, safety power cord and tools in a cool, dry place indoors.
NOTE: The weight of the vacuum should be distributed on your hips. Adjust any strap as
needed for your custom fit.
Changing the Paper Filter Bag:
1. Unscrew lid and lift lid off of the body.
2. Remove the full paper bag from the tank and dispose of
properly in a fireproof container.
3. Take a new paper filter bag and set inside cloth filter bag,
expanding it to the sides of the cloth filter bag.
4. Place lid back onto the vacuum body, tightening securely.
Maintaining the Cloth Filter:
The cloth filter should be inspected and cleaned each time you empty the tank. DO NOT
wash the cloth filter. It could cause shrinkage of the cloth and damage to the gasket.
Simply shake off any dust or loose particles and brush the exposed surface with a soft
bristle brush.
4.0 Operation and Assembly Instructions Continued
Maintaining the HEPA Cloth Filter:
When the white disk inside your dome filter is discolored, replace it with a new HEPA
filter with bag support. Replacement time frame of the HEPA filter depends on the
frequency and application of use. For best results, replace every six (6) months.
IMPORTANT: Following the above instructions is critical in prolonging the life of your
vacuum. All filters must be used at all times. Failure to do so will VOID your warranty.
Assembling Attachments:
The vacuum comes assembled, but you will need to install the hose to the wand and the
wand to the attachment.
Wand Assembly (for 2-Piece Wand Only):
• Align the button lock of the upper wand section with the opening
for the button lock in the lower wand section.
• Push the sections together until the button lock slides into place
and the lock is secured.
To Connect Wand to Hose:
• Insert the tapered end of the wand into the swivel cuff at the end
of the hose.
To Connect Wand to Attachments:
• Turn wand nut counterclockwise approximately four (4)
complete turns.
• Insert the tool into the wand and coupling.
• While holding the tool in place, turn nut clockwise until wand
nut is fully locked.