Brake chamber clamp repositioning instructions, Brake chamber clamp repositioning – SAF-HOLLAND XL-AM20006BM Brake and Service Chamber User Manual
Page 8
8
XL-AM20006BM-en-US · 2014-04-22 · Amendments and Errors Reserved · © SAF-HOLLAND, Inc., SAF-HOLLAND, HOLLAND, SAF,
and logos are trademarks of SAF-HOLLAND S.A., SAF-HOLLAND GmbH, and SAF-HOLLAND, Inc.
Figure 9
Figure 8
Figure 7
3. Brake Chamber Clamp
Repositioning Instructions
1. Put the unit on a work surface. It is strongly recommended
NOT to unclamp or re-clamp a unit that is attached to
the vehicle in place for use. To ensure a leak free unit,
this procedure should be done on a shop bench or similar
work area.
2. If the unit is a service chamber, proceed to Step 3. If the
unit is a combination brake, Refer to Section 3 to make
sure that the chamber is caged. After the spring brake
has been changed, proceed to Step 3.
IMPORTANT: in order to unclamp the service side of
the spring brake, first cage the power
(main) spring.
Failure to cage the power side makes
assembly very difficult, typically resulting
in service side leaks, which if not avoided
could cause property damage.
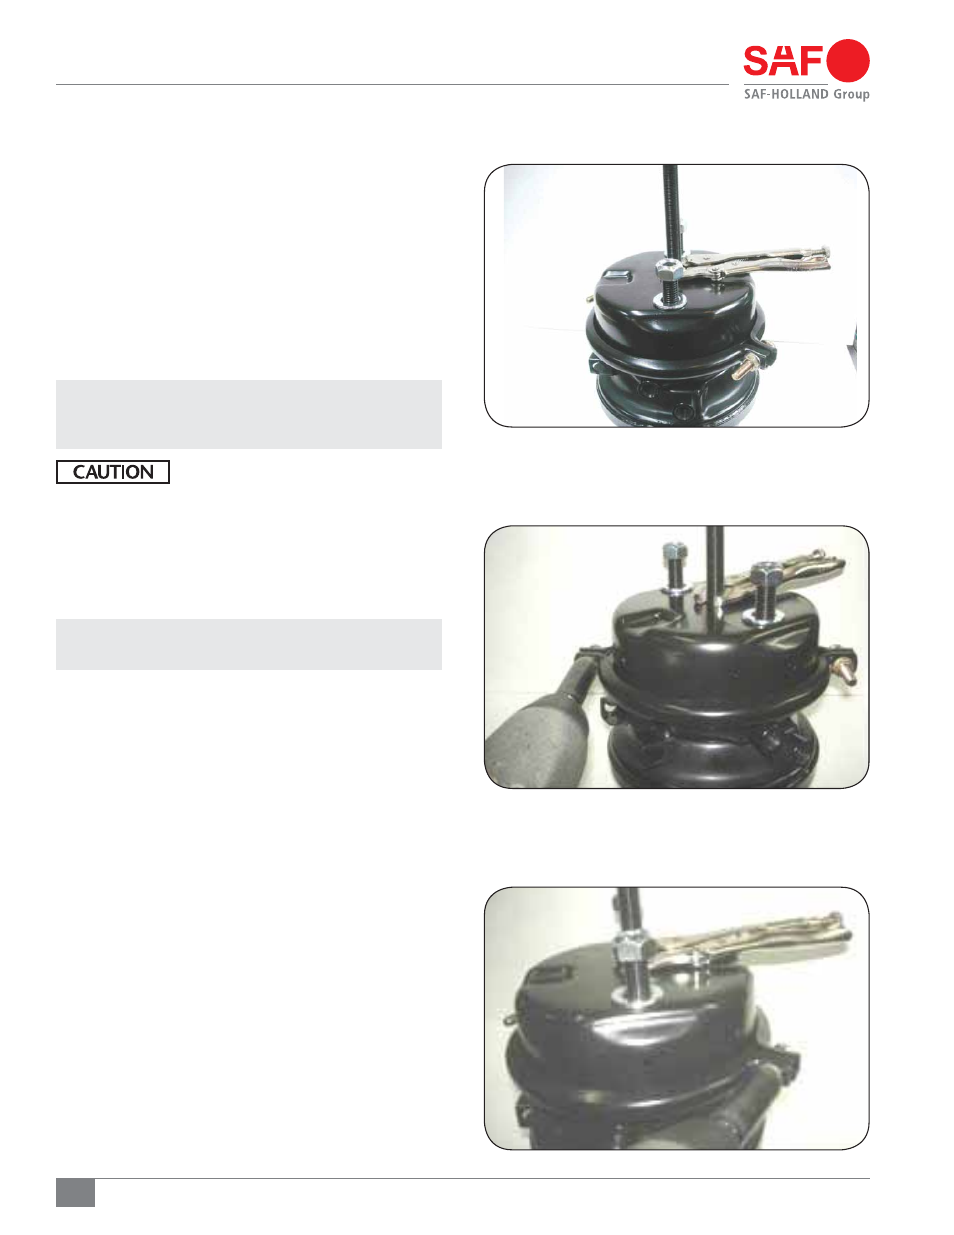
3. Place the chamber in a vertical position with the air ports
in front (Figure 7). Place a vise grip pliers on the push
rod to prevent sudden separation of the service base
from the piggy back. Be careful not to damage threads.
NOTE: Ensure the vise grip pliers are secured on the
push rod (Figure 7).
4. With the vise grip pliers in place, loosen the clamp nuts.
This can be done by hand with a wrench or pneumatic gun.
Use a 9/16" Socket (Figure 8 and 9).
Brake Chamber Clamp Repositioning