Whelen WCC9 User Manual
Automotive: sirens/switches, Safety first, Installation
Page 1
®
ENGINEERING COMPANY INC.
Configuration Guide:
6-button WeCan® Control Head
with Slide Switch
Safety First
•
If mounting this product requires drilling holes, the installer MUST be sure that no vehicle components or other vital
parts could be damaged by the drilling process. Check both sides of the mounting surface before drilling begins. Also
de-burr any holes and remove any metal shards or remnants. Install grommets into all wire passage holes.
•
Do not install this product or route any wires in the deployment area of your air bag. Equipment mounted or located in
the air bag deployment area will damage or reduce the effectiveness of the air bag, or become a projectile that could
cause serious personal injury or death. Refer to your vehicle owners manual for the air bag deployment area. The User/
Installer assumes full responsibility to determine proper mounting location, based on providing ultimate safety to all
passengers inside the vehicle.
•
For this product to operate at optimum efficiency, a good electrical connection to chassis ground must be made. The
recommended procedure requires the product ground wire to be connected directly to the NEGATIVE (-) battery post.
•
If this product uses a remote device to activate or control this product, make sure this control is located in an area that
allows both the vehicle and the control to be operated safely in any driving condition. DO NOT ATTEMPT TO ACTIVATE
OR CONTROL THIS DEVICE IN A HAZARDOUS DRIVING SITUATION.
•
It is the responsibility of the installation technician to make sure that the installation and operation of this product will
not interfere with or compromise the operation or efficiency of any vehicle equipment! Before returning the vehicle to
active service, visually confirm the proper operation of this product, as well as all vehicle components/equipment.
•
Do not attempt to activate or control this device in a hazardous driving situation.
•
This product contains either strobe light(s), halogen light(s), high-intensity LEDs or a combination of these lights. Do
not stare directly into these lights. Momentary blindness and/or eye damage could result.
For warranty information regarding this product, visit www.whelen.com/warranty
©2009 Whelen Engineering Company Inc.
Form No.14285A (092810)
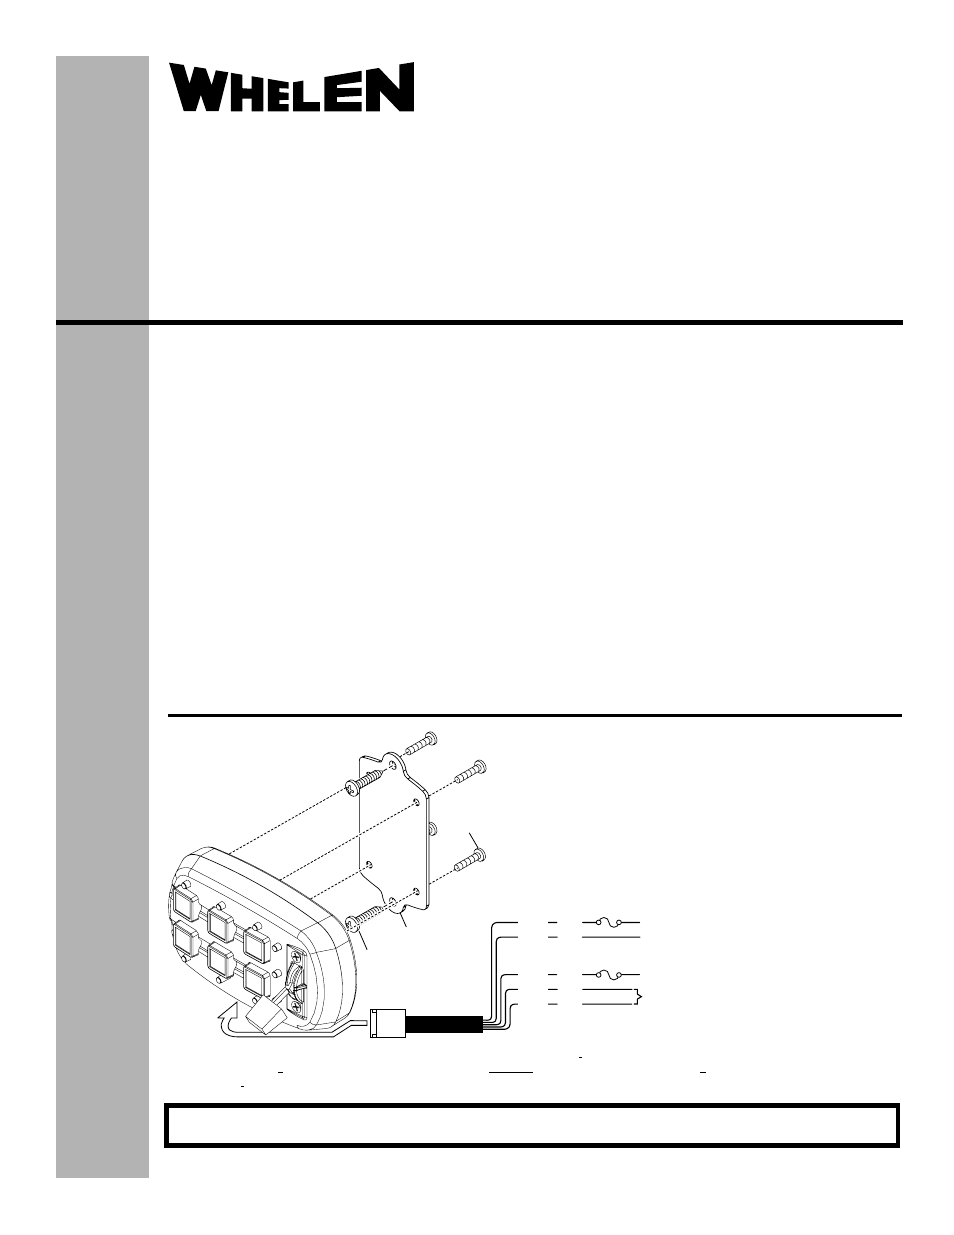
4 X 1/4 PFH
PLASTI-LOC
SCREW
(QTY 4)
6 X 1/2"
PPHSMS
(QTY 2)
MOUNTING
PLATE
PLUG IN
HERE
WHT
GRN
GRY
RED
BLK
Connect to +12V DC
Connect to Ground
Backlight: Connect to an ignition controlled 12-volt circuit.
Connect to any WeCan® Lightbar
Secure the mounting plate to the control head using the supplied
4 X 1/4 PFH Plasti-Loc screws.
NOTE: This control head can
either be used as a hand held
unit or be mounted into a
vehicle.
NOTE: Dip switches are located on the back of the unit.
1.
Secure the controller to the mounting surface using the supplied
6 X 1/2" PPHSMS.
Extend the wires and connect as described below.
Installation:
2.
3.
WARNING! All customer supplied wires that connect to the positive terminal of the battery must be sized to supply at
least 125% of the maximum operating current and
at the battery to carry the load. DO NOT USE CIRCUIT
BREAKERS WITH THIS PRODUCT!
FUSED
22 GA
22 GA
22 GA
22 GA
22 GA
Fuse @
3 amps
Fuse @
1 amp
Automotive:
Sirens/Switches
51 Winthrop Road
Chester, Connecticut 06412-0684
Phone: (860) 526-9504
Fax: (860) 526-4078
Internet: www.whelen.com
Sales e-mail: [email protected]
Canadian Sales e-mail: [email protected]
Customer Service e-mail: [email protected]