Whelen BETA124R User Manual
Page 4
Page 4
Hands-Free Siren Activation...
The Beta™ siren amplifier, when installed according to the wiring diagram on page 2, offers the ability to activate siren tones using
the vehicle’s steering wheel horn ring. After the horn transfer switch has been set to siren operation, the hands-free mode is enabled
when switch 3 is closed. After hands-free mode is enabled, pressing the horn ring button will start the Wail siren tone. A second
press of the horn ring button will change the siren tone from Wail to Yelp. A third press will change the siren tone from Yelp to
Piercer. The siren tones will continue to cycle from Wail to Yelp to Piercer with each subsequent press of the horn ring button. Two,
rapid presses on the horn ring button ends hands-free siren tone generation until the horn ring button is pressed again. At that time
the cycle is repeated.
To exit the Hands-Free mode, end current siren tone with two, rapid horn ring presses, turn off Switch 3 and return the horn transfer
switch to its normal operating position. Normal vehicle horn operation is then restored.
Manual Siren Activation (Manual Mode)...
The Beta siren amplifier, when installed according to the wiring diagram on page 2, offers Manual siren activation using the vehicle’s
steering wheel horn ring as a momentary switch. After the Horn Transfer switch has been set to siren operation, the horn ring button
will now activate the Manual siren tone. The default manual siren tone “ramps up” to a predetermined level and continues at that
level until the Manual switch is released. When the switch is released, the tone is immediately terminated.
Radio Repeat Volume
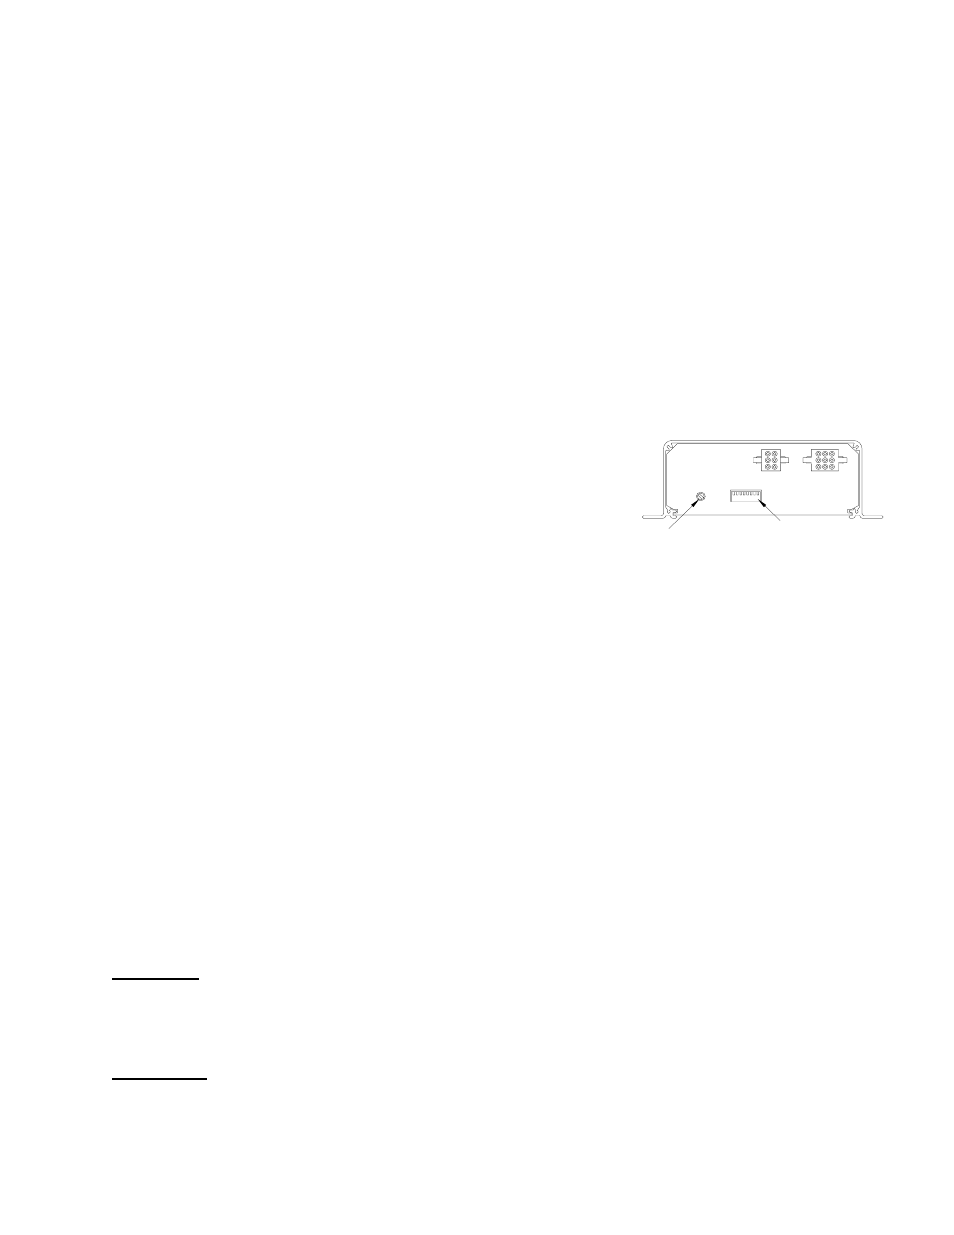
Before using the Beta siren amplifier, the Radio Repeat output volume must be adjusted
to satisfactory operating levels. To adjust this level, a small, flat-blade screwdriver is
needed. Locate the radio repeat adjustment port (potentiometer) to the left of the dip
switches on the back side of the remote amplifier (see diagram to the right). Set the
volume level of the vehicle’s two-way radio to its normal operating volume. Turn the
rotary knob on the control head to RAD to activate radio repeat. Insert the screwdriver
in the radio repeat adjustment port and turn in a clockwise direction to increase the
sound to its maximum desired volume.
Dip Switch Functions Explained...
Some of the default functions of the Beta siren amplifier can be customized (via dip switches) to suit the needs of the operator. In the
default factory configuration, each dip switch is in the Down (ON) position. The following section will explain dip switch functionality
in both the ON and OFF position:
Dip Switch #1
Down (Default)
Tone 3 and Hands-Free 3rd tone are enabled
Up (Optional)
Tone 3 and Hands-Free 3rd tone are disabled
Dip Switch #2
Down (Default)
Tone 3 and Hands-Free 3rd tone are Piercer™
Up (Optional)
Tone 3 and Hands-Free 3rd tone are Hi/Low
Dip Switch #3
Down (Default)
Tone 3 is the override tone for Yelp
Up (Optional)
Airhorn is the override tone for Yelp
Dip Switch #4
Down (Default)
Wail has normal Yelp override
Up (Optional)
Wail has 10 second override for Yelp
Dip Switch #5
Down (Default)
Manual Tone ramps up to a predetermined level and, upon release, terminates
Up (Optional)
Manual Tone ramps up to a predetermined level and, upon release, ramps down and
terminates
Dip Switches #6, #7 & #8
NOTE: Unlike dip switches #1 through #5, where each dip switch functions independently of the others,
dip switches #6, #7 and #8 are used in conjunction with each other to achieve a specific function.
Default setting
Dip Switch #6 Down
Dip Switch #7 Down
Dip Switch #8 Down
•
Default system configuration
Optional setting
Dip Switch #6 Up
Dip Switch #7 Down
Dip Switch #8 Down
•
Configures system so that Wail tone has priority over all tones (except Airhorn).
•
Hands-Free siren activation is not effected in this setting.
DIP SWITCH
RADIO VOL ADJUST
REAR VIEW