Installation, En 1 14 – DE DIETRICH DHE1149A User Manual
Page 14
EN
1
14
INSTALLATION
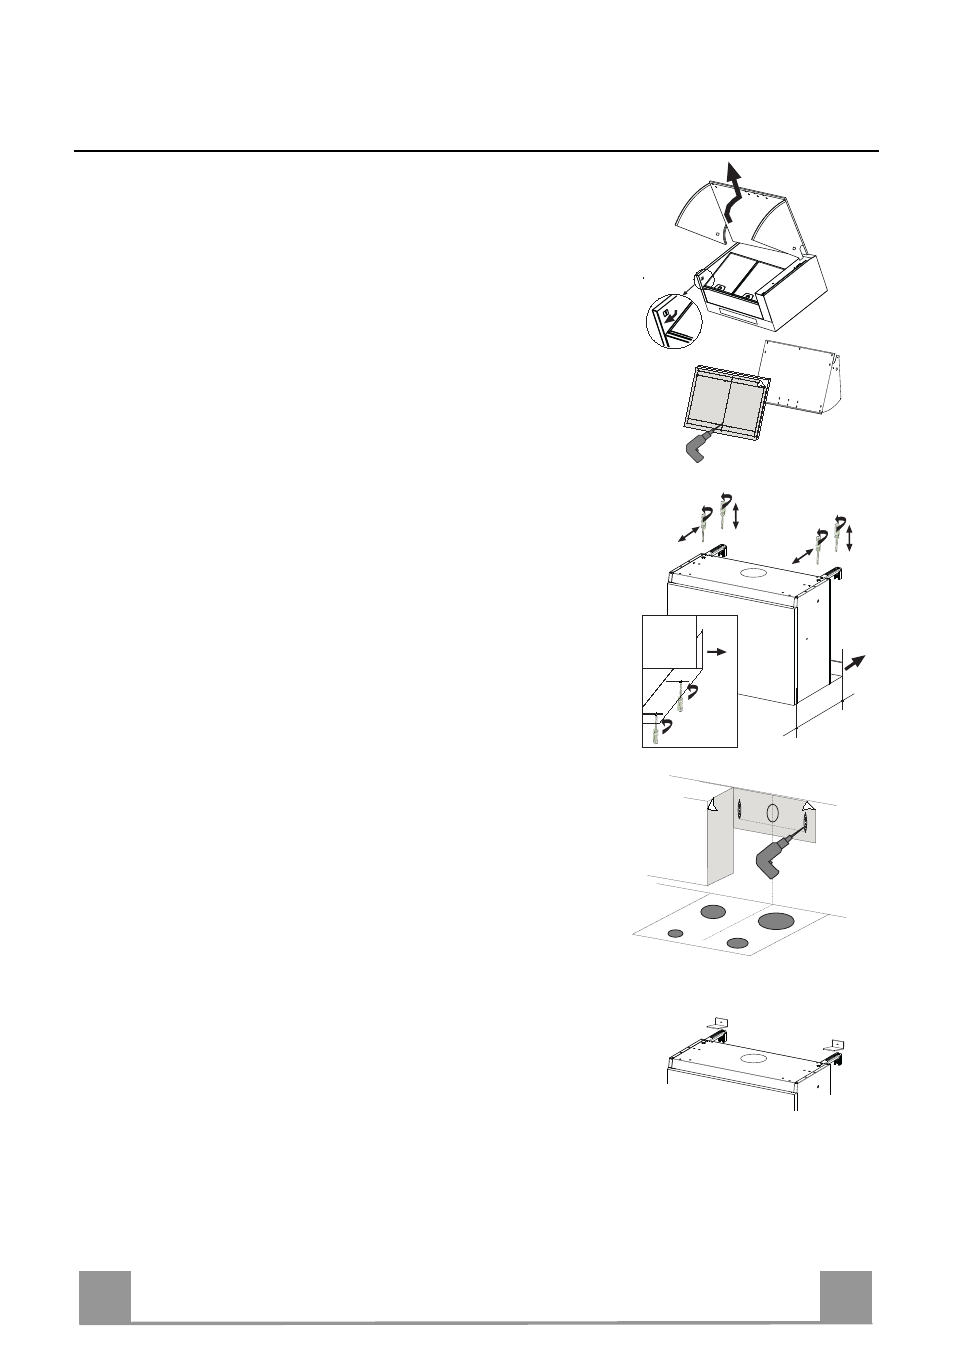
FIXING OF THE FRONTAL PANEL TO THE VISOR
• Pull out the metal visor and, at the same time, unlock the lever
on the left side of the hood.
• Use the cardboard template when drilling the front panel. Fix
the panel to the visor using the screws supplied.
FIXING OF THE HOOD TO THE WALL
• Hood depth can vary from 275 to 360 mm.
• Regulate the Vx screws when adjusting the brackets to the
right depth.
• When adjusting the lower part of the hood to the requested
depth it is necessary to loose the screws of the metal distance
piece and to move it as much as necessary.
• Use the specific cardboard template when drilling the holes
into the wall. Put the dowels into the holes and fix the two
metal brackets using the four screws supplied together with
other accessories.
• Use the specific cardboard template when drillig the side clos-
ets.
When the hood is used in ducting version it is necessary to re-
move the grid from the air outlet.
• Hang the hood on the metal brackets.
• Put back the visor again paying attention that the runners are
put correctly into the proper places. Adjust the visor sliding by
means of the two screws.
• Regulating the Vy screws it is possible to align the hood height
compared to the closets.
• When necessary adjust again the hood depth.
• Place the safety squares above the fixing brackets.
• Mark the midpoint of the holes.
• Drill the wall and fix the safety squares together with screws
and dowels (supplied).
275-360 m
m
Vx
Vy
Vx
Vy