PLANET NAS-7202 User Manual
Nas-7202, Quick guide
NAS-7202
NAS-7202
Quick Guide
Quick Guide
2011-AB2210-000
PLANET Technology Corporation
Tel: 886-2-2219-9518
Fax: 886-2-2219-9528
Email: [email protected]
www.planet.com.tw
11F., No.96, Minquan Rd., Xindian Dist., New Taipei City 231, Taiwan (R.O.C.)
PLANET reserves the right to change specifications without prior notice. All brand names and trademarks are property of
their respective owners. Copyright © 2011 PLANET Technology Corp. All rights reserved.
VERIFY THE CONTENTS INSIDE PACKAGE BOX
The package should contain the items plus NAS-7202. If any item is missing or damaged, please contact the seller immediately
STEP 1 : Hardware Installation
STEP 3 : Web Management
STEP 2 : Hardware Connection
Power Adapter
CD-ROM
Quick Installation Guide
HDD Screw
RJ-45 Cable
Login the Homepage
The Web management allows you to access and manage the NAS RAID Server easily. Launch the Web browser and then enter
the IP address. The default IP address is 192.168.0.100 and fill the User Name and Password to login the Web management.
The default User Name / Password is
admin / admin.
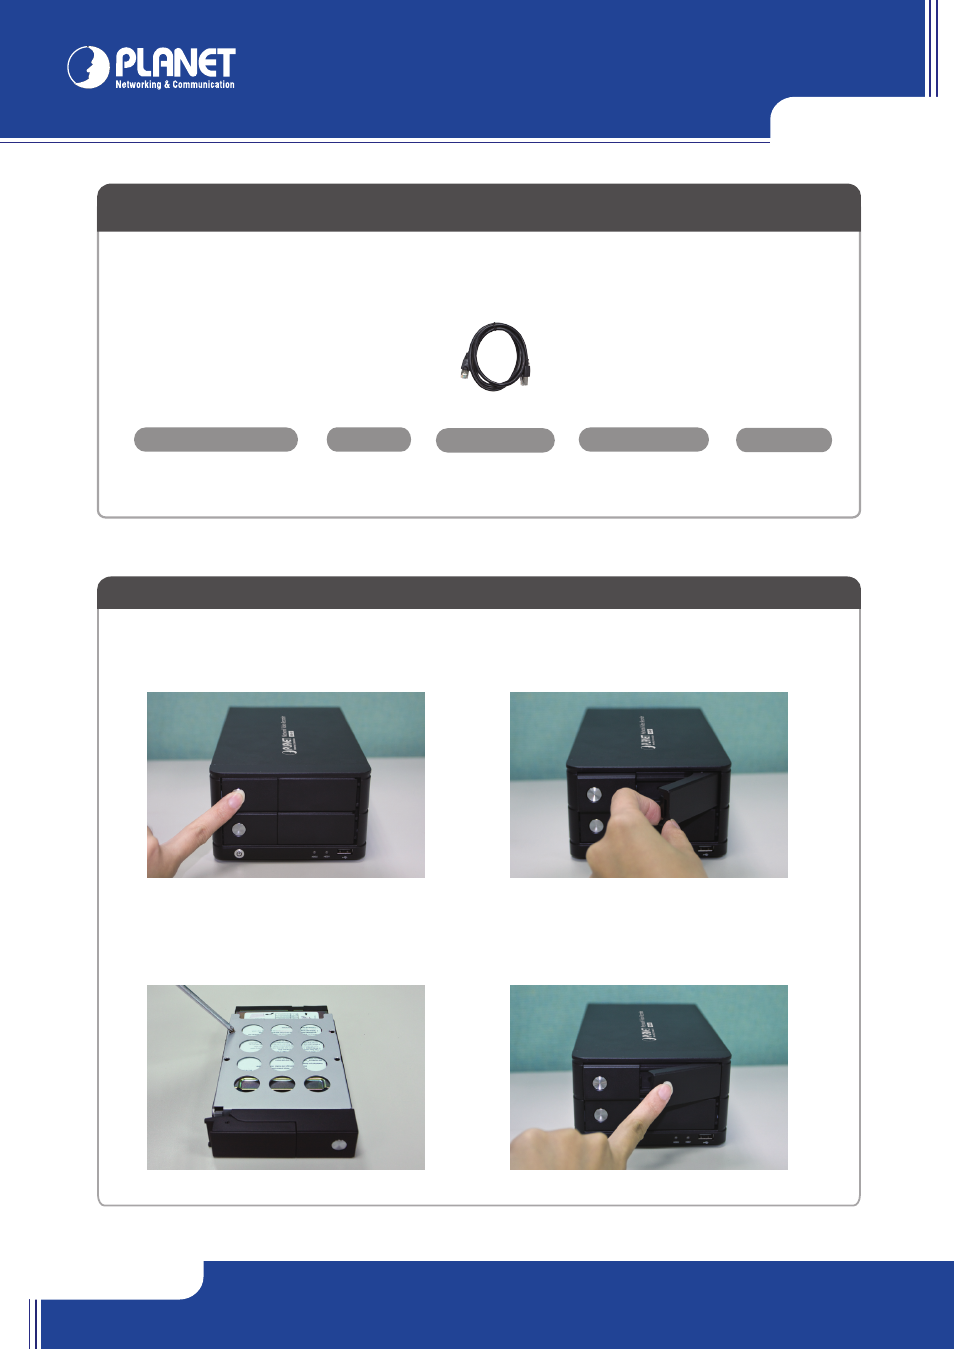
Installing the Hard Disk Drive
1. Push the silver button to release the HDD tray.
3. Place the HDD on the tray and secure the HDD
with the screws at the bottom (as il-lustrate).
4. Push the tray back in the unit and press down the
black bar to secure the tray.
Install
“NAS Finder for Windows” utility from the CD
Please go to Start → Programs → PLANET → NAS-7202 → NAS Finder →
Refresh to run the search tool.
The NAS-7202 should be located and its IP address should be displayed:
Double-click on it and the program should automatically access the NAS-7202’s
web administration page from your default browser.
Further configurations and information can be found in the user’s manual CD. Please check the user’s manual for more understanding.
Note :
If any of above items are missed or damaged, please contact your local dealer for support.
2. Pull out the HDD tray.
USB HDD
x 8
Steps
Description
1
Connect NAS-7202 and a Switch, Hub, Router, or computer with RJ-45 Ethernet cable.
2
[Optional] Connect USB storage device(s) to this device with USB cable(s). NAS-7202 can automatically mount
the USB devices connected.
3
Connect the power supply to NAS-7202.
4
Press the “Power button” to turn on NAS-7202. The HDD activate LED on the front panel will light up during
booting-up. NAS-7202 will be ready to use when the blue LED lights up steady.