Yamaha YDP-S52 User Manual
Page 10
iPhone/iPad Connection Manual
10
2
Press the WPS button on your access point within two minutes after step 1 above.
When the connection to the wireless network is completed, the LED lamp of the adaptor lights, and
then flashes during communication over the network.
NOTE
For details about the operations in the setting of the access point, read the owner’s manual for the
product you are using.
The necessary information is automatically set, and the connection between access point and the
instrument has been completed. Proceed to step 6 on
to connect the access point and iPhone/
iPad. If you cannot set by WPS, follow the instructions in “Displaying the Networks in the Wireless LAN
and Connecting to the Network.”
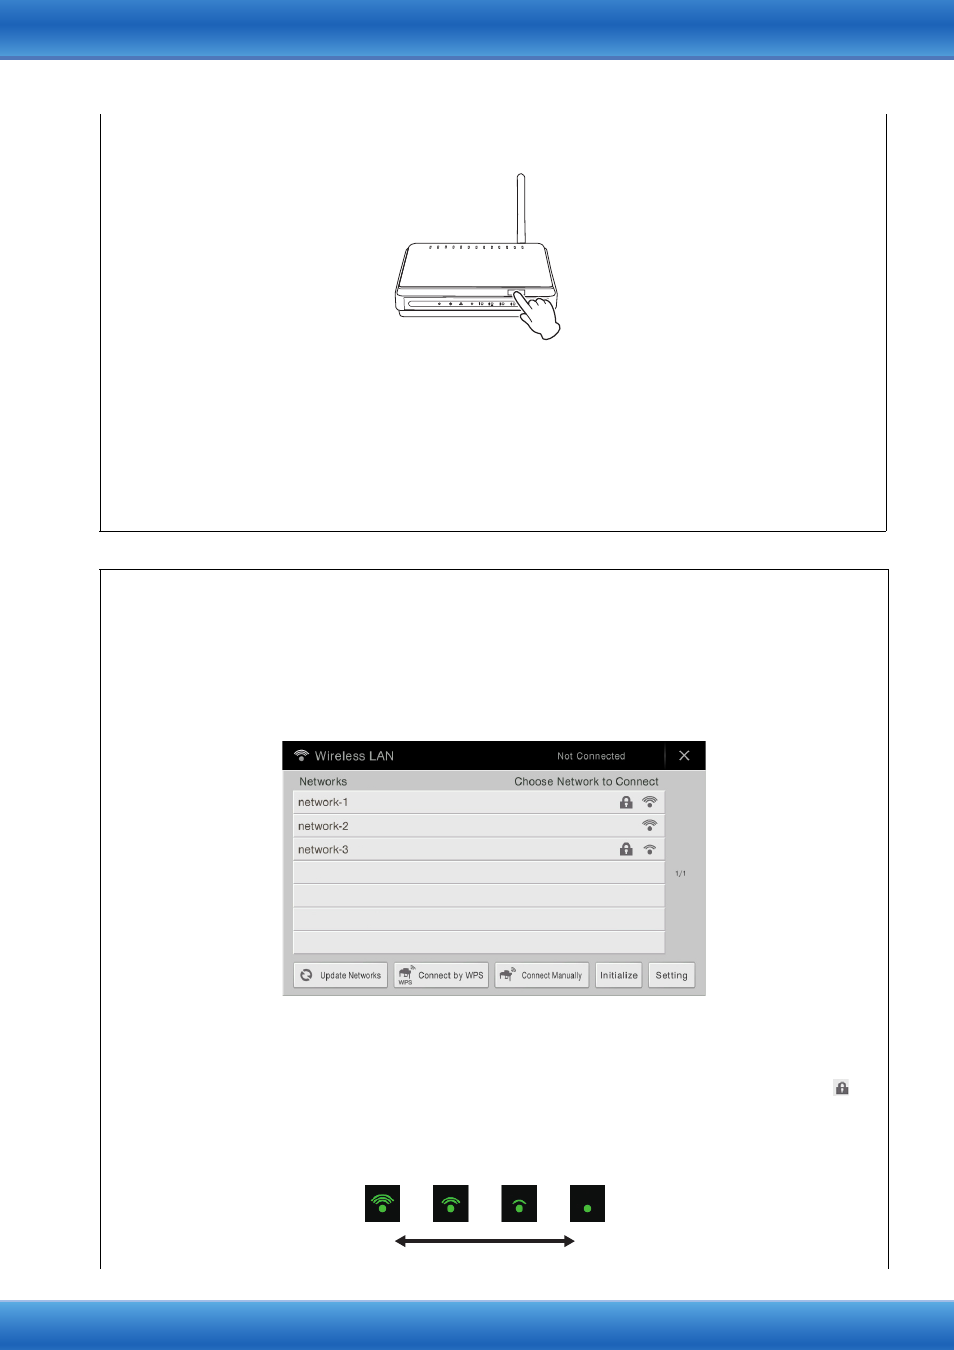
Displaying the Networks in the Wireless LAN and Connecting to the Network
You can connect the instrument to the Network by selecting it in the wireless LAN display on the
instrument. For more information on displaying networks in the wireless LAN display of the instrument,
refer to the Owner’s Manual or the Reference Manual of your instrument.
1
Display the Networks in the wireless LAN display of the instrument.
For example, on the CVP-609/CVP-605: Menu [Wireless LAN]
NOTE
If no signal from the access point is received, the access point cannot be listed. Also, closed access
points cannot be listed.
2
Connect the instrument to the access point.
From the Networks listed on the display, select the desired one. For a network with a lock icon (
),
you need to enter the password, and for the network without the lock icon, you can connect the
network only by selecting it.
When connection is done successfully, “Connected” is shown at the top of the display, and the icon
shown below appears according to the signal strength.
Press the WPS button on your
access point.
Strong
Weak