Level set led, Low cut switch, Band equalization – MACKIE ProFX4v2 User Manual
Page 10: Hi eq, Low eq, Pr ofx4v2, Profx4v2
Pr
oFX4v2
10
ProFX4v2
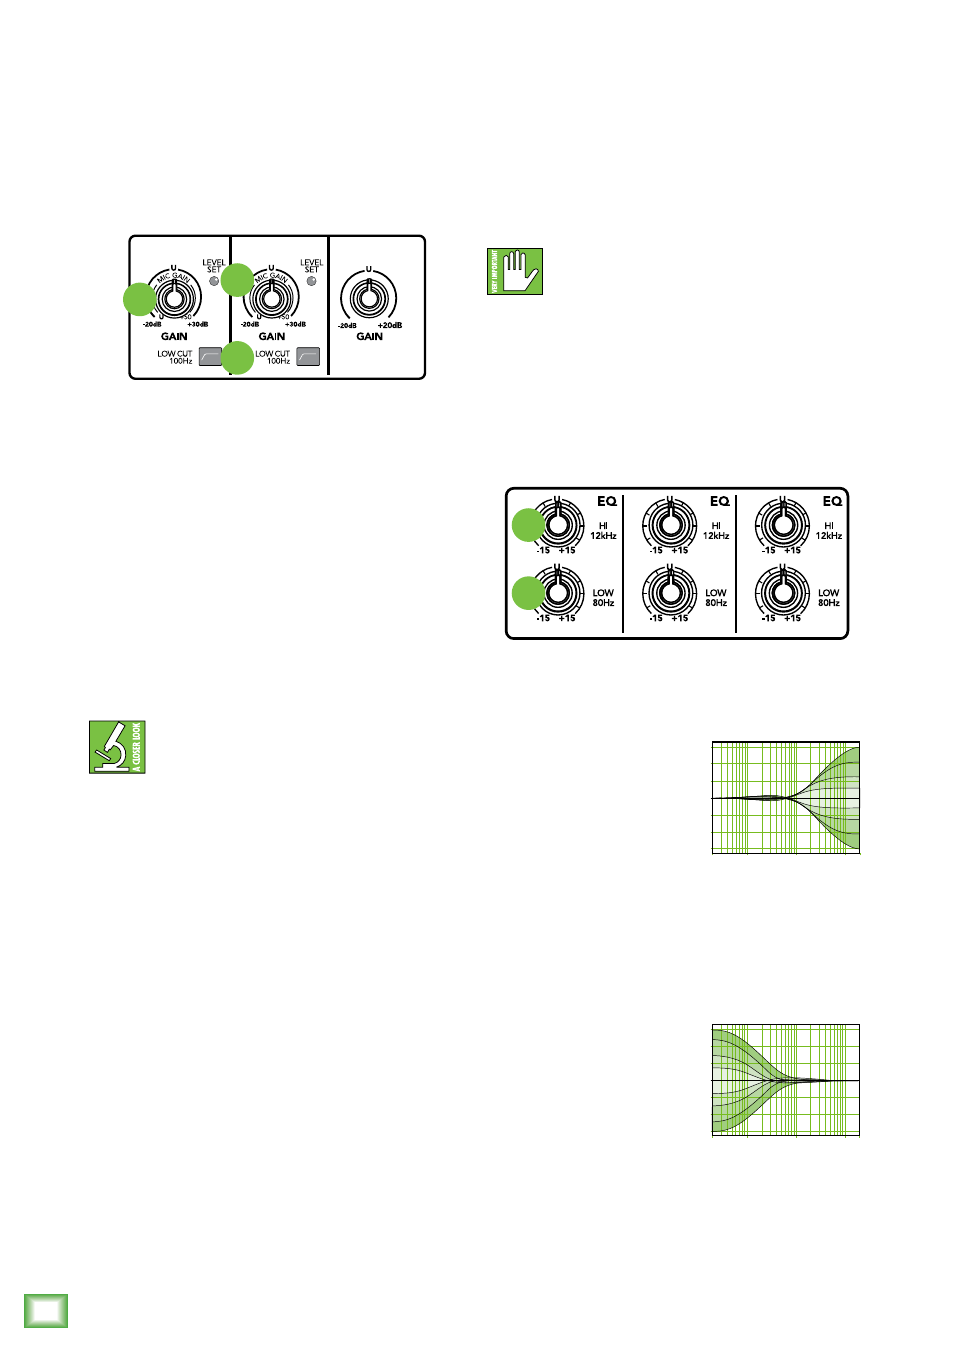
8. Level Set LED
These LEDs are used with the gain control to set the
channel preamplifier gain just right for each source.
If one or more channels are distorting, check the level
set LEDs. If they are on continuously, turn down the
gain.
9. Low Cut Switch
Both mono channels have a low-cut switch (often
referred to as a high-pass filter) that cuts bass
frequencies below 100 Hz at a rate of 18 dB per octave.
We recommend that you use low-cut on every
microphone application except kick drum, bass guitar,
or bassy synth patches. These aside, there isn’t much
down there that you want to hear, and filtering it
out makes the low stuff you do want much more crisp
and tasty. Not only that, but low-cut can help reduce
the possibility of feedback in live situations, and it
helps to conserve amplifier power.
Another way to consider the low-cut’s function
is that it actually adds flexibility during live
performances. With the addition of low-cut,
you can safely use low equalization on vocals.
Many times, bass shelving EQ can really benefit voices.
Trouble is, adding low EQ also boosts stage rumble,
mic handling clunks and breath pops from way-down
low. Applying low-cut removes all those problems,
so you can add low EQ without blowing the woofers.
7
9
8
2-Band Equalization
The ProFX4v2 has 2-band equalization at carefully
selected points — low shelving at 80 Hz, and hi shelving
at 12 kHz. “Shelving” means that the circuitry boosts
or cuts all frequencies past the specified frequency.
For example, rotating the low EQ knob 15 dB to the
right boosts bass starting at 80 Hz and continuing
down to the lowest note you never heard.
With too much EQ, you can really upset things.
We’ve designed a lot of boost and cut into each
equalizer circuit because we know that
everyone will occasionally need that. But if you max the
EQ on every channel, you’ll get mix mush. Equalize
subtly and use the left sides of the knobs (cut), as well
as the right (boost). If you find yourself repeatedly using
a lot of boost or cut, consider altering the sound source,
such as placing a mic differently, trying a different kind
of mic, a different vocalist, changing the strings, or
gargling.
10. Hi EQ
The hi EQ provides up to
15 dB of boost or cut above
12 kHz, and it is also flat
(no boost or cut) at the
detent. Use it to add sizzle
to cymbals, an overall sense
of transparency, or an edge to keyboards, vocals, guitar
and bacon frying. Turn it down a little to reduce
sibilance or to mask tape hiss.
11. Low EQ
The low EQ provides up to
15 dB of boost or cut below
80 Hz. The circuit is flat at
the center detent position.
This frequency represents the
punch in bass drums, bass
guitar, fat synth patches, and some really serious male
singers who eat raw beef for breakfast.
10
11
20
Hz
100
Hz
1k
Hz
10k
Hz
20k
Hz
–15
–10
–5
0
+5
+10
+15
20
Hz
100
Hz
1k
Hz
10k
Hz
20k
Hz
–15
–10
–5
0
+5
+10
+15