Using the print release function – Sharp MX-6070N User Manual
Page 6
6
Print Release Settings Guide
USING THE PRINT RELEASE FUNCTION
This section explains how to store jobs in the primary unit, and how to select and print jobs from a secondary unit.
Storing a job in the primary unit from your computer
When user authentication enabled in the machine, you must enter your user information (login name, password, etc.) in
the settings screen of the printer driver in order to print.* For explanations of the settings, see printer driver help.
* The user information that is required varies depending on the enabled authentication method. Check with the machine
administrator for this information.
In a Windows environment
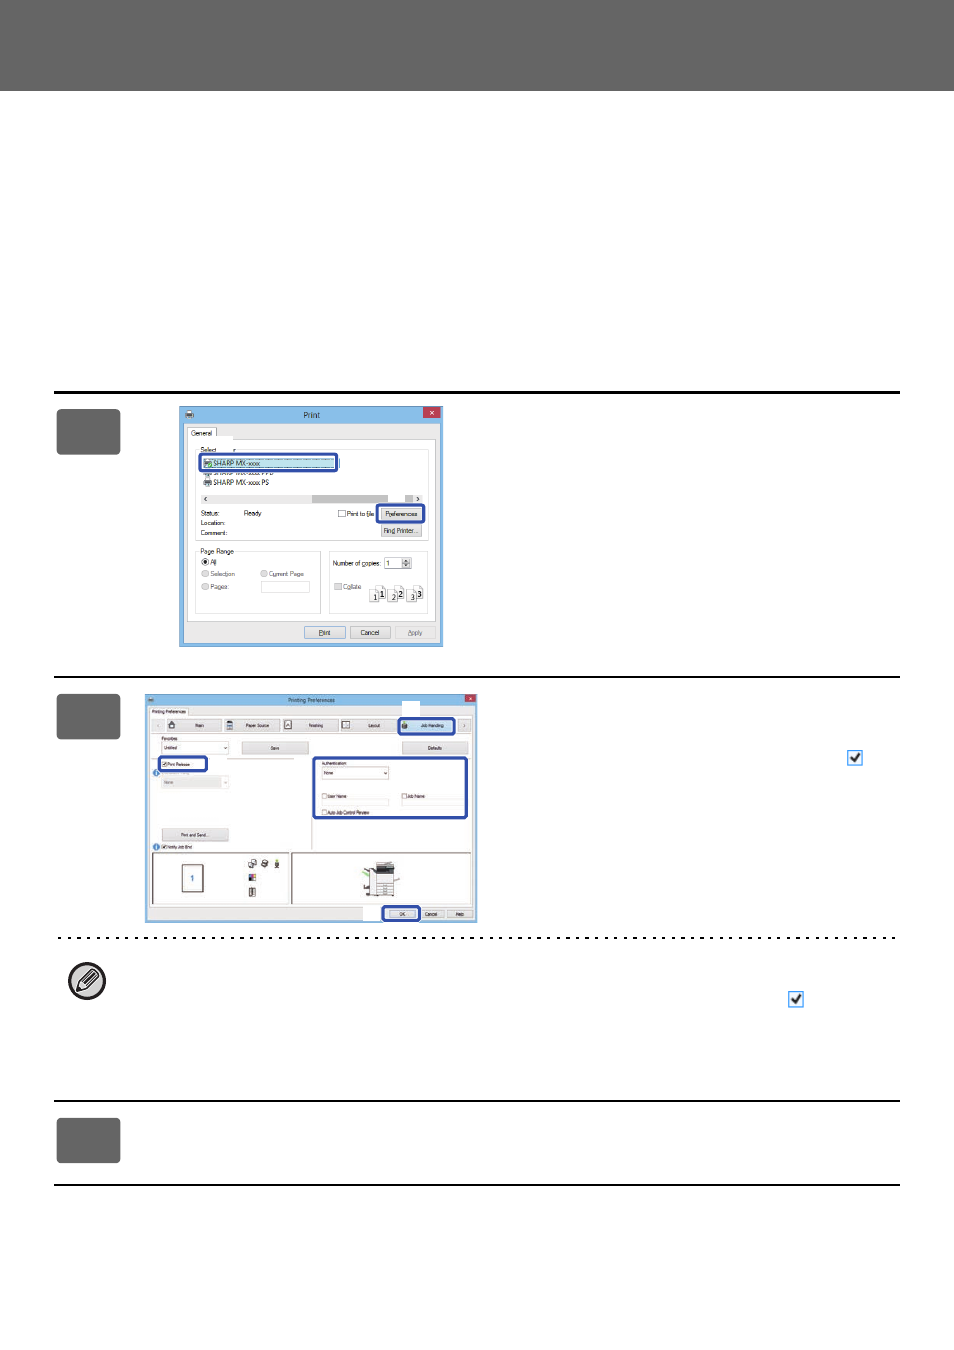
1
Open the printer driver properties
window.
(1) Select the printer driver of the Primary
Unit.
(2) Click the [Preferences] button.
2
Configure the print release function.
(1) Click the [Job Handling] tab.
(2) Select the [Print Release] checkbox
.
(3) Enter user information as needed.
For more information, see the User's Manual.
(4) Select any print settings that are needed,
and click the [OK] button.
• The print release function cannot be used at the same time as the document filing function.
• You can change the number of copies and color mode at the time of printing.
• To have the print release function be always enabled, select the [Print Release] checkbox
in [Printing
Policy] on the [Configuration] tab of the printer driver.
• If less than 10 MB is free in the storage area of the primary unit, the job will not be stored. Delete
unneeded jobs and print again.
3
Start printing.
(1)
(2)
(1)
(2)
(3)
(4)