Roland XS-42H Matrix Switcher 4 x 2 HDMI User Manual
Rack-mounting, Pdf manual, Free-standing use
Owner’s Manual
© 2018 Roland Corporation
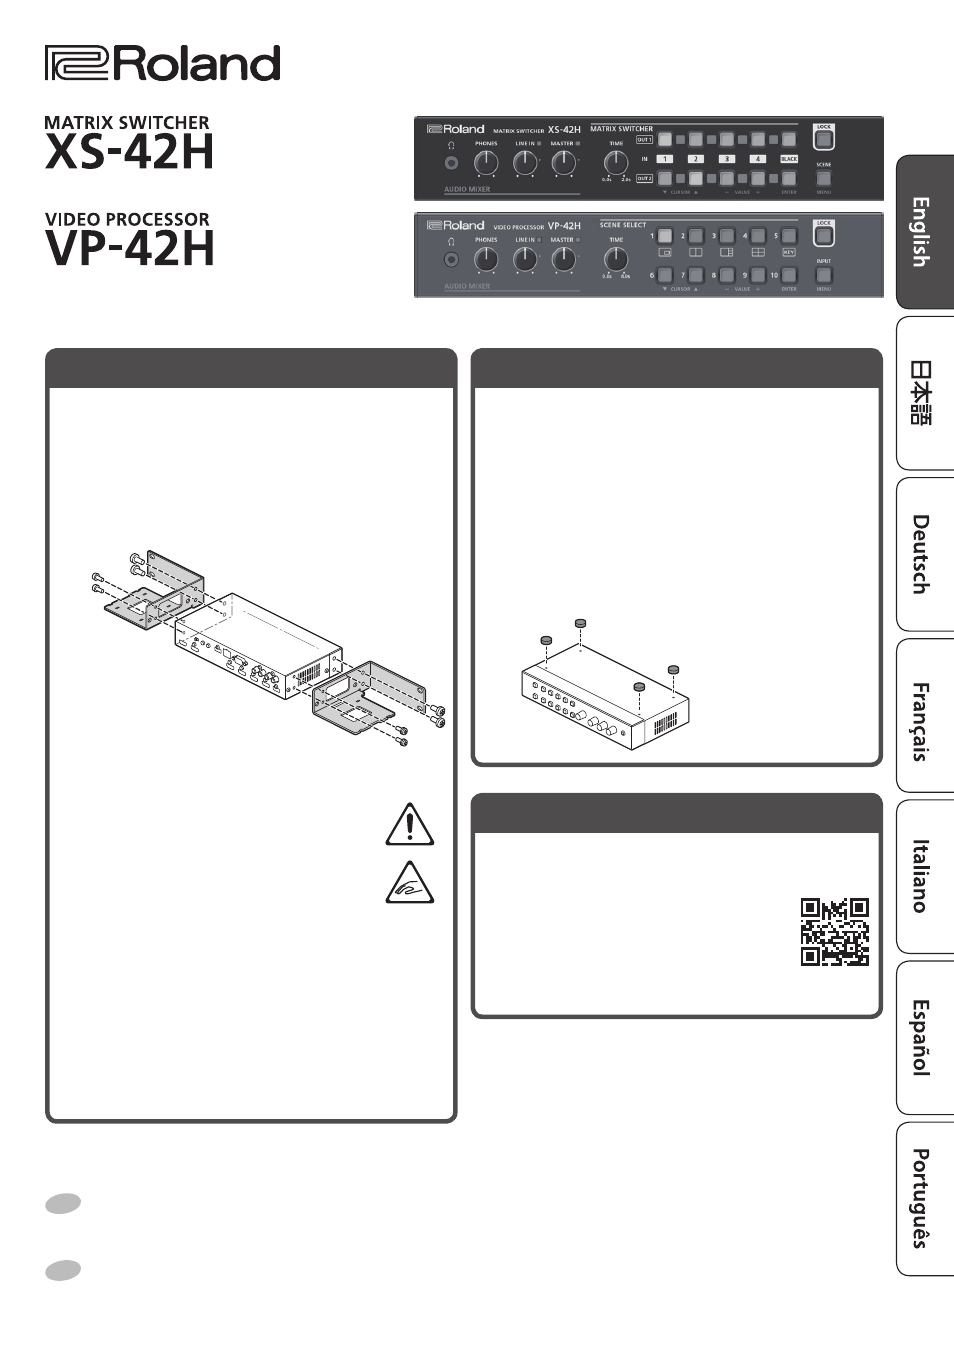
Rack-Mounting
Attaching the rack-mount angles
By attaching the included rack-mount angles to this
unit, you can mount it in a rack.
1.
Remove the screws from the side panels. Using
the screws that you removed, attach the rack-
mount angles as shown in the illustration.
Important notes on rack mounting
5
Install in a well-ventilated location.
5
Do not block the cooling vents located on
the unit’s top panel and side panels.
5
Avoid mounting the unit in a sealed-type
rack. Warm air within the rack cannot
escape and is sucked into the unit, making
efficient cooling impossible.
5
If the back of the rack cannot be opened, install
an exhaust port or ventilation fan at the top back
surface of the rack, where warm air collects.
5
When using the unit while mounted in a movable
case (portable rack), remove the front and rear rack
covers so that the front and back of the unit are not
obstructed.
5
Take care not to pinch your fingers etc. while
mounting the unit in a rack.
Before using this unit, carefully read “USING THE UNIT SAFELY” and “IMPORTANT NOTES” (the leaflet “USING THE UNIT SAFELY” and the
Owner’s Manual (p. 8)). After reading, keep the document(s) where it will be available for immediate reference.
Before using the unit, ensure that its system program is at the most recent version. For information on available upgrades for the
system program, see the Roland website (https://proav.roland.com/).
You can check the system program version by Long-pressing the [MENU] button
0
“System”
0
“Version.”
PDF Manual
(download from the Web)
Details on operations, menu lists, and a list of RS-232
commands are provided in “Reference Manual” (PDF).
Downloading
1.
Access the Roland website.
https://proav.roland.com/
2.
Move to the product page
0
click “Support”
0
download the applicable PDF file.
Free-Standing Use
Attaching the rubber feet
If you will be placing this unit on a desk or shelf for
use, attach the included rubber feet (4 pcs.). This
prevents the unit from slipping or from scratching the
surface on which it is placed.
1.
Remove the rubber feet from the sheet.
2.
Peel the double-sided tape off the rubber feet,
and affix the feet so that they cover the four
guide holes on the bottom of the unit.