Roland Boutique JD-08 Synthesizer Module User Manual
Jd-08 quick start, Panel descriptions, Outputting sound
JD-08 Quick Start
Panel Descriptions
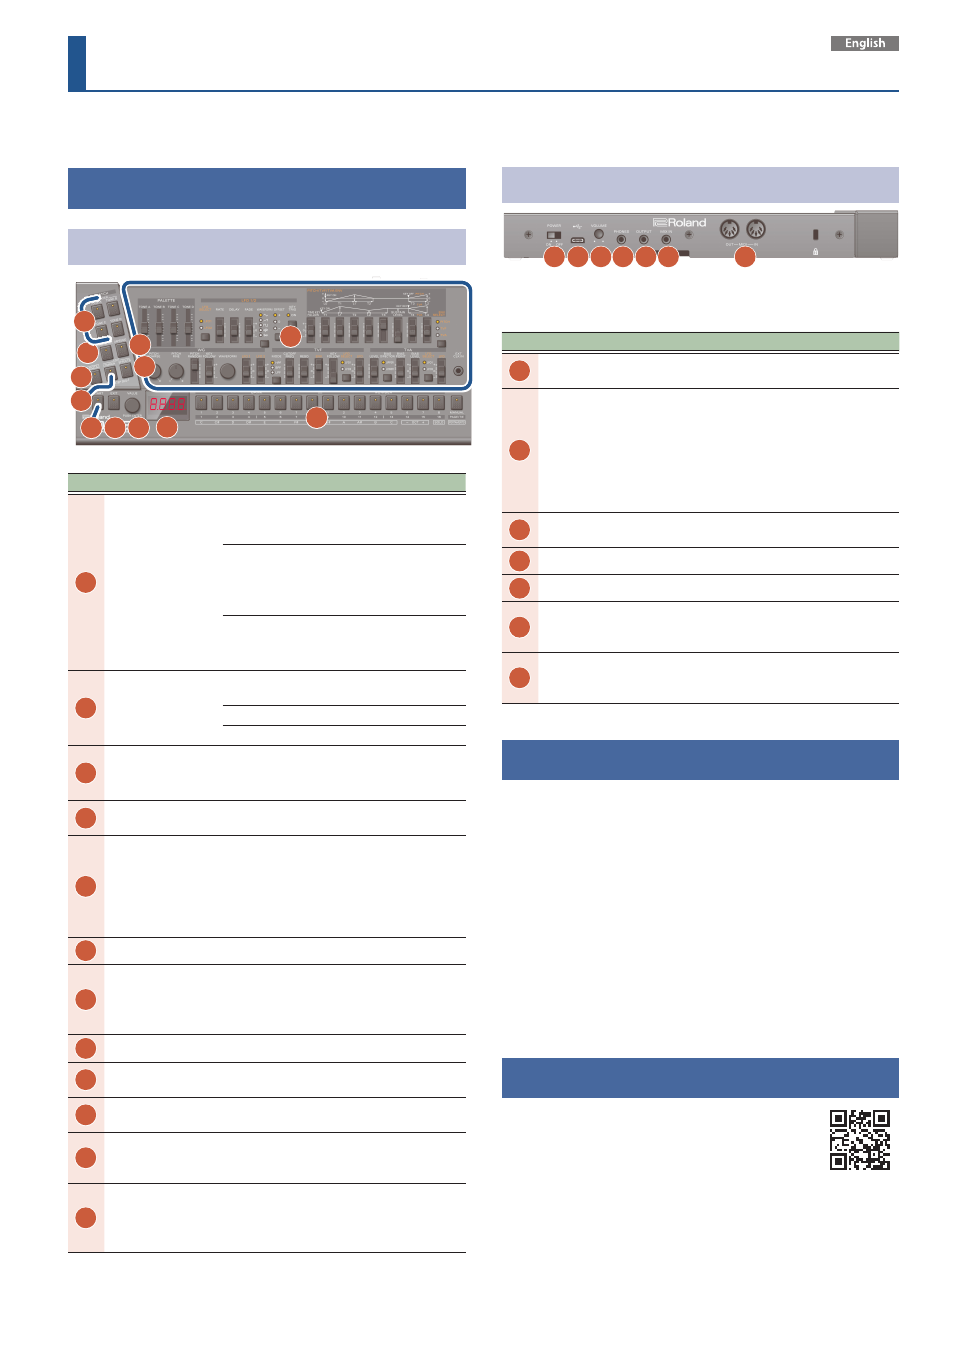
Top Panel (Control Section)
2
3
4
6
8 9 10
11
12
5
7
1
No.
Name
Explanation
1
LAYER buttons
([TONE A]–[TONE D]
buttons)
The functions of the LAYER buttons change
depending on the status of the [LAYER-
ACTIVE] button.
LAYER
Turns the layer on/off.
The LAYER button lights
up for layers that produce
sound.
ACTIVE
Select the layer to edit.
The selected LAYER button
blinks.
2
[LAYER-ACTIVE]
button
Toggles between functions of the LAYER
button.
Off
LAYER
On
ACTIVE
3
[ARPEGGIO] button
Turns the arpeggio on/off.
Long-press the button to show the
arpeggio settings menu.
4
[NOTE] button
When this is on, you can use the [1]–[13]
buttons as a keyboard.
5
[COMMON] button
Displays the settings menu.
* Press the [EFFECTS] button while
holding down the [COMMON] button to
edit the sequencer (STEP SEQ). Press the
[COMMON] button again to show the
sequencer settings menu.
6
[EFFECTS] button
Displays the effects settings menu.
7
[START] button
Plays back (the button lights up) or stops
the sequencer (the button goes dark).
Use this together with the [1]–[16] buttons
to switch to different patterns.
8
[EXIT] button
Returns to the previous screen.
9
[VALUE] knob
Edits the parameter’s value. Press the knob
to confirm the value or operation.
10
Display
Shows the bank and patch number,
parameter value and tempo.
11
[1]–[16], [PAGE/TIE]
button
Use these buttons to switch between tones
(patch/bank), and to input notes into the
sequencer.
12
Tone section
(controls inside
the outlined
section)
Use these controls to edit the tones. Refer
to the manual on our website for details.
Rear Panel
13 14 15 16 17 18
19
* To prevent malfunction and equipment failure, always turn
down the volume, and turn off all the units before making any
connections.
No.
Name
Explanation
13
[POWER]
switch
This turns the power on/off.
14
USB Type-C®
port
Use a commercially available USB Type-C
cable to
connect this port to your computer. It can be
used to transfer USB MIDI and USB audio data.
You must install the USB driver when connecting
the JD-08 to your computer. Download the USB
driver from the Roland website.
https://www.roland.com/global/support/
15
[VOLUME]
knob
Adjusts the volume.
16
PHONES jack Connect headphones (sold separately) here.
17
OUTPUT jack Connect this jack to your amp or monitor speakers.
18
MIX IN jack
This is the audio input jack. Sound from the
connected device is output from the PHONES jack
and OUTPUT jack.
19
MIDI
connectors
Connect a MIDI device to these connectors using
a commercially available MIDI cable. This lets you
control the connected MIDI devices from this unit.
Outputting Sound
1.
Turn the JD-08 power on.
* Before turning the unit on/off, always be sure to turn the volume
down. Even with the volume turned down, you might hear some
sound when switching the unit on/off. However, this is normal
and does not indicate a malfunction.
2.
Hold down the [START] button and press the [9]–
[16] buttons (NUMBER 1–8).
Select a pattern. The pattern number appears on the display.
3.
Press the [START] button.
This plays back the pattern. Press the [START] button again to stop the
pattern.
Online Manual
For more details on this unit, refer to the online manual
(HTML) by accessing the link below.
https://roland.cm/jd-08_om
Before using this unit, carefully read “USING THE UNIT SAFELY” and “IMPORTANT NOTES” (the leaflet “USING THE UNIT SAFELY”). After reading, keep
the document(s) where it will be available for immediate reference.
© 2021 Roland Corporation