Epson PictureMate PM-400 Personal Photo Lab User Manual
Start here, Pm-400, Load paper
Start Here
4
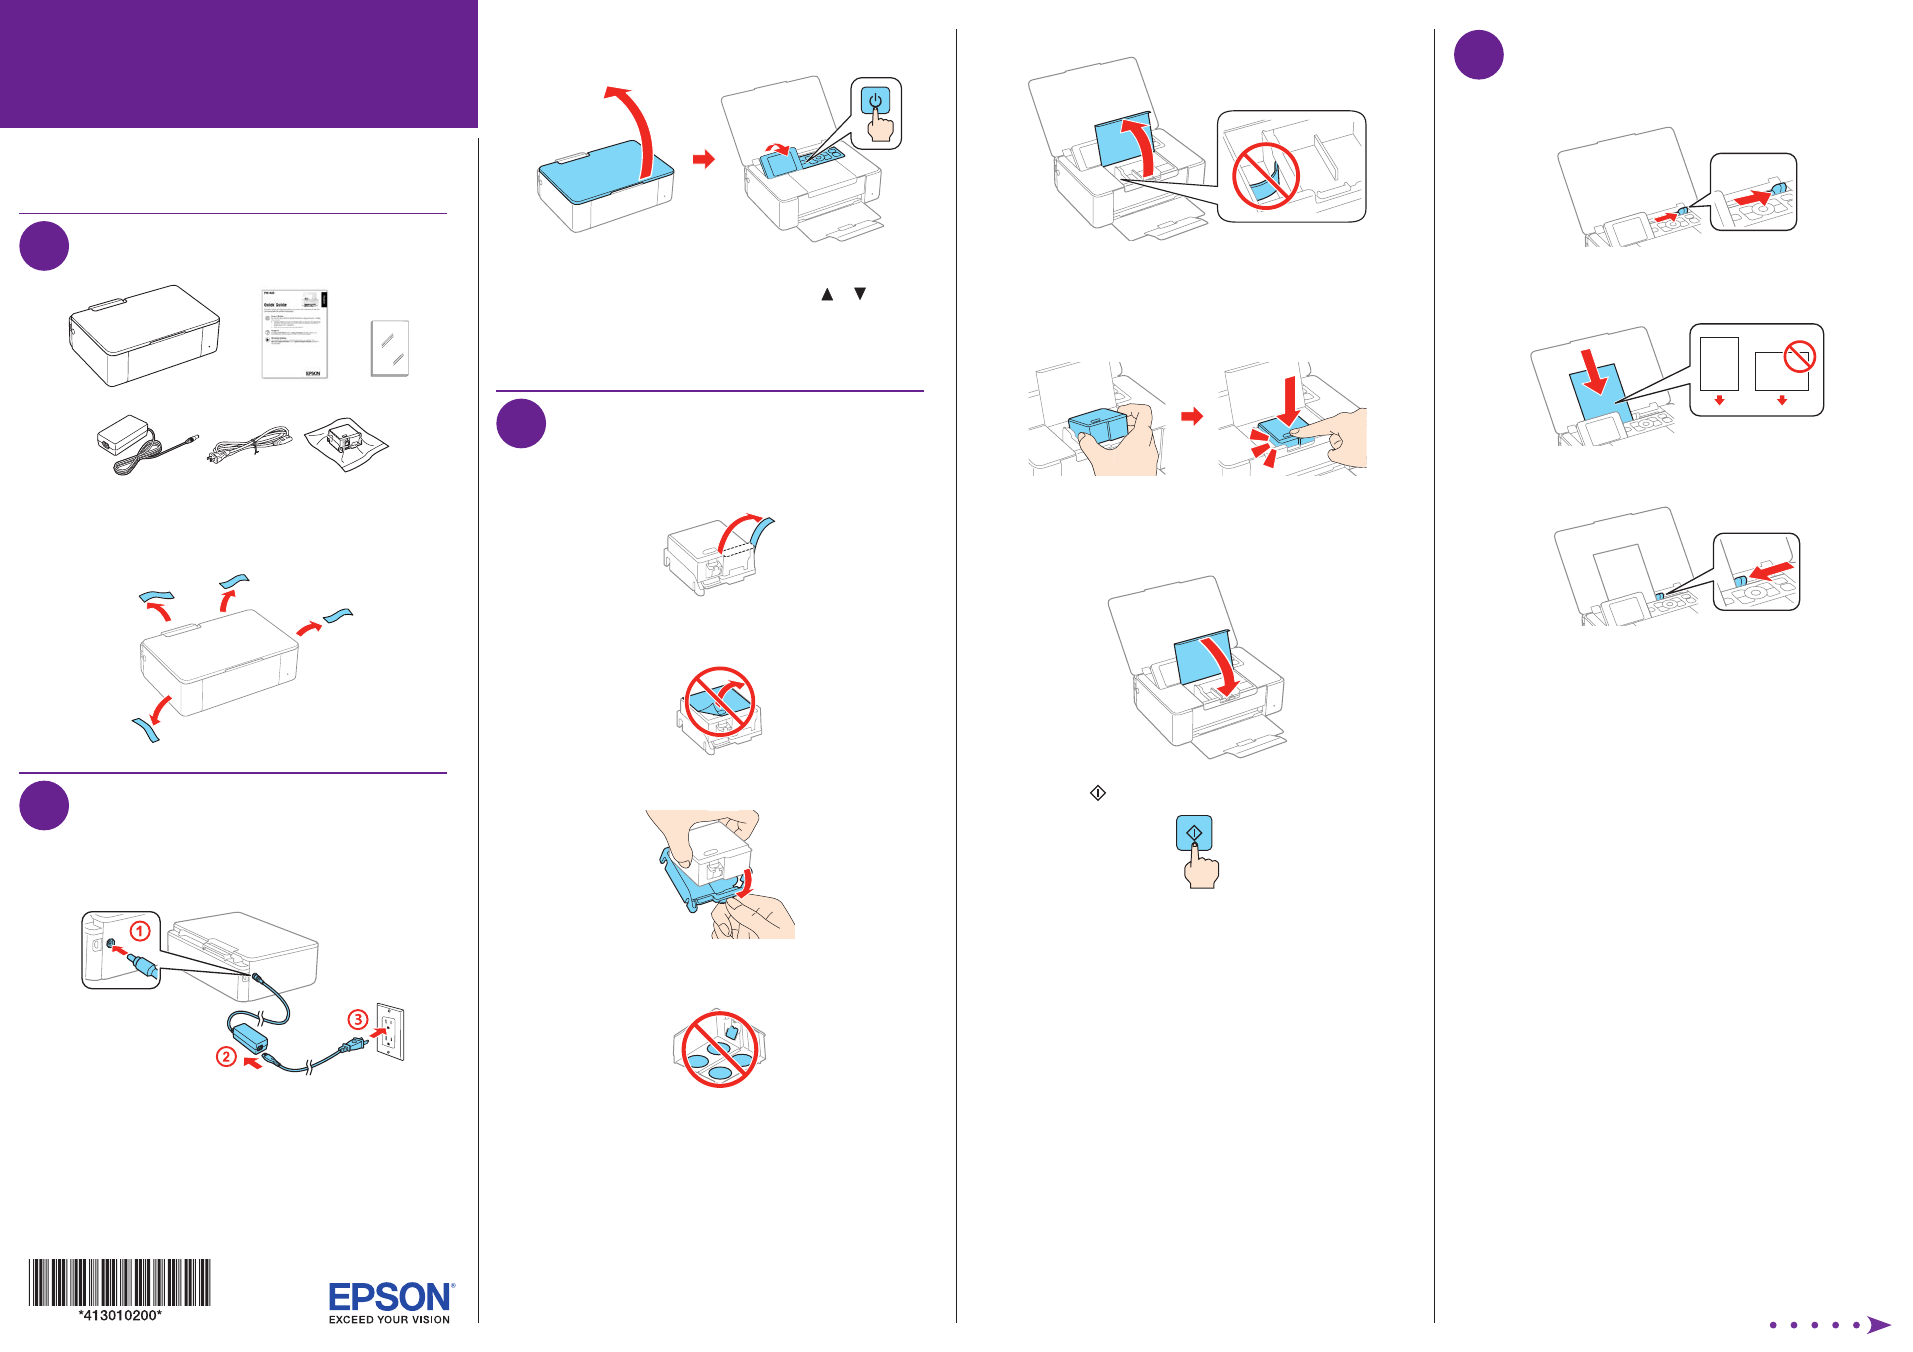
Load paper
1
Slide the edge guide to the right.
2
Load one of the included 4 x 6-inch sheets, glossy or
printable side up and short edge first.
3
Slide the edge guide against the paper, but not too tightly.
4
Select
Change on the LCD screen and press the
OK button.
5
Select
4x6in and press the OK button.
6
Select
Prem. Glossy and press the OK button.
7
Press the
OK button again to confirm the paper settings.
Read these instructions before using your product.
1
Unpack
4 x 6-inch
paper
Note:
Do not open the ink cartridge package until you are ready to
install the ink. Cartridges are vacuum packed to maintain reliability.
Remove all protective materials from the product.
2
Turn on and configure
1
Connect the power adapter to the side of the product.
Then connect one end of the power cord to the power
adapter and the other end to an electrical outlet.
Caution:
Do not connect to your computer yet.
2
Open the cover, raise the LCD screen, and turn on the
product.
3
To select English as your language, press the
OK button.
If you want to change the language, press or to
select it, then press the
OK button.
Note:
You can change the language later using the product’s
control panel. For more information, see the online User’s Guide.
3
Install ink cartridge
1
Unpack the initial ink cartridge and completely remove the
yellow tape only.
Caution:
Do not remove any other labels or seals, or ink
may leak.
2
Remove the cap and carefully dispose of it.
Caution:
Do not touch the areas shown below. Doing so may
prevent normal operation and printing.
3
Open the inner cover.
Caution:
Do not touch the flat white cable.
4
Hold the cartridge with the green chip facing towards you
and insert the cartridge at an angle as shown. Then press
the ink cartridge down until it clicks into place.
Caution:
Make sure to insert the ink cartridge in the correct
direction or you may damage the product.
5
Close the inner cover.
6
Press the button to start charging the ink.
Ink charging takes approximately 4 minutes. Ink charging
is complete when you see the home screen displayed on
the LCD screen.
Caution:
Don’t turn off the product or open the inner cover while
it is charging or you’ll waste ink.
Note:
• The printer is designed for use with Epson
®
cartridges only, not
third-party cartridges or ink.
• The cartridge included with the printer is designed for printer
set up and not for resale. After some ink is used for charging,
the rest is available for printing.
PM-400