Apple 27" Studio Display (Nano-Texture Glass, Tilt Adjustable Stand) User Manual
Page 33
Studio Display
073-00335-A | 33
© 2022 Apple Inc. All rights reserved.
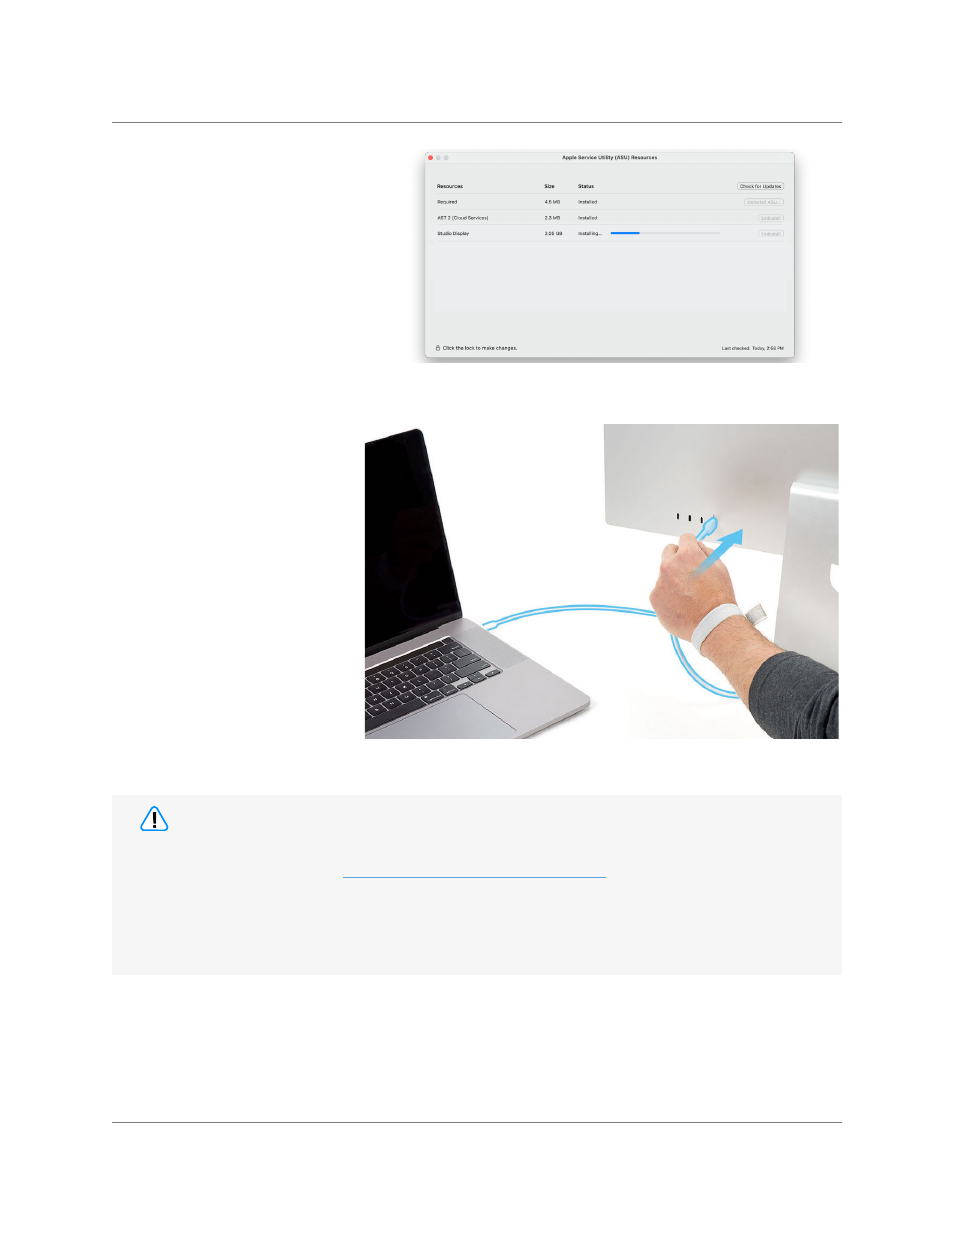
18. Open the Apple Service
Utility app on the Mac.
Ensure that all Resources
have been installed.
Note: The time to download
and install Resources will
vary based on your network
connection speed to the
internet.
Display (Stand) | Reassembly
19. Plug the display power cord
into an electrical outlet.
20. Plug one end of the USB-C
charge cable into the Mac.
Then plug the other end of
the USB-C charge cable
into the Thunderbolt 3 port
on the back of the display.
The Thunderbolt 3 port is
the rightmost port.
• After you’ve completed all removal and reassembly steps, learn how to initiate the System
Configuration process at
.
• If you replaced the display, the display’s brightness, True Tone, and Center Stage may not
function properly until you complete System Configuration.
• If you replaced the logic board, an alert symbol and “support.apple.com/display/restore” will
appear on your screen until you complete System Configuration.
Caution