Chimera OctaPlus 57 Hi-Heat Kit I User Manual
Lightbank assembly for the octaplus 3, And octaplus5, Octaplus
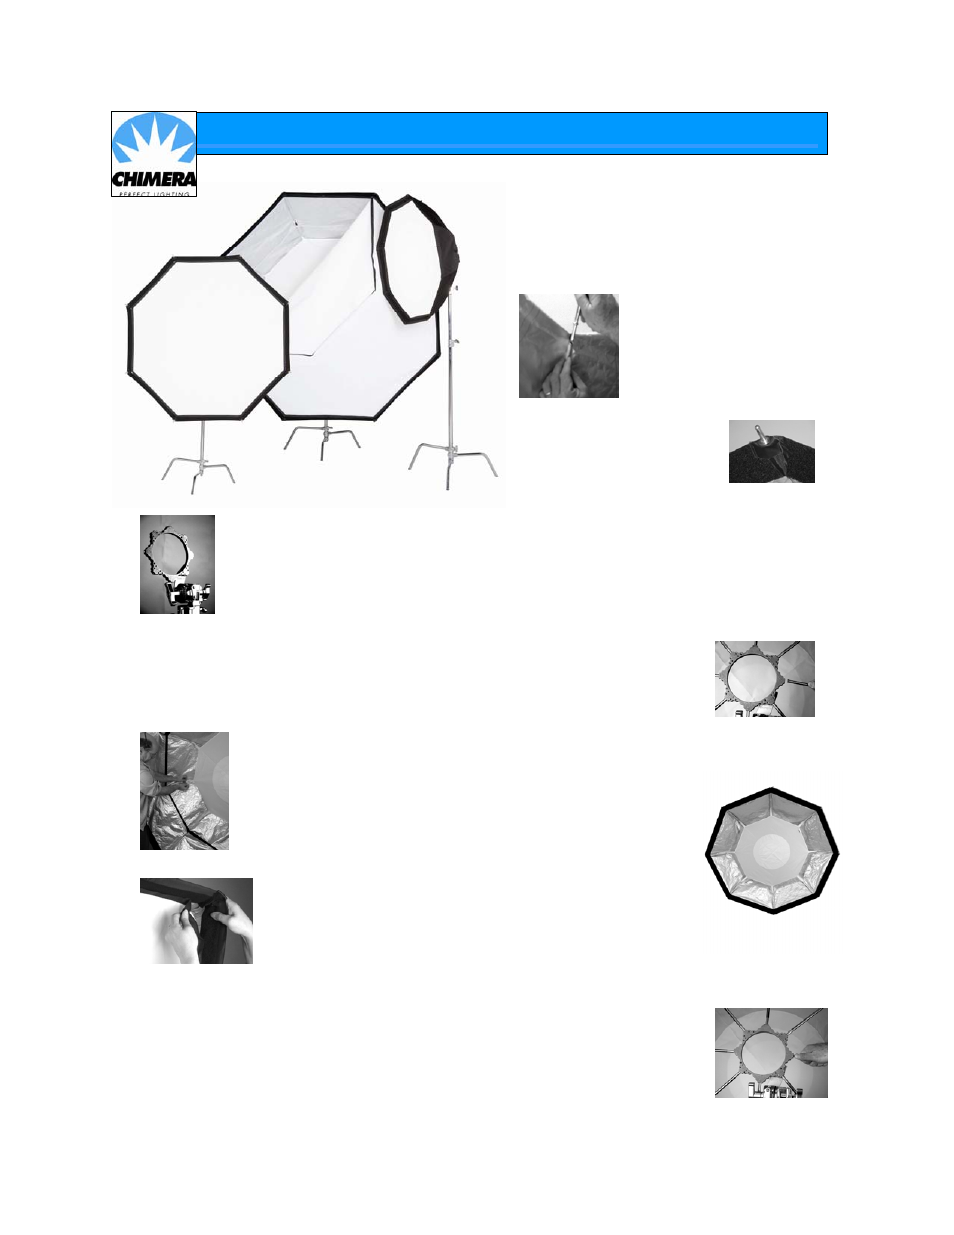
Lightbank Assembly for the
OctaPlus 3
™
and
OctaPlus5
™
Insert Poles into Pole Sleeves
-
Insert rounded
pole-ends into pole sleeves
located in inside “corners” of
the OctaPlus™ Lightbank.
Guide each pole carefully
through the pole sleeve until it
is snug at the opposite end of
the sleeve.
Note
:
On the
OctaPlus 5™, the adaptor tips for the OctaPlus
57™ will push through the
grommet hole and be exposed
(see details on next page).
Mount Your OctaPlus™ Ring on the Stand –
We
strongly recommend that a stand adapter
(
CHIMERA
® model #3770) be used with the OctaPlus 5 and 57™ Lightbanks so that the weight is
not supported by the lighting instrument. A stand adapter, while helpful, is not essential for the
OctaPlus 3™ Lightbank. Mount your Speed Ring to the light stand using the 3770 stand adaptor or
the mounting method of your choice.
For your safety and the security of your lighting instrument, if
at all possible, mount your lighting instrument to the OctaPlus™ Ring after mounting the assembled
OctaPlus™ Lightbank on the stand.
Erect the OctaPlus™ on the OctaPlus™ Ring
-
Start with one of upper holes; insert
exposed pole-end extending from Lightbank into hole on outside edge of Speed Ring. Pole
ends must be seated fully in bottom of holes. Repeat the pole insertion until all the poles are in
place. Many users feel it is easiest to insert the poles directly opposite each other. This helps
even out the tension on the OctaPlus™ Lightbank as it is assembled.
Install the Baffle and Front Screen –
The interior baffle is attached to the inside of the
OctaPlus™ Lightbank just in front of the lighting instrument. Attach one of the Velcro® tabs on
the baffle to one of the Velcro® tabs on the pole sleeves. The next
attachment should be made directly opposite the first. Continue with the
attachment of the tabs working in this opposite attachment method until all
eight tabs are installed. Working in this method will assure a much tighter
fitting baffle for more even light distribution. Reposition the tabs, if
necessary, to make sure the baffle is centered in the OctaPlus™ Lightbank.
When installing the front screen, the
CHIMERA®
label should be facing
the outside. Take one of the eight sides of the front screen and line the
“back” edge of the Velcro® hook up with the back edge of the Velcro®
pile strip just inside the front of the OctaPlus™ Lightbank. Press the
two strips together and then move to the next edge of the front screen
and line it up the same way. Continue attaching the edges in a circular
fashion around the Lightbank. Keep the front screen as taut and smooth as possible for the
best possible light distribution.
Removing OctaPlus™ from the OctaPlus™ Ring -
-
Allow the light to cool completely
before removing the OctaPlus™ Lightbank. For longest life, remove the front screen and baffle
from the OctaPlus™ Lightbank and fold them neatly. Starting with one of the poles, grasp pole
in palm of hand and place thumb on the OctaPlus™ Ring. Grip the pole on opposite side with
your other hand for additional leverage. Apply backward pressure on pole to center it in its
mounting hole and slide to pole out of the hole. Repeat until all poles are free.
OctaPlus
™
Lightbank Care and Use Instructions