Rough Country 664 User Manual
Page 5
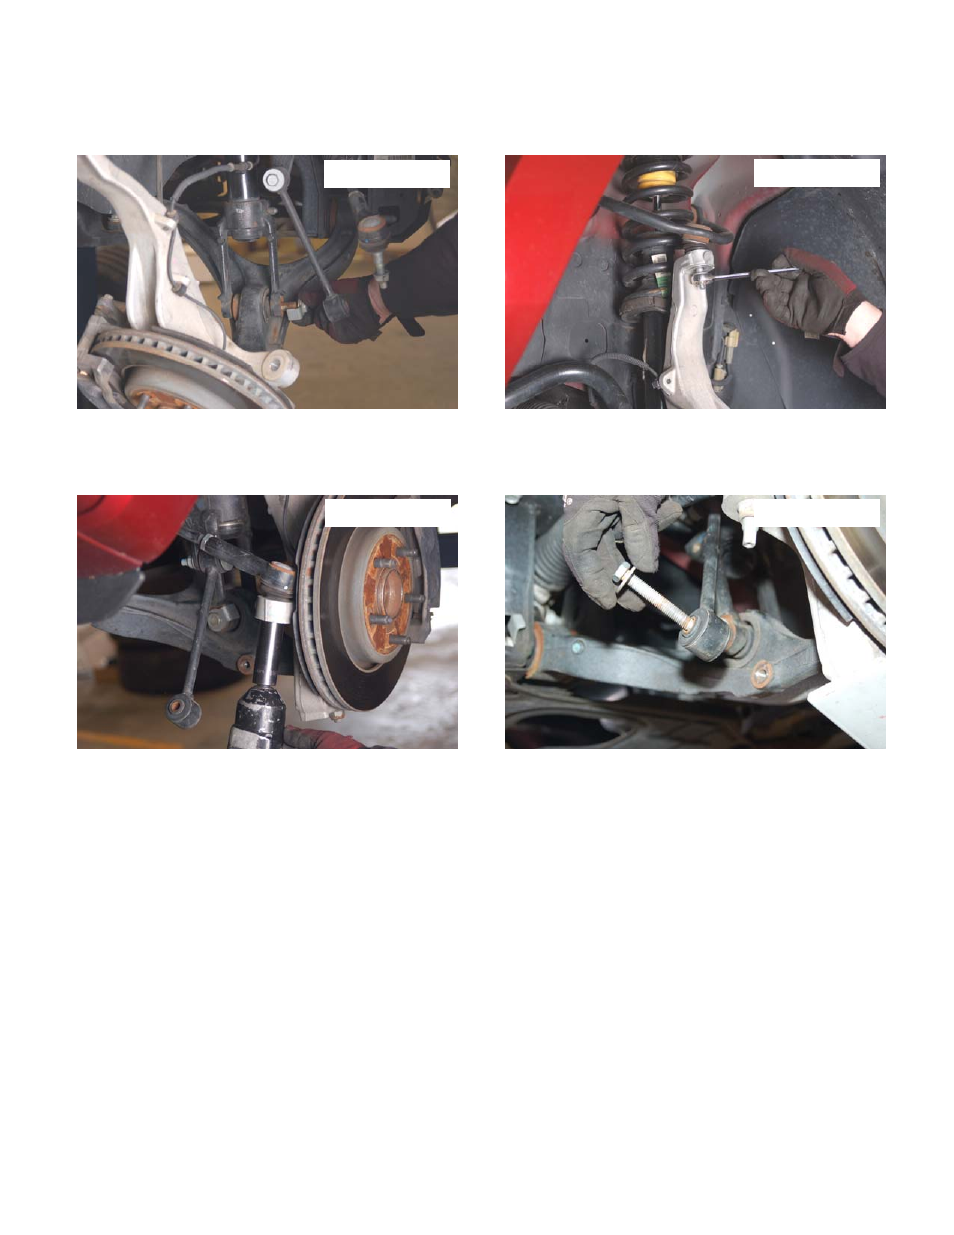
20. Swing the lower control arm up and reinstall the lower strut mount in the stock location on the lower control arm
using the factory hardware. Tighten with a 24mm socket/wrench. Tighten upper strut mount using 18mm socket/
wrench. See Photo 19.
21. Jack up the lower control arm and reinstall the knuckle to the upper ball joint with stock hardware using a 18mm
wrench. See Photo 20.
22. Reinstall the tie rod to the knuckle with factory hardware using a 21mm socket / wrench. See Photo 21.
23. Repeat process for the passenger side.
24. Reattach the sway bar to the driver and passenger side lower control arm with the factory hardware and using a 18
socket. See Photo 22.
25. After strut spacer installation has been completed, Reinstall the washer fluid tank and air box on the passenger side
with the factory hardware using a 8mm socket / wrench.
26. Reinstall the electrical boxes on the driver side with factory hardware using a 10mm wrench / socket.
27. Reinstall the tires/ wheels.
28. Jack up the vehicle and remove the jack stands,.
29. Lower the vehicle to the ground.
PHOTO 20
PHOTO 21
PHOTO 22
PHOTO 19