English – AEG AR 4021 BT User Manual
Page 84
84
ENGLISH
Carefully slide the unit into the sleeve until it locks
into place.
Press
RESET
(30) with a pen or other pointed object
after all connections are made.
Attach the front panel (A) as described under “Attach
Front Panel”.
CAUTION
Cable damage possible!
To avoid cable damage observe the cables when slid-
►
ing the unit into the sleeve.
Attach the frame.
Remove Unit
Follow these instructions to remove the unit:
Remove the frame.
Insert left and right installation keys in the slots left
and right (the claws are now bent back).
Slide the unit out of the sleeve.
NOTE
Unevenness of the casing can cause the claws to
►
lock. Unlock the claws with the installation keys, if
necessary.
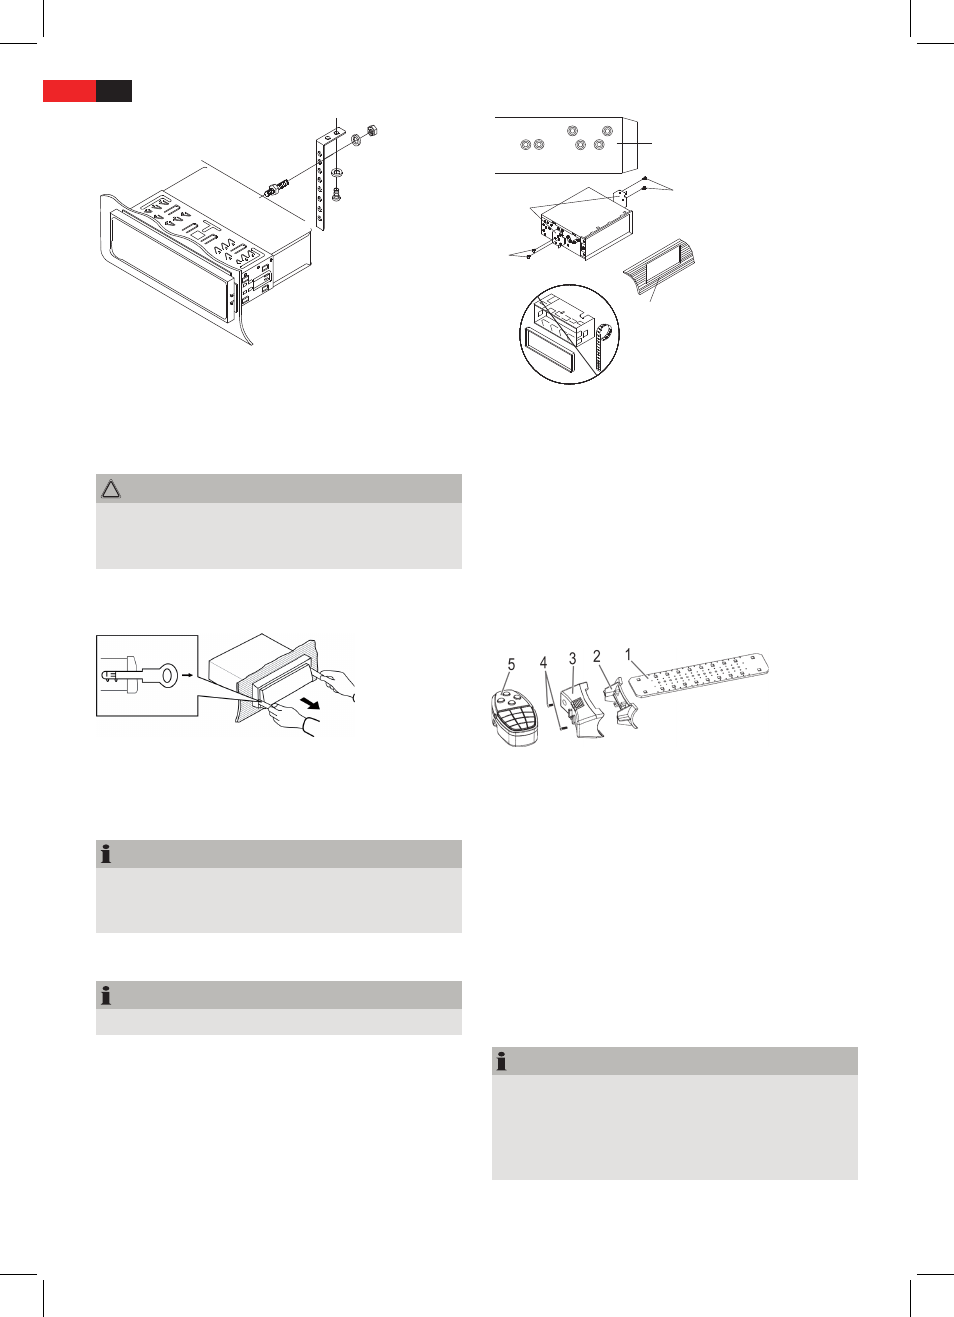
Toyota or Nissan Installation
NOTE
Sleeve, frame and mounting strip are not needed.
►
Use the threads on the side of the casing (A) to mount the
unit on the vehicle bracket (supplied with your car). The
holes are marked with T (for Toyota) and N (for Nissan).
A
B
C
D
B
Loosen the mounting screws for the hooks left and
right at the front of the unit and remove the hooks.
Mount the brackets (B) with screws on the unit (D).
Connect External Audio Device
Connect line out of the external audio device to
AUX
IN
(16) jack on the front panel.
Select playback mode for external device by repeatedly
pressing
PAIR/MOD
(4) until
AUX
is displayed.
Fit steering wheel mount for remote control
You can mount the remote control onto the inside of the
steering wheel. Follow the steps below:
1 Rubber strap
2 Mounting bracket
3 Mounting bracket cover
4 Screws
5 Remote control
Use a Philips head screwdriver to loosen the screws (4),
in order to disassemble the steering wheel mount into
the parts shown above (1-4).
Place the rubber strap around the steering wheel.
When doing so, select the corresponding pre-punched
holes to fasten the mount
securely
to the steering
wheel.
Place the cover (3) over the mounting bracket (2). Then
tighten the screws (4) again.
Insert battery into remote control
NOTE
Before using the remote control for the first time,
►
you must insert the supplied battery to make the
remote control ready for use
The life of the supplied batteries may be shortened
►
due to storage conditions.
Open the battery compartment (17) of the remote
control.