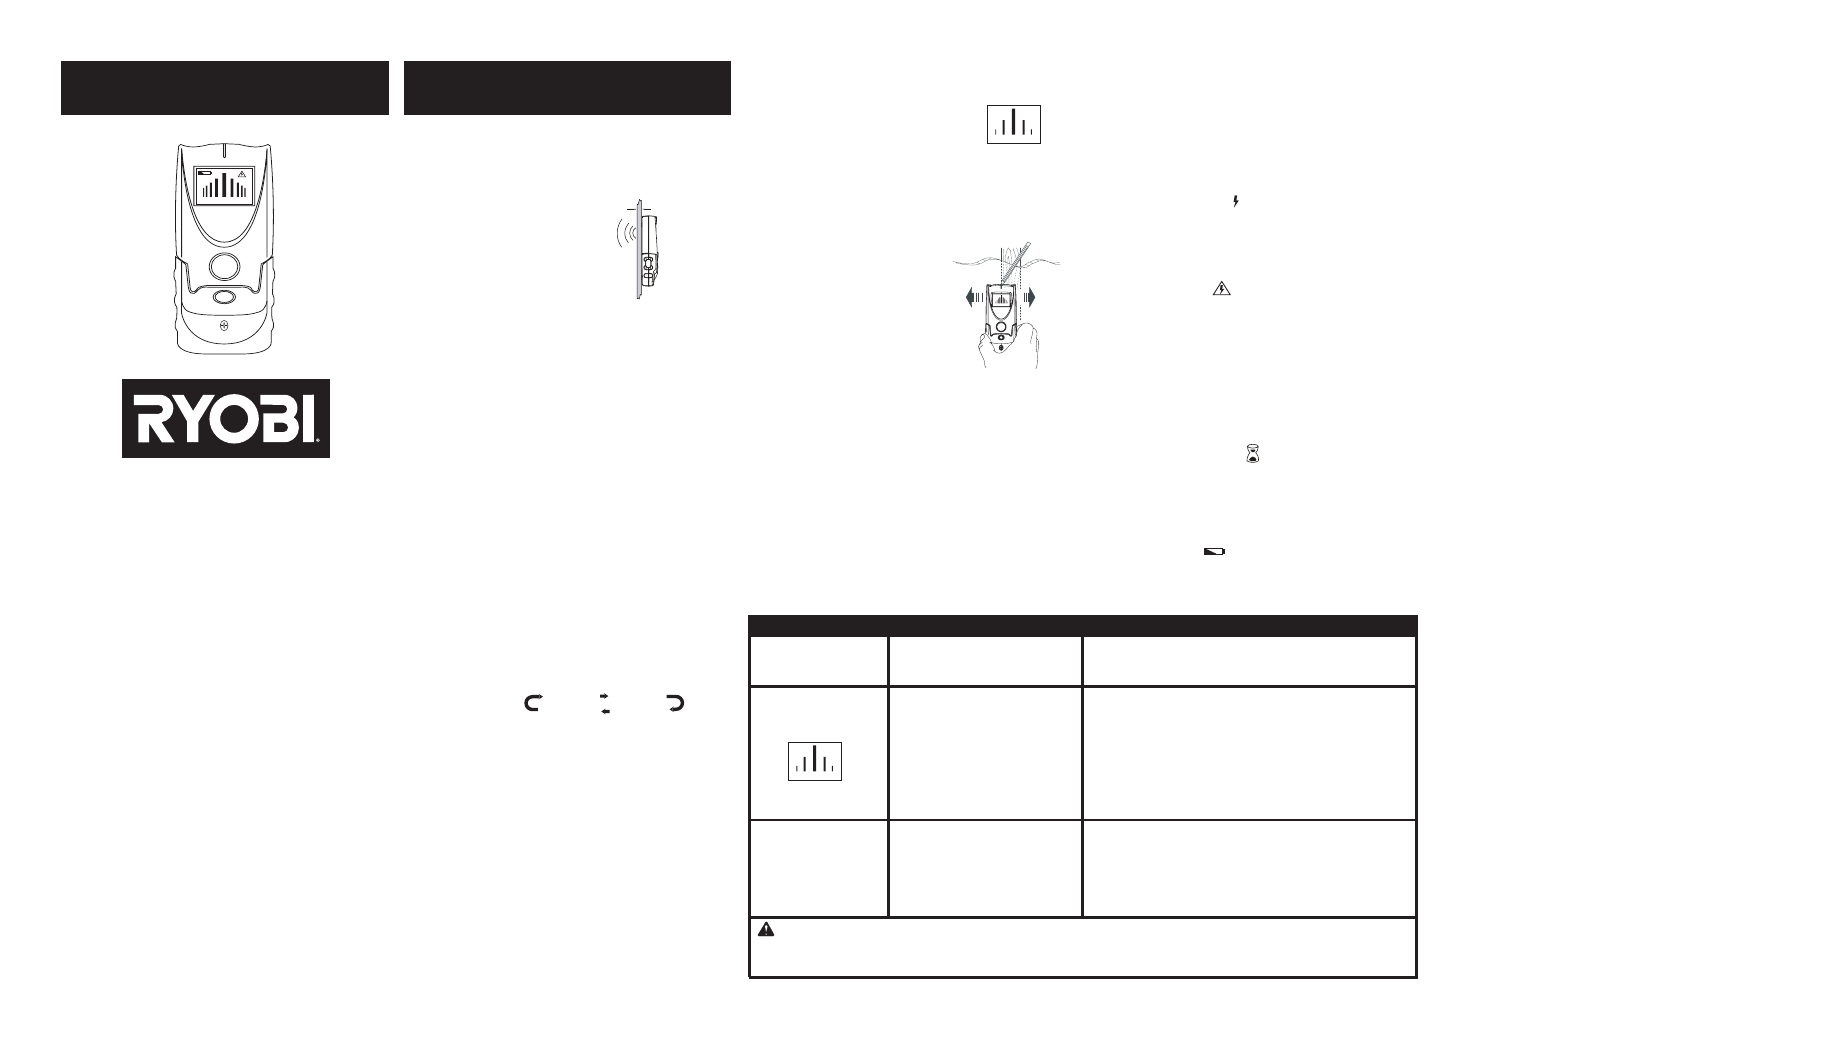
Ryobi ESTP004 User Manual
Estp004 studtech pro, Situations possible causes solutions, Warranty
Wood Stud Deep Stud
Metal Stud
Deep Metal
Zebra (LCD)
WOOD
The Ryobi Electronic
StudTech Pro™ locates wood
and metal studs, metal rebar and hot unshielded AC
wiring in walls. It features a large LCD for easy read, a
high impact case for durability, and a soft touch rubber
grip. Use
StudTech Pro™ to detect wood or metal
studs up to
1-1/2” (38mm) deep. For metal rebar in concrete,
StudTech Pro™ can detect up to 2” (51mm) deep.
• Toggle switch to select detection of wood/metal
studs (drywall depth up to 3/4”), deep wood/metal
studs (drywall depth up to 1-1/2”), and metal rebar.
• LCD bar graph readout
(not for Deep metal mode)
• Soft rubber grip
• High impact housing
• Auto power off after 2 minutes
when left unattended
• Low battery indicator
• 9 Volt battery included
• Toggle “mode” switch to “metal” to detect metal studs
up to 3/4” behind drywall.
• Toggle to “wood” mode to detect wood studs up to
3/4” behind drywall and metal studs up to 1” behind
drywall.
• Toggle to “deep” mode to detect wood and metal
studs up to 1-1/2” behind drywall.
• Toggle to “deep metal” to detect metal rebar up to 2”
deep in concrete.
Situations
Possible Causes
Solutions
• Choose desired detection mode by cycling the
various modes with the “MODE” button on the front
face of unit.
No indications.
LCD shows “Zebra”
Indications in too
many places.
• No studs in that area.
• You have accidentally
calibrated over a stud.
Over-the-stud calibration
error.
• Scan began on dense part
of wall or over stud.
• Unit not flat against wall.
• Unit was rocked or lifted
during scan.
• Detect other objects
besides studs.
• Electrical wiring and metal/
plastic pipes may be near
or touching back surface of wall
ESTP004
StudTech Pro™
SELECT MODE
• Move several inches to the left or right and start
again.
•
Select “Deep” stud and start again.
• Release On/Off button, move over a few inches,
press On/Off button, and start again.
• On rough surfaces, place piece of cardboard on
wall, scanning through it to help slide unit more
smoothly.
• Always hold
StudTech Pro™ parallel to stud or joist
and move across it.
• Because studs are normally spaced 16 in. (406mm)
or 24 in. (610mm) apart and are 1-1/2 in. (38mm)
wide, beware of anything closer together or of a
different width.
• All modes except Deep Metal have sequential level
indicators ( bar graph) on the LCD.
• After calibration has finished,
slowly slide unit across wall
right or left. As you begin to
approach a stud, the
sequential levels on the LCD
will increase, and peak at the
stud edge for Wood Stud and Deep
Stud modes, and for Metal Stud mode. Mark this
spot to indicate stud edge.
• Continue scanning beyond the marked spot until
the peak level disappears then slide unit in reverse
direction to locate the other edge of stud. Mark this
second spot. Center of stud is the middle between
the two marks.
MODE
DEEP WOOD METAL
AC
9 volt
FEATURES
INSTALLING THE BATTERY
• Open battery door at the back of unit.
• Attach a 9 Volt battery to the connector.
• Put the battery into the compartment.
• Close battery compartment door.
This product is a consumable item. Therefore it is
warranted against defective parts and labor only and
not misuse or deterioration of the product through
normal wear and tear for a period of 2 years from
date of purchase.
WARRANTY
983000-344
8-03
SPECIFICATIONS
POWER ON
• Press and release the “ON/OFF” button to power on
the unit.
Reminders:
Wood Stud Mode - detect wood studs in drywall of
3/4” deep and detects in drywall meteal studs up to
1” deep.
Deep Stud Mode - detect wood and metal studs in
drywall of 1-1/2” deep.
Metal Stud Mode - detect metal studs in drywall of
3/4” deep.
Deep Metal Mode - detect metal rebar within 2”
• When the unit powers on or the detection mode
is changed, the unit needs an initial calibration
before use for about 2 seconds. Hold the unit in still
position flat against the testing surface until the bar
graph on LCD disappears, and a beep sound is
heard, indicating successful calibration.
CALIBRATION
i.
The user is required not to move the unit during
calibration.
ii. If the calibration fails, the LCD will
display the error “Zebra” display.
The unit may be over a
stud. The user should power off and re-calibrate the
unit by powering it on again several inches left or
right from the previous location.
Reminders:
Wood Stud Deep Stud
Metal Stud
Deep Metal
Zebra (LCD)
WOOD
Wood Stud Deep Stud
Metal Stud
Deep Metal
Zebra (LCD)
WOOD
SCANNING
i.
Deep Metal mode does not have any intermediate
levels, and will turn on all level segments
simultaneously when metal is detected.
Reminders:
ii. If no stud was found, the unit may have been
placed over a stud or the drywall is too thick. The
user should re-calibrate the unit by powering it on
again several inches left or right from the previous
location, or use Deep Stud mode for scanning studs
behind drywalls.
• Press the AC button “ “ to toggle the AC detection
ON and OFF. The “AC” symbol will be displayed to
indicate that AC detection is now active.
• Sweep the unit against the wall, when hot
unshielded AC wiring presence is detected, the
“lightning” symbol
Wood Stud Deep Stud
Metal Stud
Deep Metal
Zebra (LCD)
WOOD
will be displayed and a high
pitch sound will be generated.
AC DETECTION
• Press and release the ON/OFF button to power off the unit.
POWER OFF
i.
The unit will power off after being left unattended for
2 minutes. The built-in timer for the auto-off function
is reset when the mode button is pressed or the
peak indicator of the bar graph is turned on.
ii. The hourglass symbol “ “ will flash for 30 seconds
before power off.
iii.The unit will retain the status of selected mode and
AC function after power off.
Reminders:
• When the battery is close to empty, the LOW
BATTERY icon “ “ will begin to flash.
LOW BATTERY DETECTION:
i.
Remove the battery to prevent deterioration if the
unit is to be stored for an extended period of time.
Reminders:
Wood Stud Deep Stud
Metal Stud
Deep Metal
Zebra (LCD)
WOOD
Wood Stud Deep Stud
Metal Stud
Deep Metal
Zebra (LCD)
WOOD
Wood Stud Deep Stud
Metal Stud
Deep Metal
Zebra (LCD)
WOOD
up to 1-1/2”
WARNING: To avoid risk of electric shock, ALWAYS turn power off when working near electric wires. Avoid
nailing, cutting or drilling in walls where electrical or plumbing may be present. Do not permit children to use this
device. It is not a toy.
Depending on proximity of electrical wiring or pipes to
the wall surface, the
StudTech Pro™ may detect them
in the same manner as wood or metal studs. Caution
should always be used when nailing, cutting or drilling
in walls, floors and ceiling that may contain these
items. To avoid electrical, plumbing, etc. remember
that studs or joist are normally spaced 16” (406mm)
or 24” (610mm) apart and are 1-1/2” (38mm) in width.
Anything closer together or a different width may not
be a stud, joist or rebar. Always turn off the power
when working near electrical wires.
OPERATING NOTES
RYOBI TECHNOLOGIES INC.
1428 Pearman Dairy Road
Anderson, SC 29625
www.ryobitools.com
Telephone: 1-800-525-2579
ESTP004
StudTech Pro™