Curb mount – TAMKO Curb Mount User Manual
Page 3
CURB MOUNT
TAMKO SOLAR ATTIC VENT
MODELS 31001281 • 31001282
3
Central District
220 West 4th St., Joplin, MO 64801
800-641-4691
Northeast District
4500 Tamko Dr., Frederick, MD 21701
800-368-2055
Southeast District
2300 35th St., Tuscaloosa, AL 35401
800-228-2656
Southwest District
7910 S. Central Exp., Dallas, TX 75216
800-443-1834
Western District
5300 East 43rd Ave., Denver, CO 80216
800-530-8868
Visit Our Web Site at
tamko.com
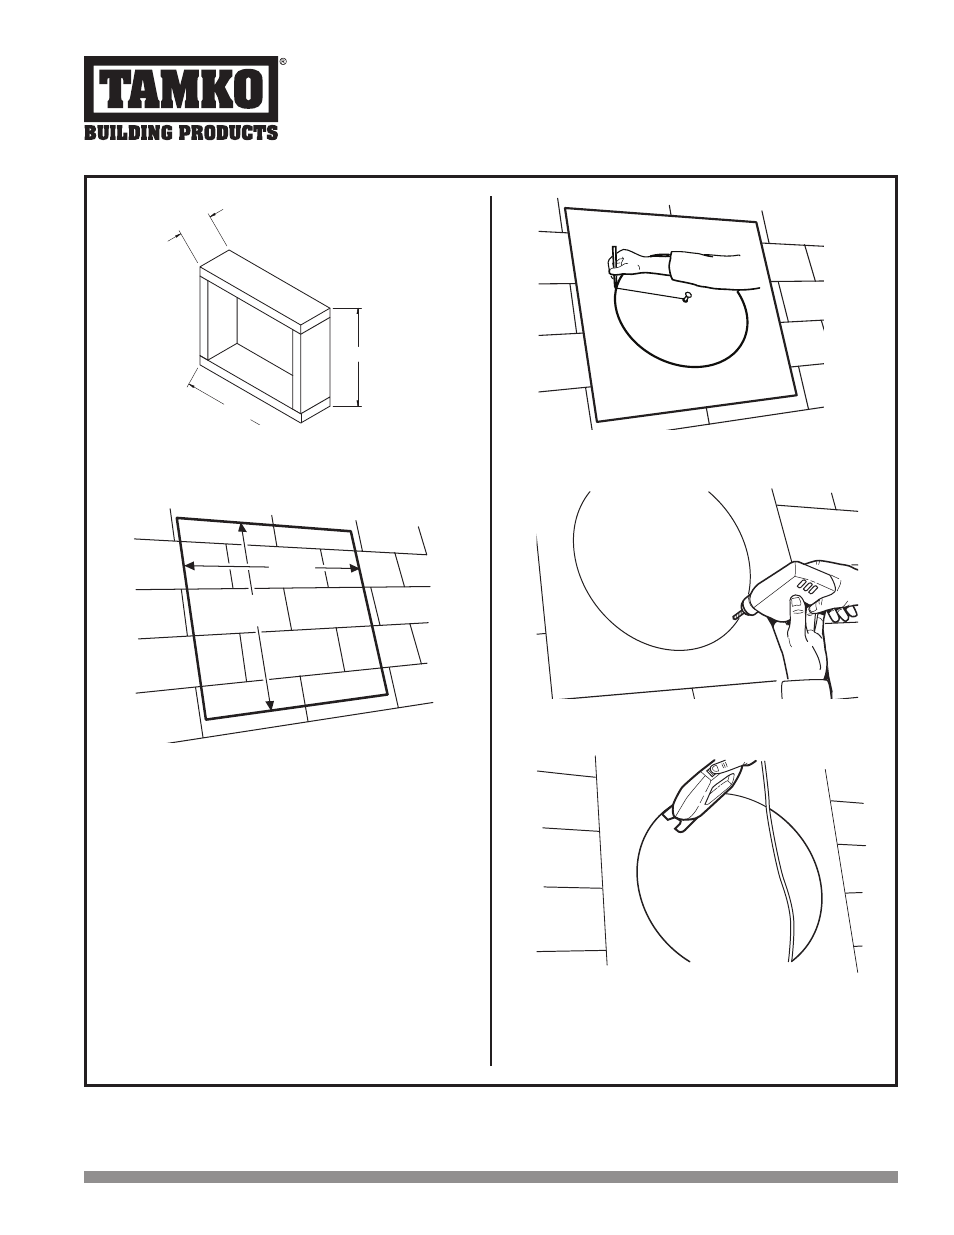
19-1/4"
2" MIN.
16-1/8"
6. Taking into consideration the thickness of your chosen
flashing material, build a 19-1/4” x 16-1/8” (outside
dimensions) curb out of 2” x 4” or 2” x 6” material.
20”
17”
7. Working from the outside of your roof, use the guide hole as
a center point, cut and remove roofing material in a 20” x 17”
minimum area.
8. Use the guide hole as a center point, use a nail and string to
scribe a 14” diameter circle on the underlayment or roof decking.
9. Drill a large starting hole for the sabre saw just inside of the
line or the 14" circle.
.
10. Cut out the roof board(s) inside of the line.
(CONTINUED from page 2)
(Continued)