User operation guide – ABtUS AV508-WP1 User Manual
Page 2
*Specifi cations are subject to changes without notice.
User Operation Guide
COMPONENT
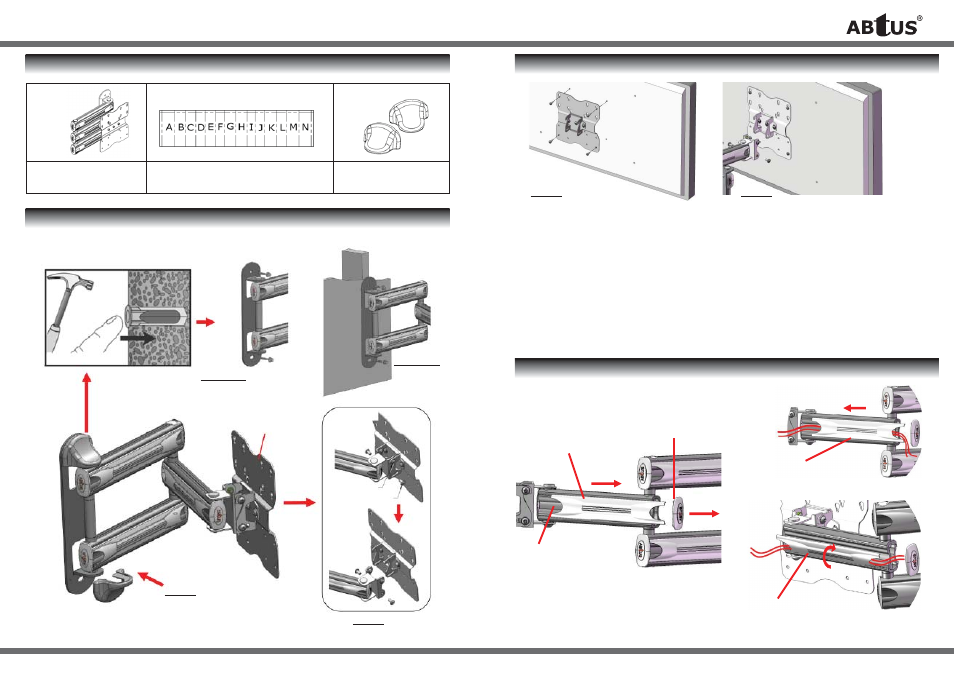
MOUNTING
INSTALLATION
CABLE MANAGEMENT
Item 1
AV508-WP1 - 1pc
Item 2
Screw bag - 1 set
Item 3 -
3 Covers - 2 pcs
Step -1 (a)
Step-1(a) – Concrete Wall mounting – drill holes
and insert the Wall Anchors into the concrete wall.
Fix the Mount onto the wall with the Lag Bolts and
Washers provided.
Step-1(b) – Wood Stud mounting – use Stud
fi nder to locate the stud. Fix the Mount on the wall
with the Lag Bolts and Washers provided.
*Caution: Do not use Wall Anchors when
mounting onto Wood Stud !!
Step-2 – cover with Cover provided (Item-3)
Step -2
Front VESA plate
assembly
Push in
Hammer
Gently
Step -1 (b)
Step -3
screw A (x2)
screw B (x2)
Step -4
Step -5
OR cover from the front,
press cover until you hear a
“Click!” sound
3.4 Slide cover back
into arm after cables routed
3.2 Slide covers out
from the arms
3.1 Remove End Cap
3.3 Run cables
Step-3 – remove the Front VESA plate assembly
from the Mount. (Note: loosen and left screw-A
on the bracket, remove screw-B)
Step-4 – fi x the Front VESA plate assembly on
the Plasma.
Step-5 - Lift and lower the Plasma with the Front
VESA plate assembly onto the
Front arm of the mount. Tighten screw-A and B.