Rear panel – Alto Professional Live 2404 User Manual
Page 9
9
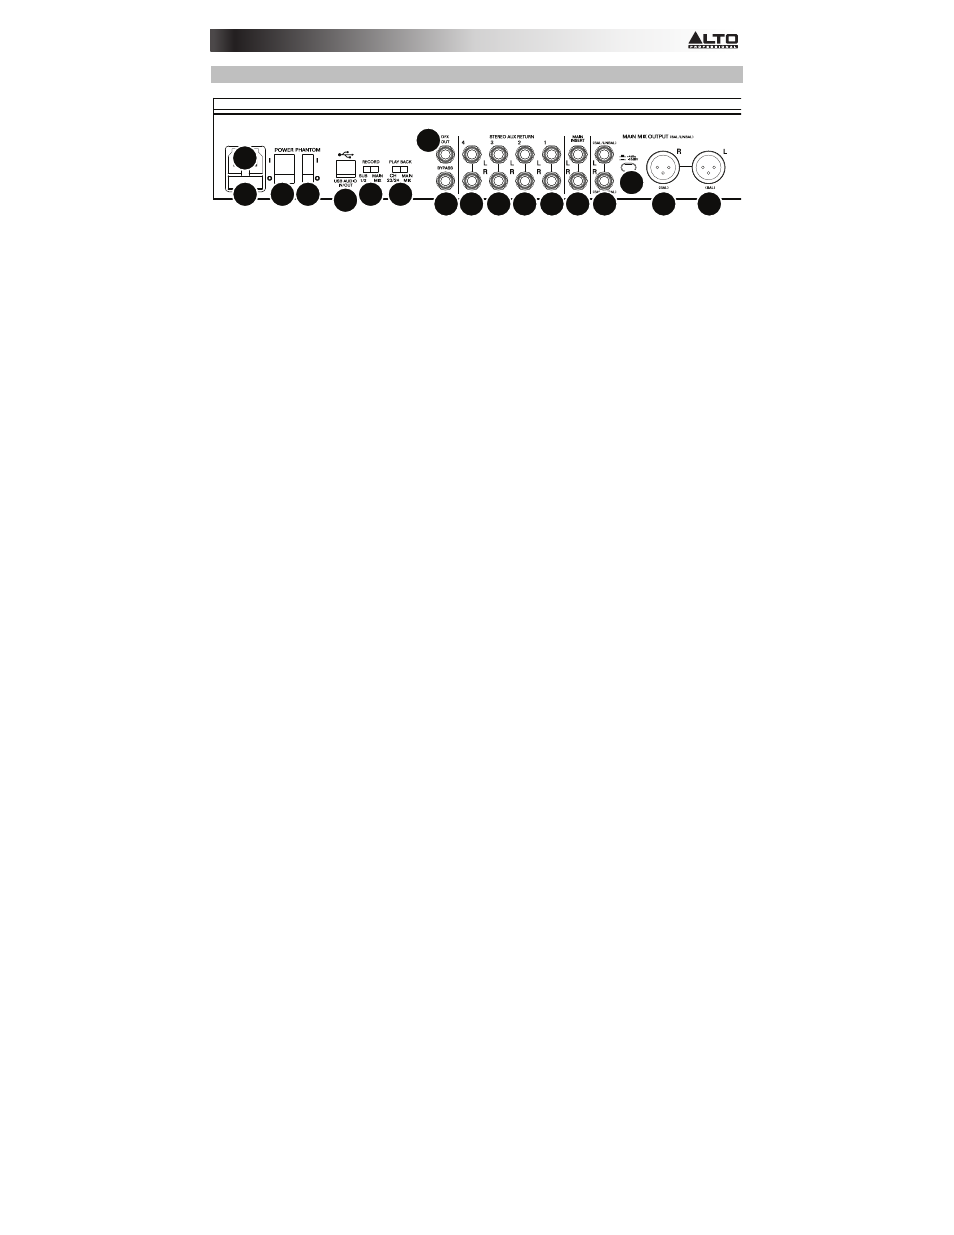
Rear Panel
1
2 3 4 8 9
10
11
12 13 13 13 13
5
6
5
7
5
1.
Power In: Use the included power cable to connect the mixer to a power outlet. While
the power is switched off, connect the power cable into the mixer first, then connect the
power cable to a power outlet.
2.
Fuse Cover: If the fuse is broken, use a screwdriver or other tool to lift this tab, and
replace the fuse with a fuse with the same rating (printed just above the Power In). Using
a fuse with an incorrect rating can damage the unit and/or fuse.
3.
Power Switch: Powers the mixer on and off. Turn on the mixer only after connecting all
of your input devices but before turning on your amplifiers. Turn off amplifiers before you
turn off the mixer.
4.
Phantom Power: Activates/deactivates phantom power. When activated, phantom
power supplies +48V to the XLR mic inputs. Please note that most dynamic microphones
do not require phantom power, while most condenser microphones do. Consult your
microphone's documentation to find out whether it needs phantom power.
5.
Main Mix Outputs: Use standard XLR or 1/4" TRS cables to connect either pair of these
outputs to your loudspeakers or amplifier system. Use the Main Fader to control the level
of these outputs.
6.
Main Mix Pad: When this button is depressed, the signal sent to the Main Mix Outputs is
reduced by 10 dB. When raised, the signal is increased by 4 dB. Set this switch
depending on the nominal operating level of your equipment; professional-grade
equipment works at a nominal +4 dBu while consumer-grade equipment works at a
nominal -10 dBV.
7.
Main Mix Insert: Use a standard 1/4" TRS Y-cable to connect an external processor
(such as a compressor, limiter, external EQ unit, etc.) to this jack. The signal will be taken
after the Graphic Equalizer and returned before the Main Fader. The tip of the TRS
connection is the send, and the ring zis the return.
8.
USB Port: Use a standard USB cable to connect this USB port to a computer. The mixer
can send or receive audio to or from your computer through this connection.
• When sending audio, the Main Mix or Subgroups 1 and 2 will be sent from the mixer
to your computer, depending on the position of the Record switch.
• When receiving audio, it will be sent from your computer to Channels 23/24 or Main
Mix, depending on the position of the Play Back switch.
9.
Record: This switch determines what audio is sent to the computer from the mixer's USB
Port: Subgroups 1 and 2 (Sub 1/2) or the Main Mix.
10.
Play Back: This switch determines where the audio sent from the computer (to the
mixer's USB Port) will be routed when it returns to the mixer: Channels 23/24 (Ch 23/24)
or the Main Mix.
11.
DFX Out: Use a standard 1/4" TRS cable to connect this output to an amplifier system.
The signal from the mixer's effects processor will be sent to this output.
12.
Bypass: Connect an optional standard 1/4" TS footswitch (sold separately) to this input.
You can use the footswitch to activate or deactivate the mixer's effects processor.
13.
Stereo Aux Return: Connect the outputs of an external device to these inputs with 1/4"
mono cables. If your source is mono, plug it into the left jack and it will be heard on both
the left and right sides.