Walltalkers colonial trim & tray User Manual
Walltalkers For Home
colonial wood trim & tray installation instructions
w
www.walltalkers.com
1. Examine goods to assure quantity and quality are as ordered.
Lay out all the work to be completed along the base of the wall.
The parts will include those supplied by walltalkers and those the
installer must supply. Walltalkers supplies the wood trim (with
wood insert) and tray in the quantities ordered. The installer must
supply the mounting hardware, wood filler, and touch-up finish.
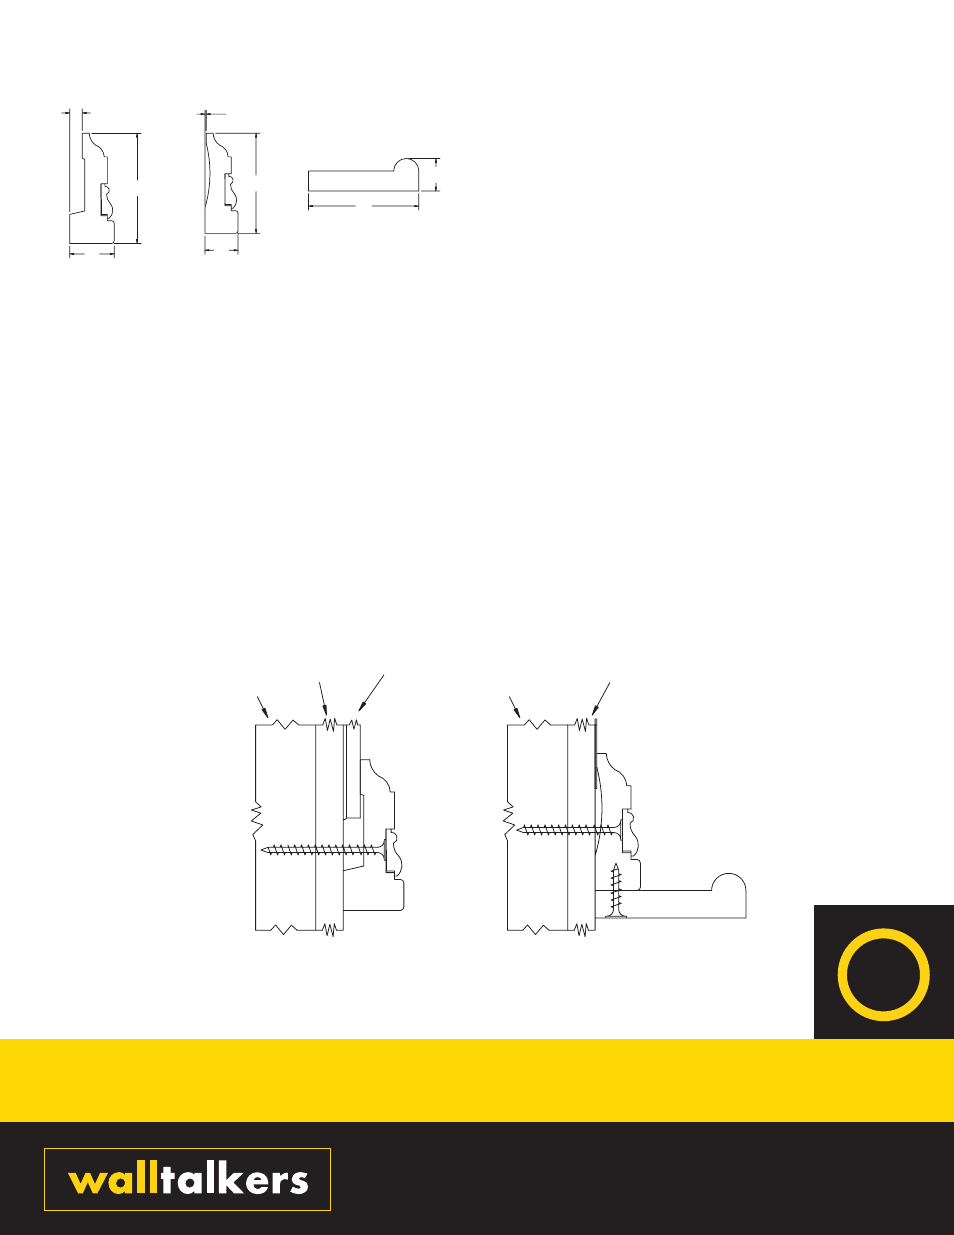
All trim should be installed with condition appropriate hardware
16" on center, slightly offset from the trim hardware locations, as
show below on the right.
2. Install the walltalkers or tac•wall material prior to the trim
and/or tray. Overlap the edges of the dry erase or tackable
material with the trim. Overlapping will ensure a good
appearance for the finished product.
3. Measure, mark, and cut the wood trim pieces to size. The interior
dimension of the finished trim pieces should be 1" to 1-1/2" shorter
than the perimeter measurement of the dry erase or tackable
surface. See the reverse side of this page for an illustration. Use a
miter saw to cut the corners at 45° angles, similar to a picture frame.
For best results, cut the wood trim and wood insert simultaneously
(double-sided tape may be used to securely hold the insert in place).
A low profile hook and loop fastening system may be used to hold
the insert in place for this operation, and to secure the insert in place
on the wall to finish the trim system. Assure the finished trim pieces
are square prior to gluing and mechanically fastening to the wall.
Remove the wood insert to install the trim.
4. For walls with wood backing or studs, begin installing the trim pieces
with #10 X 2" flat head wood or sheet metal screws, 2-1/2" for
tac•wall version. Mark holes at each stud or 16" on center with
solid wood backing, centered in the channel as shown above. The
vertical wood pieces of trim may require the use of drywall anchors
to securely fasten the wood to the wall. Predrill, using a 1/8" bit,
through the trim at every mark. Use a countersink bit to make a
slight indentation at each screw hole. Begin installing the trim with
the recommended screws. For the bottom trim piece, screws must
make a solid contact with the wall studding or wood backing to
properly support the marker tray. For installations on cement,
block, or other substrate, use condition appropriate hardware
(i.e. masonry anchors, self-tapping screws, etc.).
a division of Koroseal Interior Products, LLC
Colonial
tac•wall
Trim
Colonial
walltalkers
Trim
5/16"
1/16"
2-3/4"
1-1/8"
2-1/2"
13/16"
2-3/4"
13/16"
Colonial Tray
Note: Follow the same instructions for walltalkers
®
or
tac•wall
®
t
tac•wall
Stud
Drywall
Stud
Drywall