Rigging, 4 attaching the rigging frame – Adamson S-Series User Manual
Page 21
Page 21
Fig. 1
Fig. 2
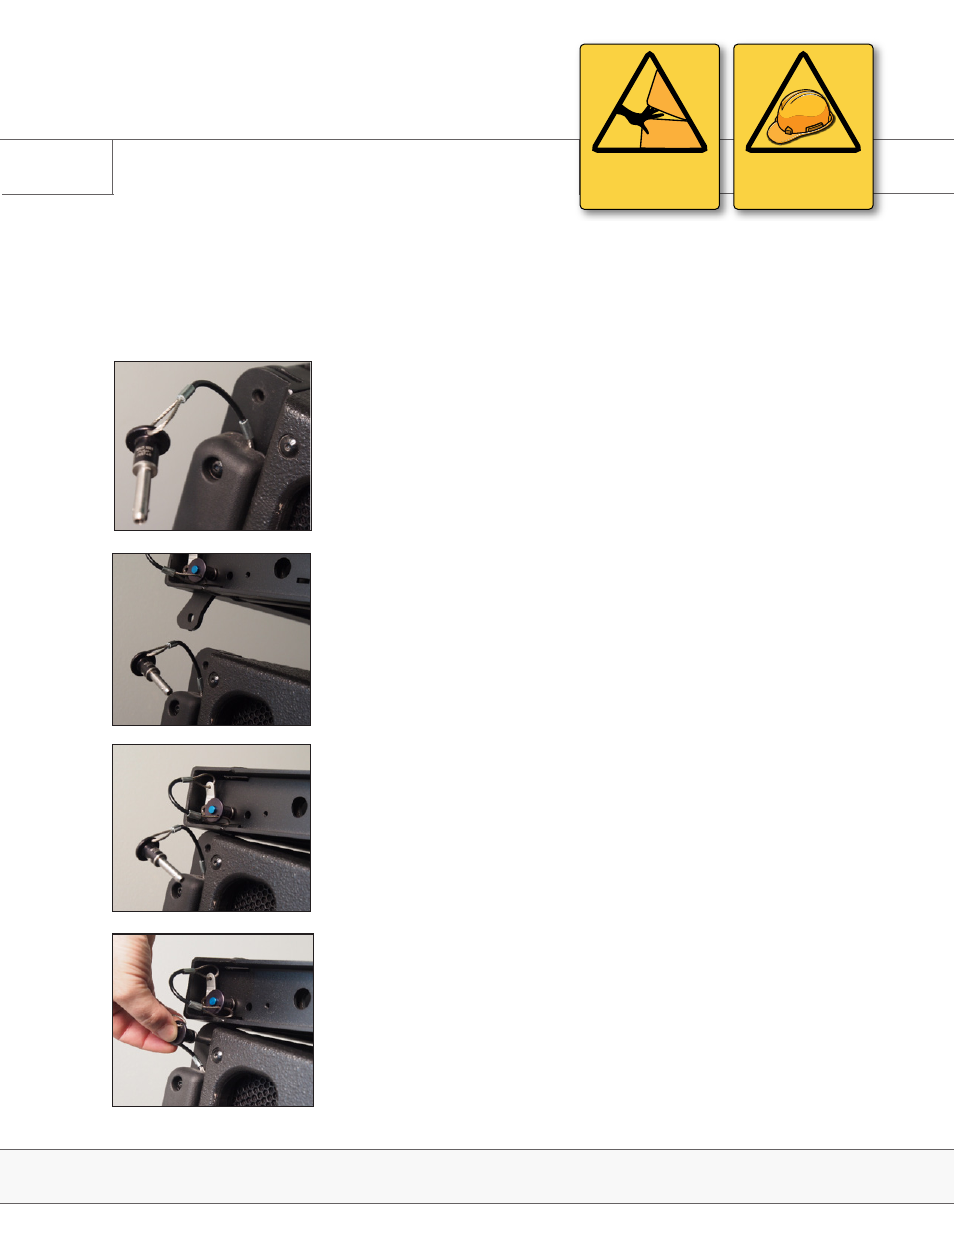
2. Release the front link pins from the S-Series Support Frame. Keep
the links in place by placing the pin in the hole shown. Position the
frame over the top enclosure of the array. (Fig. 2)
3. Lower the front links into the rigging channels of the top enclosure
of the array. (Fig. 3)
Fig. 3
4. Secure the front links to the enclosure using the top front link
pins. (Fig. 4)
Fig. 4
3.4 Attaching the Rigging Frame
1. Remove the top front link pins from the top enclosure in the array.
(Fig. 1)
The S-Series Support Frame contains 4 link points, all of which need to be attached to the top enclosure in your
array. The system ideally uses 2 motors: one in front, one in back of the frame for easy adjustment once the array
has been flown. For flying from a single point, you’ll need to firmly decide the angle of the frame prior to rigging all
the cabinets.
Rigging
S-Series | Rigging
PINCH POINT
CAN CAUSE SEVERE
PERSONAL INJURY
WARNING
SAFETY RISK
PAY SPECIAL ATTENTION