ARRIS DCX3510M Quick Start Guide User Manual
Dcx3510-m, Read this first, Important handling and installation instructions
Motorola Mobility, Inc. 101 Tournament Drive, Horsham, Pennsylvania 19044 U.S.A.
www.motorola.com
MOTOROLA and the Stylized M Logo are registered in the US Patent and Trademark Office. Dolby and the double-D symbol are
registered trademarks of Dolby Laboratories. HDMI, the HDMI Logo and High-Definition Multimedia Interface are trademarks or
registered trademarks of HDMI Licensing LLC. All other product or service names are the property of their respective owners.
© Motorola Mobility, Inc. 2011. All rights reserved.
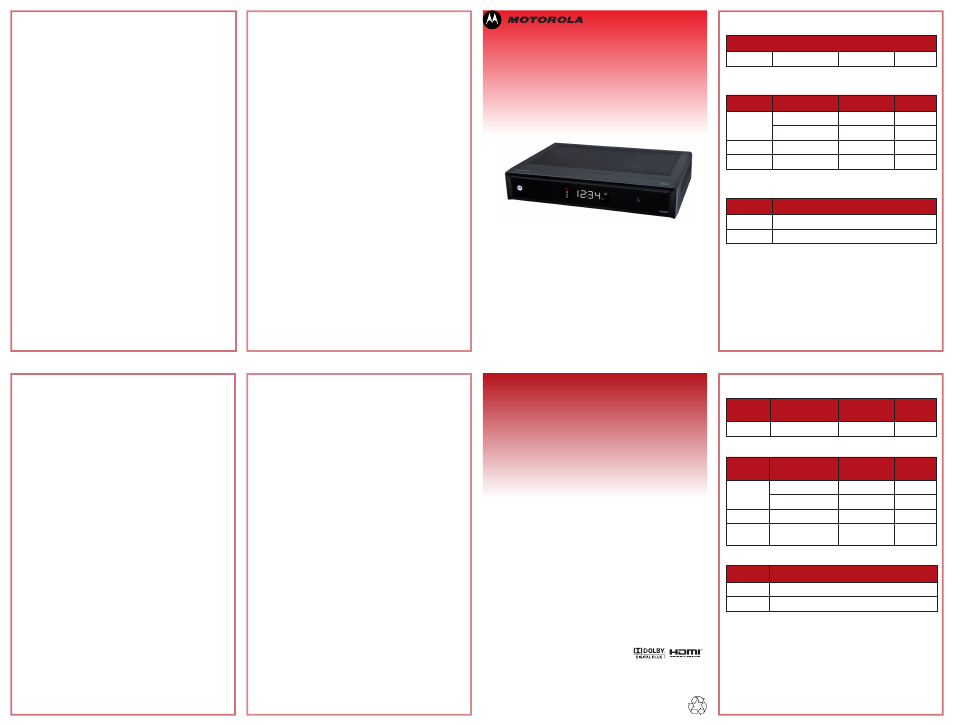
DCX3510-M
Quick Start Guide
Guía rápida de instalación
582851-001-c 06/11
READ THIS FIRST
Connecting your DCX 3510-M
1
Determine which connections will work best with
your A/V equipment.
Depending on the type of television and A/V components you
own, choose the connections that will provide the highest-quality
audio and video. Please refer to your equipment user manuals
and the tables provided in this guide to help you decide.
2
Connect the DCX 3510-M to your cable service.
Connect the coaxial cable from your wall outlet to Cable In on
the back of the DCX 3510-M.
3
Connect the DCX 3510-M to your A/V equipment.
Once you have decided which audio and video connections you
need to make, refer to the illustrations in this guide to connect
the DCX 3510-M to your TV and other A/V components.
4
Turn on the DCX 3510-M.
Plug the DCX 3510-M power cord into the receptacle on the back
of the unit. Plug the other end into a non-switched wall outlet.
The DCX 3510-M will turn on automatically.
5
Enjoy your new services!
Important: If your TV screen is blank or you have no sound, you may
have mixed a video or audio connection. After plugging the video or
audio cable into a connector on the DCX 3510-M, be sure to plug the
other end of the cable into the corresponding connector on your TV or
other A/V component.
Important handling and installation
instructions
• Transport the cable terminal in its shipping box or an equally padded
container.
• Install the terminal away from heat sources such as radiators, heat
registers, and stoves. The air surrounding the terminal should not
exceed 40 ºC (104 ºF).
• Do not place the terminal in an enclosed area where the cooling vents
are blocked or impede the flow of air through the ventilation openings.
• Position the unit with at least 2 inches of space on all sides.
• Place the terminal on a flat surface not prone to vibration or impact.
• Do not install the terminal in an area where condensation occurs.
• To prevent the temporary loss of guide data and cause a temporarily
non-responding terminal, do not plug the AC power cord into a
switched power outlet.
• To avoid shock and vibration damage to the internal hard drive, do not
move the terminal while it is plugged in.
• To allow the hard drive to spin down and park its heads, wait at least 10
seconds after disconnecting power before moving the terminal.
Additional information for adjusting user
settings
The DCX 3510-M User Settings menu allows you to adjust the video, audio, and
closed captioning configuration of the set-top.
The User Settings menu can be accessed with your remote control by powering
off the DCX 3510-M set-top and then pressing the Menu key on the remote
control within 2 seconds.
F
or more detailed instructions on changing the set-top configuration through the
User Settings menu, please refer to the DCX 3510-M User Guide available online
at
http://motorola.com/homevideo/support.
LEA ESTA INFORMACIÓN EN PRIMER
LUGAR
Cómo conectar el DCX 3510-M
1 Determine qué conexiones funcionarán mejor con
su equipo de A/V.
Elija las conexiones que le proporcionen la máxima calidad de
audio y video según el tipo de televisor y componentes de A/V
que tenga. Consulte los manuales de usuario de su equipo y las
tablas que aparecen en esta guía como ayuda para decidir.
2 Conecte el DCX 3510-M a su servicio de cable.
Conecte el cable coaxial de su toma de pared a la entrada de
cable Cable In que se encuentra al dorso de su DCX 3510-M.
3 Conecte el DCX 3510-M a su equipo de A/V.
Una vez que decida cuáles son las conexiones de audio y video
que necesita hacer, consulte las ilustraciones de esta guía para
conectar el DCX 3510-M a su TV y a otros componentes de A/V.
4 Encienda el DCX 3510-M.
Enchufe el cable de conexión del DCX 3510-M en la fuente
ubicada detrás de la unidad. Enchufe el otro extremo en un
tomacorriente no conmutado. El DCX 3510-M se encenderá
automáticamente.
5 ¡Disfrute de la imagen y el audio!
Importante: Si la pantalla de su televisor está en blanco o no tiene
sonido, es posible que haya conectado al revés una entrada de audio
o video. Luego de enchufar el cable de audio o video a un conector
en el DCX 3510-M, asegúrese de enchufar el otro extremo del cable
en el conector correspondiente de su televisor u otro componente de
A/V.
Standard-definition video connections
Video
Quality
1
TV
Video Input
DCX 3510-M
Video Output
Includes
Audio
Best
Composite Video
Composite Video
No
2
High-definition video connections
Video
Quality
1
TV
Video Input
DCX 3510-M
Video Output
Includes
Audio
Best
HDMI
TM
HDMI
Yes
DVI
HDMI
4
No
2
Better
IEEE-1394
3
IEEE-1394
3
Yes
Good
Component (Y Pb Pr)
Y Pb Pr
No
2
Alternate audio connections
Audio
Quality
1
Audio
Input/Output
Best
Digital Audio Optical S/PDIF
Good
Stereo L/R
1
The best available audio and video connections are indicated by solid lines in the connection
illustrations.
2
See table for alternate audio connections.
3
Does not display on-screen graphics (program guide, closed captioning, etc.).
4
HDMI-to-DVI adapter not included.
Conexiones para video de definición estándar
Calidad
de video
1
Entrada de
video en TV
Salida de video
en DCX 3510-M
La conexión
de video
incluye audio
Óptima
Video compuesto
Video compuesto
No
2
Conexiones para video de alta definición
Video
Quality
1
Entrada de
video en TV
Salida de video
en DCX 3510-M
La conexión
de video
incluye audio
Óptima
HDMI
TM
HDMI
Si
DVI
HDMI
4
No
2
Mejor
IEEE-1394
3
IEEE-1394
3
Si
Buena
Por componentes
(Y Pb Pr)
Y Pb Pr
No
2
Conexiones de audio alternativas
Calidad
de audio
1
Entrada/salida
de audio
Óptima
S/PDIF óptico de audio digital
Buena
Estéreo I/D
1
Las mejores conexiones de audio y video disponibles se indican con líneas enteras en las
ilustraciones de la conexión.
2
Consulte la tabla para ver las conexiones alternativas.
3
No muestra gráficos en-pantalla (guía del programa, subtitulado, etc.).
4
No incluye adaptador HDMI a DVI.
Instrucciones importantes sobre
manejo e instalación
• Traslade la terminal de cable en su caja de envío o dentro de un envase
que cuente con un relleno de protección similar.
• Instale la terminal lejos de fuentes de calor como radiadores,
reguladores de calor y estufas. El aire que rodea la terminal no debe
superar los 40º C (104º F).
• No coloque la terminal en un área cerrada donde los orificios de
refrigeración estén bloqueados u obstruyan el flujo de aire a través de
las aberturas de ventilación.
• Ubique la unidad con al menos 5 cm (2 pulgadas) de espacio en todos
los laterales.
• Coloque la terminal sobre una superficie plana que no tienda a vibrar ni
a sufrir impactos.
• No instale la terminal en un área donde haya condensación.
• No enchufe el cable de alimentación de CA en un tomacorriente con
interruptor. Así, evitará que se produzca una pérdida temporal de
información de la guía de programas y que la terminal no funcione por
unos momentos.
• Para evitar descargas eléctricas y daños por vibración en el disco rígido
interno, no traslade la terminal mientras esté enchufada.
• Antes de trasladar la terminal, permita que el disco rígido baje las
revoluciones y detenga el cabezal esperando al menos 10 segundos
después de desconectar la fuente de alimentación.
Más información para ajustar las opciones
del usuario
El menú User Settings (Opciones del usuario) del DCX 3510-M le permite ajustar
los videos, el audio, y la configuración de subtítulos del decodificador.
Puede obtener acceso al menú de ajustes del usuario con su controlador remoto,
apagando la caja DCX 3510-M y después presionando la tecla Menu en el
controlador remoto dentro de 2 segundos.
Si desea obtener instrucciones más detalladas para cambiar la configuración de
la caja set-top a través del menú User Settings, consulte la Guía del usuario del
DCX 3510-M que se encuentra disponible en línea en
http://motorola.com/homevideo/support.
MOTOROLA y el Logotipo de la M Estilizada están registrados en la Oficina de Patentes y Marcas de los EE.UU.
(US Patent and Trademark Office). Dolby y el símbolo de la doble D son marcas comerciales registradas de Dolby
Laboratories Licensing Corporation. HDMI, el Logotipo HDMI y el Interfaz Multimedia de Alta Definición son marcas o
marcas registradas de HDMI Licensing LLC. Todos los demás nombres de productos o servicios son propiedad de sus
respectivos titulares.
© Motorola Mobility, Inc. 2011. Todos los derechos reservados.
HD Se Doublan El Sintonizador DVR
DCX3510-M
HD Dual Tuner DVR