BDI Float Collection User Manual
Float, Assembly instructions, Collection
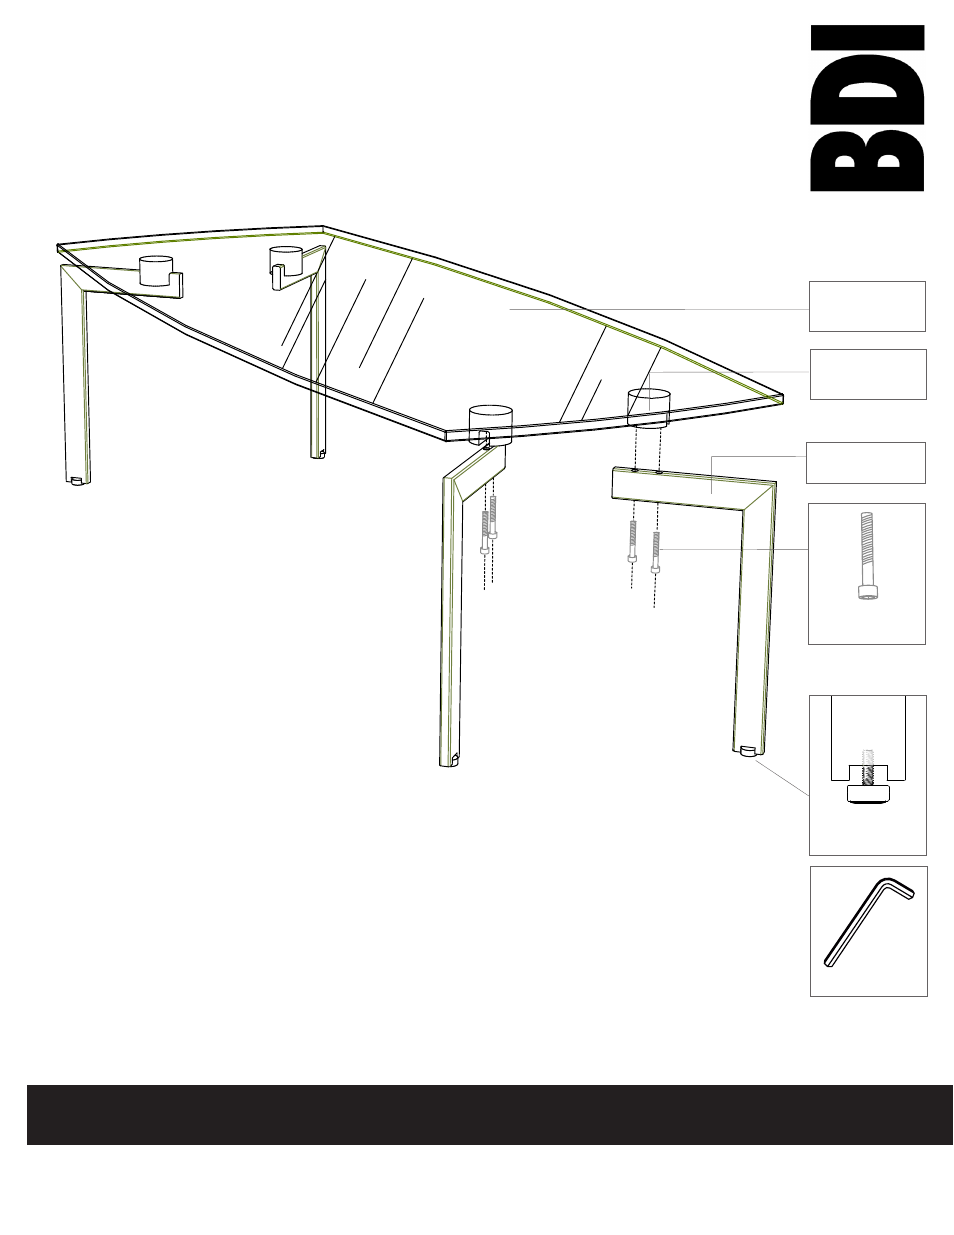
Step 1
Unpack and identify the parts shown. The assembly workspace should be a clean
non-marring surface such as carpet. For missing hardware pieces, please contact BDI
Customer Service at: [email protected] For all other concerns please contact your
local BDI Retailer.
Step 2
Lay Top (A) so that the pre-installed Pucks (B) are facing up.
Step 3
After threading Leverler Glides (E) into Steel Legs (C), attach Steel Legs (C) to Pucks (B)
using Screw (D) and Hex Wrench (F).
Step 4
Adjust the Leveler Glides (E) to level table as needed.
B - Pucks
(pre-installed)
x 3 or 4
A - Top
x 1
Your Float
™
Table is engineered for easy assembly. Carefully follow this procedure to
prevent any damage.
Placement and Maintenance
Float
™
Tables are designed for indoor use on level floors. Clean glass with glass cleaner;
steel parts and wood top with a moist cloth.
NOTE:
This instruction sheet is intended for the entire Float
™
Table collection; model
2601G is shown for illustration.
Designed by Al Glass.
‘Float’ is a trademark of Becker Designed, Inc. All rights reserved.
©2008 Becker Designed, Inc.
Float
TM
Collection
Assembly Instructions
E- Leveler Glides
x 3 or 4
C - Steel Leg
x 3 or 4
F - Hex Wrench x 1
www.bdiusa.com
3/2008
D - Screw
x 6 or 8