Besafe X3-GB User Manual
Page 5
8
9
!
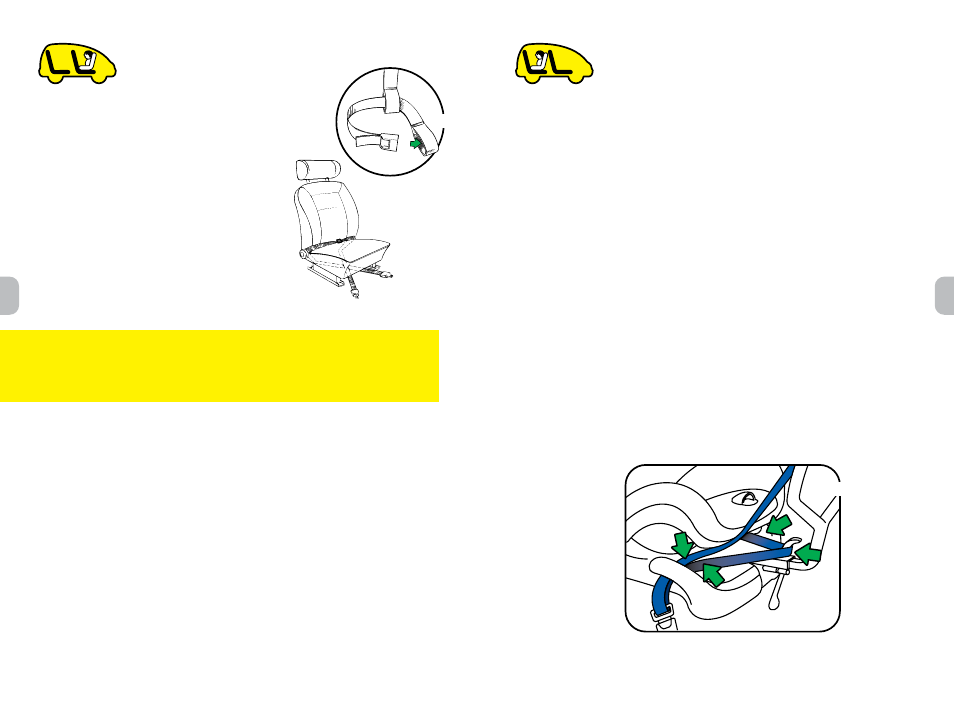
Position the 3 point car belt. Place the hip belt over the base of
the seat behind the belt guiding horns on each side (see green
arrows 1 and 2 in fig. 9). Fasten the car belt, click.
Pull the hip belt forwards and over the belt guiding hook on the
seat base (see green arrow 3 in fig. 9).
4
1
2
3
12-
13-
(9)
With the anchor belts in place the installation can continue:
Place the seat sideways into the car with the front brace
towards you.
Push the floor support down to the floor. The floor support
must go through the belt loop and the belt loop must be led
into the hook on the floor support.
Turn the seat into the right position (with the front brace
against the back rest).
Adjust the floor support so it is in contact with the floor of
the vehicle.
To enlarge the space for the legs of the child, you can move
the front brace outwards with the ratchet. Keep this space
as small as possible.
7-
8-
9-
10-
11-
Rearward-facing in the back seat:
installation
Join the 2 anchor belts together to
make a single belt. Put the lock of
belt 1 through the loop of the belt 2
and then through the loop of belt 1.
Pull it firmly (7).
Put the middle part of the anchor
belt over the inner part of the
vehicle seat. Cross the two ends
of the anchor belt under the front
seat of the vehicle and bring them
upwards to the seat (8).
Fourth alternative: using the front seat
• To continue with rearward-facing installation in the back seat,
go to page 9.
• To continue with rearward-facing installation in the front seat,
go to page 12.
(7)
(8)
a-
b-
Pull the shoulder/diagonal belt round the belt guiding horn
on the side of the base (see green arrow 4 in fig. 9). Tension
the shoulder belt.
14-