Beurer KS 52 User Manual
Page 6
6
2.1 Starting up
Batteries
Batteries (2 x AA 1.5 V) are necessary to operate the scale. Insert
them into the battery compartment in the front of the scale before
operation. Make sure they are correctly inserted. The scale must be
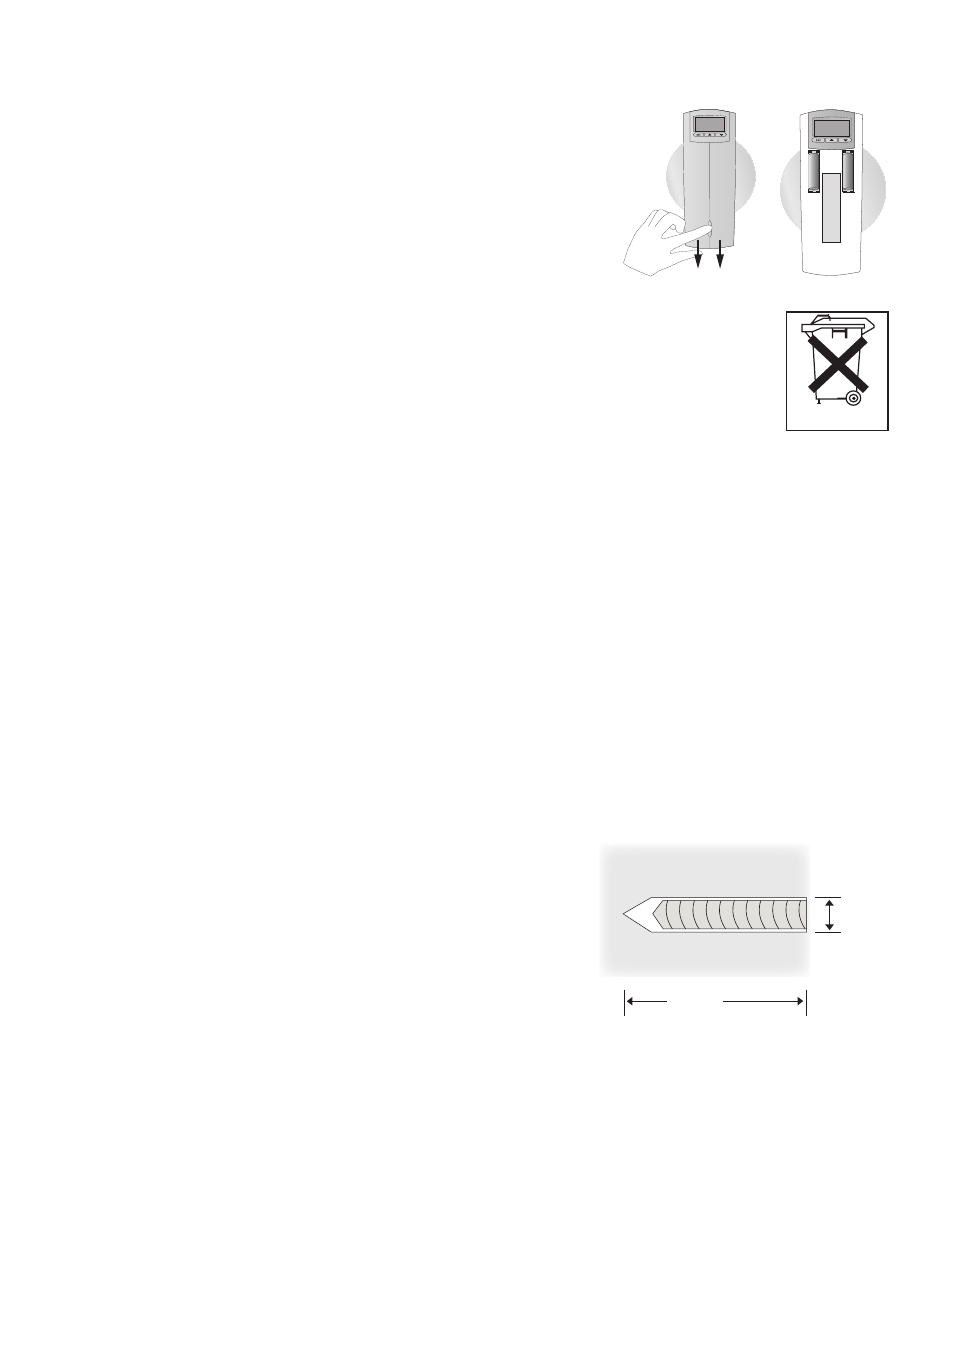
folded together to replace the batteries. Press the button on the front
and pull the battery compartment down to open it (Fig. 1). Insert the
battery correctly (Fig. 2) and close the battery compartment cover by
pushing upwards. If the display shows “Lo” or the battery symbol,
it is time to replace the battery.
Spent batteries and rechargeable batteries do not constitute normal household waste!
They are considered to be toxic waste and, as such, should be disposed of in special
containers, toxic waste collection points or brought to electrical goods dealers.
Note: Batteries containing pollutant substances are marked as follows:
Pb = Battery contains lead, Cd = Battery contains cadmium, Hg = Battery contains
mercury.
Setting the time
The scale must be in standby mode (time displayed) to set the time. Press the “Set” button (3 seconds).
The hours start flashing. Set the hours with the “
į
” and
Ĭ
” keys and press “Set” to confirm. Then
the minutes start flashing. Set the minutes with the “
į
” and “
Ĭ
” keys. Press “Set” to confirm and to
exit the time setting procedure.
Note: The time display depends on the specified weight unit. If you have selected g or ml, the time will
be displayed in 24-hour mode. If you have selected lb or fl.oz, the time will be displayed in 12-hour
mode with am and pm.
Wall mounting
The wall-mounted kitchen scale must be fastened to a solid wall with the included plastic wall-mount.
Make sure that there are no pipes or electric wires behind the wall before you start drilling and the
wall-mount is secured strongly enough for the wall-mounted kitchen scale. Make sure that there is
enough room at the selected spot for folding down the scale for weighing. Mark the 4 drill holes with
the wall-mount. Use a spirit level.
Drill the holes at least 40 mm deep, insert the wall plugs and
screw the wall-mount firmly to the wall – the hooks must point
upwards. You can also use different screws for different wall
materials (e.g. wood, plaster).
Place the wall-mounted kitchen scale on the hooks and press it
firmly into the retainer to click it into place.
You can remove the wall-mounted kitchen scale at any time by
lifting it up out of the wall-mount.
2.2 Weighing
Fold the scale glass plate down for weighing. Press the “ON/TARA” button in order to switch on the
scale. 8888 appears briefly. As soon as 0 g appears, the scale is ready for measuring. The weight is
displayed in 1 g graduations. If you wish to use different units, press the “Unit” key. Every time the key
is pressed, the unit switches from grams (g), pounds and ounces (lb/oz) and fluid ounces (fl.oz).
Weighing without a bowl
Place the item to be weighed directly on the scale. The weight thereof is displayed immediately.
Pb Cd Hg
6 mm
40 mm
+
+
–
–
Fig. 1
Fig. 2