Faucet and drain connections (not supplied) – Blu Bathworks SA3006 User Manual
Page 4
3
1 866 907 0122 blubathworks.com
2013-07
®
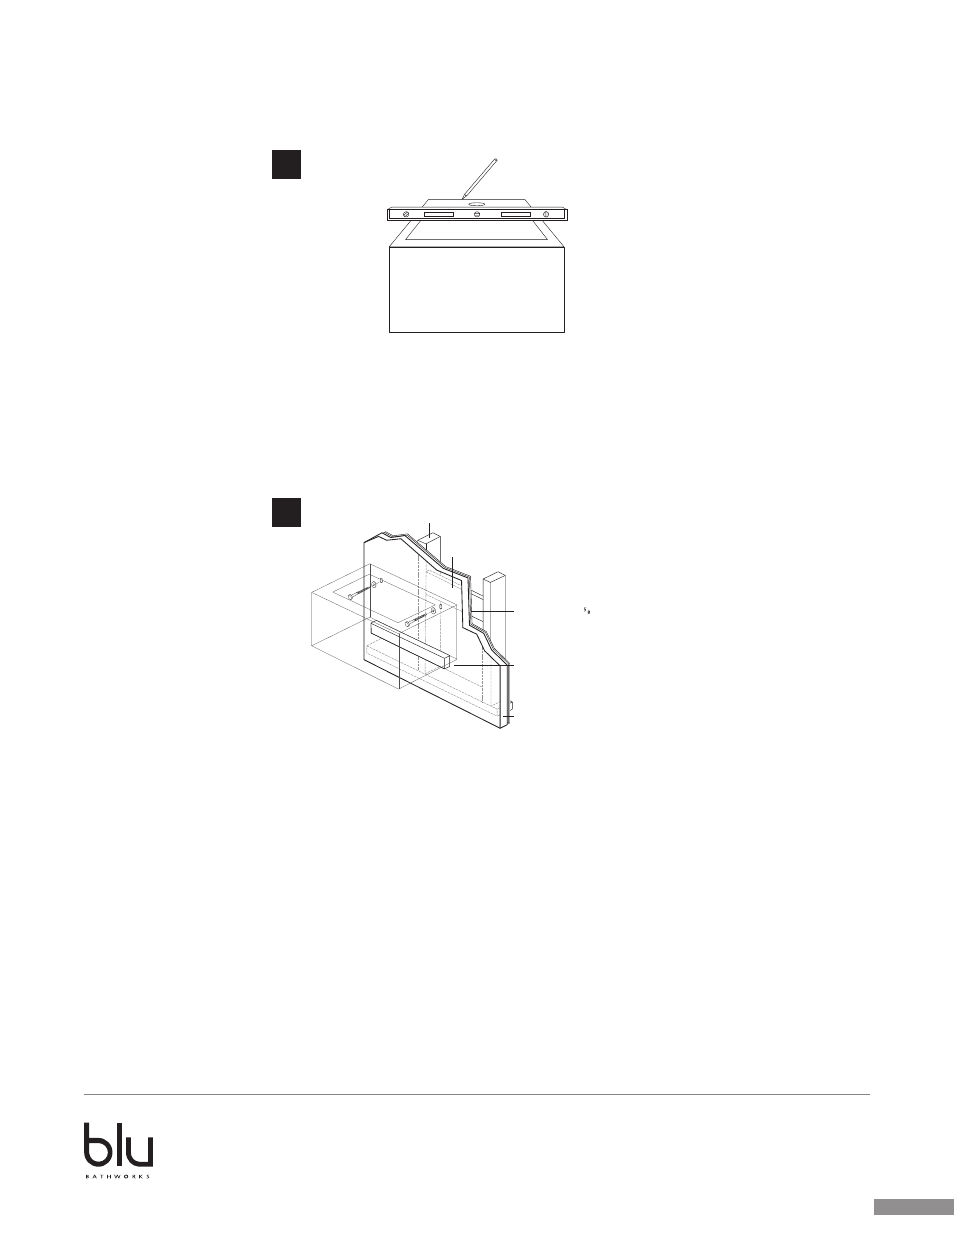
5. Check to make sure the lavatory is installed at the correct height and is level.
6. Mark and confirm the location of the mounting holes in the lavatory.
7. To help recall the lavatory position, trace a line along the sides and top edge of the lavatory.
8. Remove the lavatory and place on protected surface.
9. Install the faucets and drain (not supplied), if deck mounting is required, per the manufacturer’s installation instructions.
10. Return the lavatory into position with the marks on the wall and brace accordingly.
11. Install the lavatory mounting hardware. Place a metal washer onto a lag bolt. Ensure lag bolts are secured into the
horizontal bracing.
12. Insert the lag bolt through a mounting hole in the lavatory. NOTE: DO NOT SECURE BOLT AT THIS TIME.
13. Place the remaining metal washer onto the lag bolt. Insert the lag through the remaining mounting hole in the lavatory.
14. Level the lavatory with the mark along the top and sides of the lavatory.
15. Secure the lavatory to the wall.
WARNING: DO NOT OVERTIGHTEN. Overtightening may damage the products and cause personal injury and/or
property damage.
FAUCET AND DRAIN CONNECTIONS (NOT SUPPLIED)
1. Connect the water supply to the faucet according to faucet instructions.
2. Connect and tighten the trap to the drain.
3. Turn ON the water supplies to the faucet.
4. Purge air from the HOT & COLD water by running the water for a few seconds.
5. Fill the lavatory with water.
6. Check for leaks at the water supply and drain connections.
3
Stud
Reinforcement brace – to width or greater of basin
Existing Wall
Use brace under basin
to support vertical load
Recommend ½"- ¾" plywood
sheathing behind basin
4