Cloud Electronics 46-120 - CDI-46 User Manual
Page 9
CDI-46 Installation and Setup Guide V1.0
9
Double-click on the CDI-46 entry. This should open your default browser and make the CDI-46’s web pages visible.
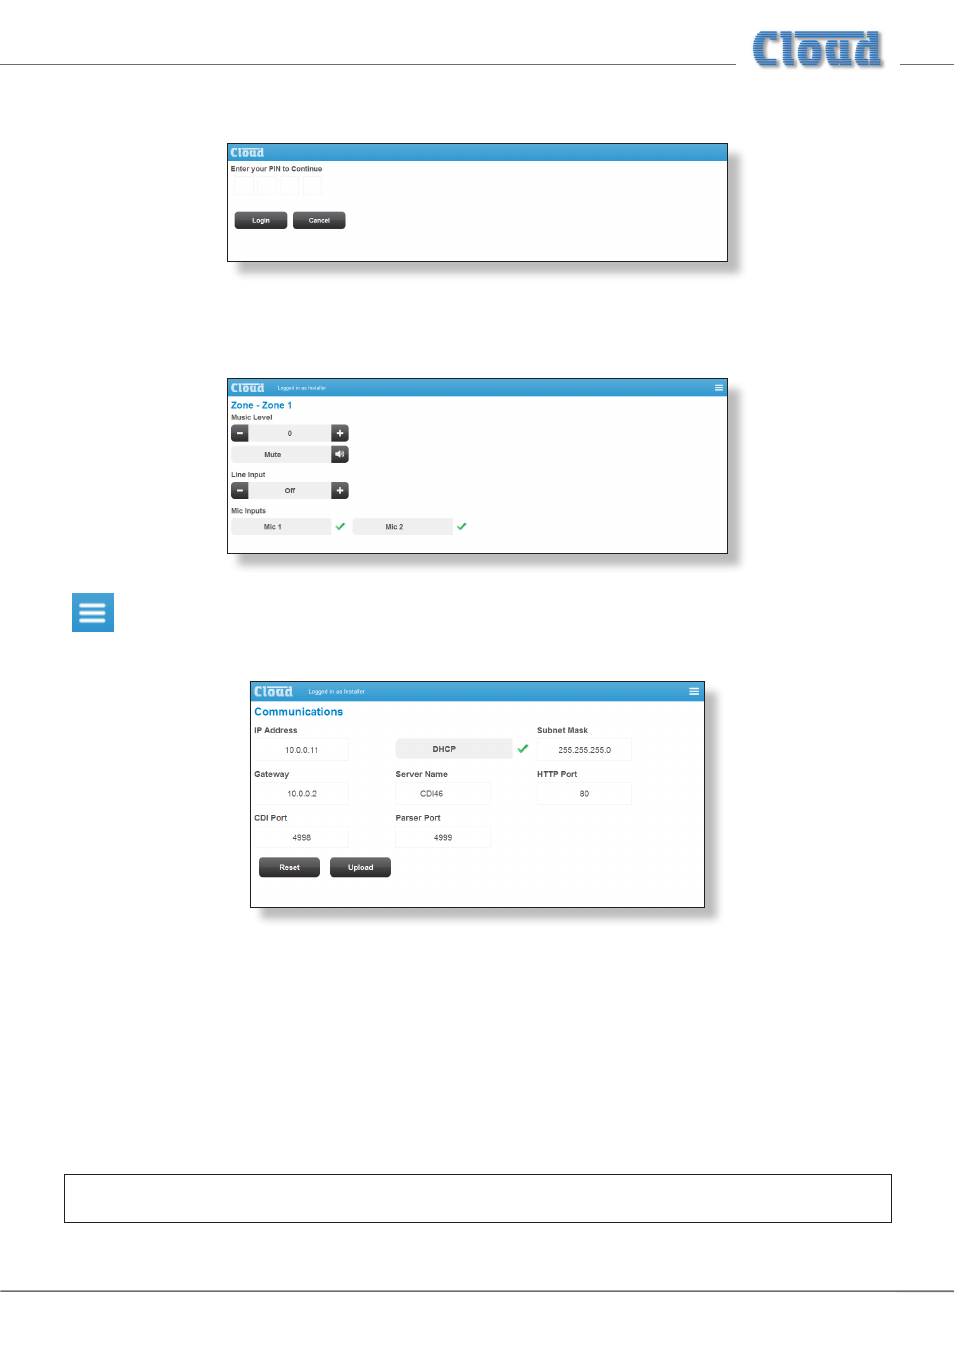
The first page to be displayed on initial connection will be the PIN entry page; enter the Installer PIN (the factory default is
1234*) to authorise access. Click
Login and the Zone 1 Settings page will be displayed.
Click the menu icon at the right hand end of the blue Cloud banner and now select
Config, followed by
Network. This will open the Communications page:
* It is recommended that the factory default PIN is changed to something less obvious when installation is complete.
We recommend that the CDI-46 should either be set with a static IP address (i.e., with DHCP disabled), or uses a fixed DHCP
allocated-address on your routing hardware. It will then have a fixed IP address on the network for other devices to browse to.
Ensure that a suitable IP address is reserved on the network to which you intend to connect the device. If the CDI-46 changes
IP address, users or third-party control applications may not be able to locate it. (Installers may need to consult the client’s IT
Manager for guidance.)
Note that when
DHCP is enabled, values in the IP Address, Subnet Mask and Gateway fields are set automatically and
the fields are no longer modifiable.
NOTE: For security, the server has a time-out of one minute; if no browser activity occurs within this time, it reverts to the
login page and the PIN will need to be re-entered.