Code Two-Bay Battery Charger User Manual
Charging a battery cartridge: charging status, Charging a battery cartridge, Charging status
14870 S. Pony Express Rd. #200 Bluffdale, UT 84065
www.codecorp.com
(801) 495-2200
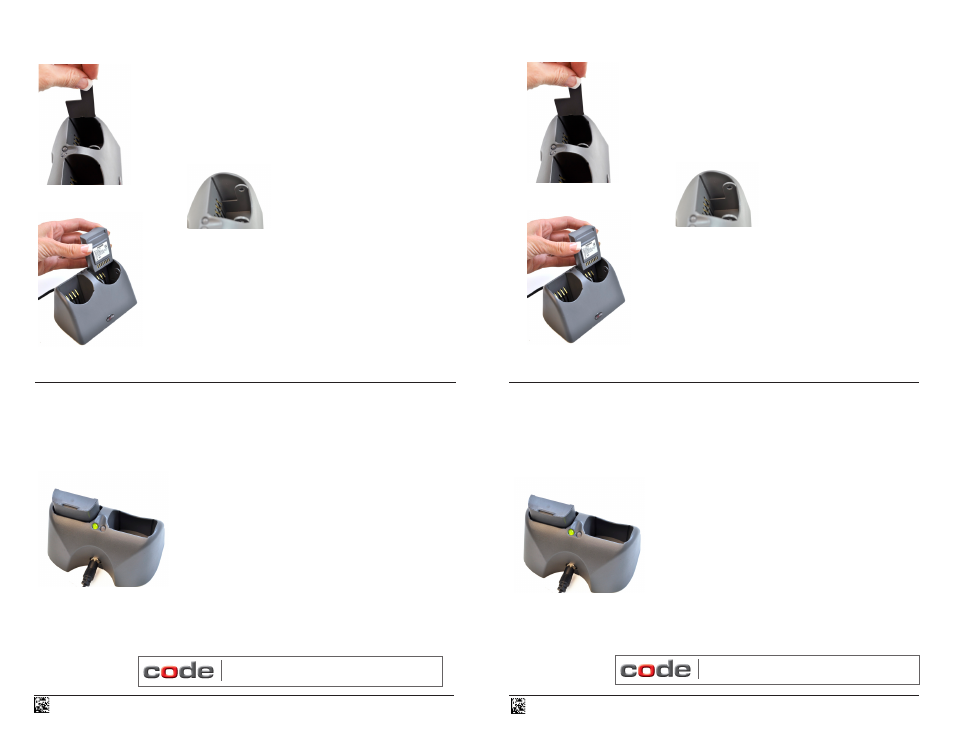
A red LED = reader/battery is charging
A green LED = reader/battery is fully charged*
*Note: In certain reader configurations, the radio is required to
always on, therfore requiring a constant power draw. In these
instances, while the power draw is minimal, the LED light may
never turn green when charging a battery attached to a reader.
Charging a Battery Cartridge:
Charging Status:
Each charging bay has an LED light to indicate the charging status of the battery or
reader. Once the reader, or battery, is engaged with the charging clips - the LED light
associated to that charging bay will light up. (Figure 6)
Figure 6
© 2012 Code Corporation. All rights reserved.
C001529_07_TwoBayBatteryCharger_Quickstart
C001529_07_TwoBayBatteryCharger_Quickstart
14870 S. Pony Express Rd. #200 Bluffdale, UT 84065
www.codecorp.com
(801) 495-2200
A red LED = reader/battery is charging
A green LED = reader/battery is fully charged*
*Note: In certain reader configurations, the radio is required to
always on, therfore requiring a constant power draw. In these
instances, while the power draw is minimal, the LED light may
never turn green when charging a battery attached to a reader.
Charging a Battery Cartridge:
To charge a battery, install 2 two plastic inserts into
a charging bay. (Figure 3)
Press down firmly on the inserts, until you hear
them click into place. (Figure 4)
Figure 4
Place the battery cartridge, with the manufacturer
label facing forward, into the charging bay.
(Figure 5)
Charging Status:
Figure 5
Each charging bay has an LED light to indicate the charging status of the battery or
reader. Once the reader, or battery, is engaged with the charging clips - the LED light
associated to that charging bay will light up. (Figure 6)
Figure 6
© 2012 Code Corporation. All rights reserved.
Figure 3
To charge a battery, install 2 two plastic inserts into
a charging bay. (Figure 3)
Press down firmly on the inserts, until you hear
them click into place. (Figure 4)
Figure 4
Place the battery cartridge, with the manufacturer
label facing forward, into the charging bay.
(Figure 5)
Figure 5
Figure 3