Rear-ventilated galaxypro, Splice plate bolt nut washer display face – Daktronics Rear-Ventilated GalaxyPro GP3 and GP4 Display User Manual
Page 2
Rear-Ventilated GalaxyPro
®
GP3 and GP4 Display Section Splicing Instructions
DD1931894 Rev 05
21 October 2014
PO Box 5128 201 Daktronics Drive, Brookings, SD 57006-5128
tel: 800-325-8766 fax: 605-697-4700
www.daktronics.com
Section Splice Instructions
Refer to Section 4 of display manual for additional
information.
Due to size, some displays ship in multiple sections. A
sectional display consists of multiple sections to form a single
display face.
Note: Section splicing can be completed at ground level if the
display is no more than two sections tall.
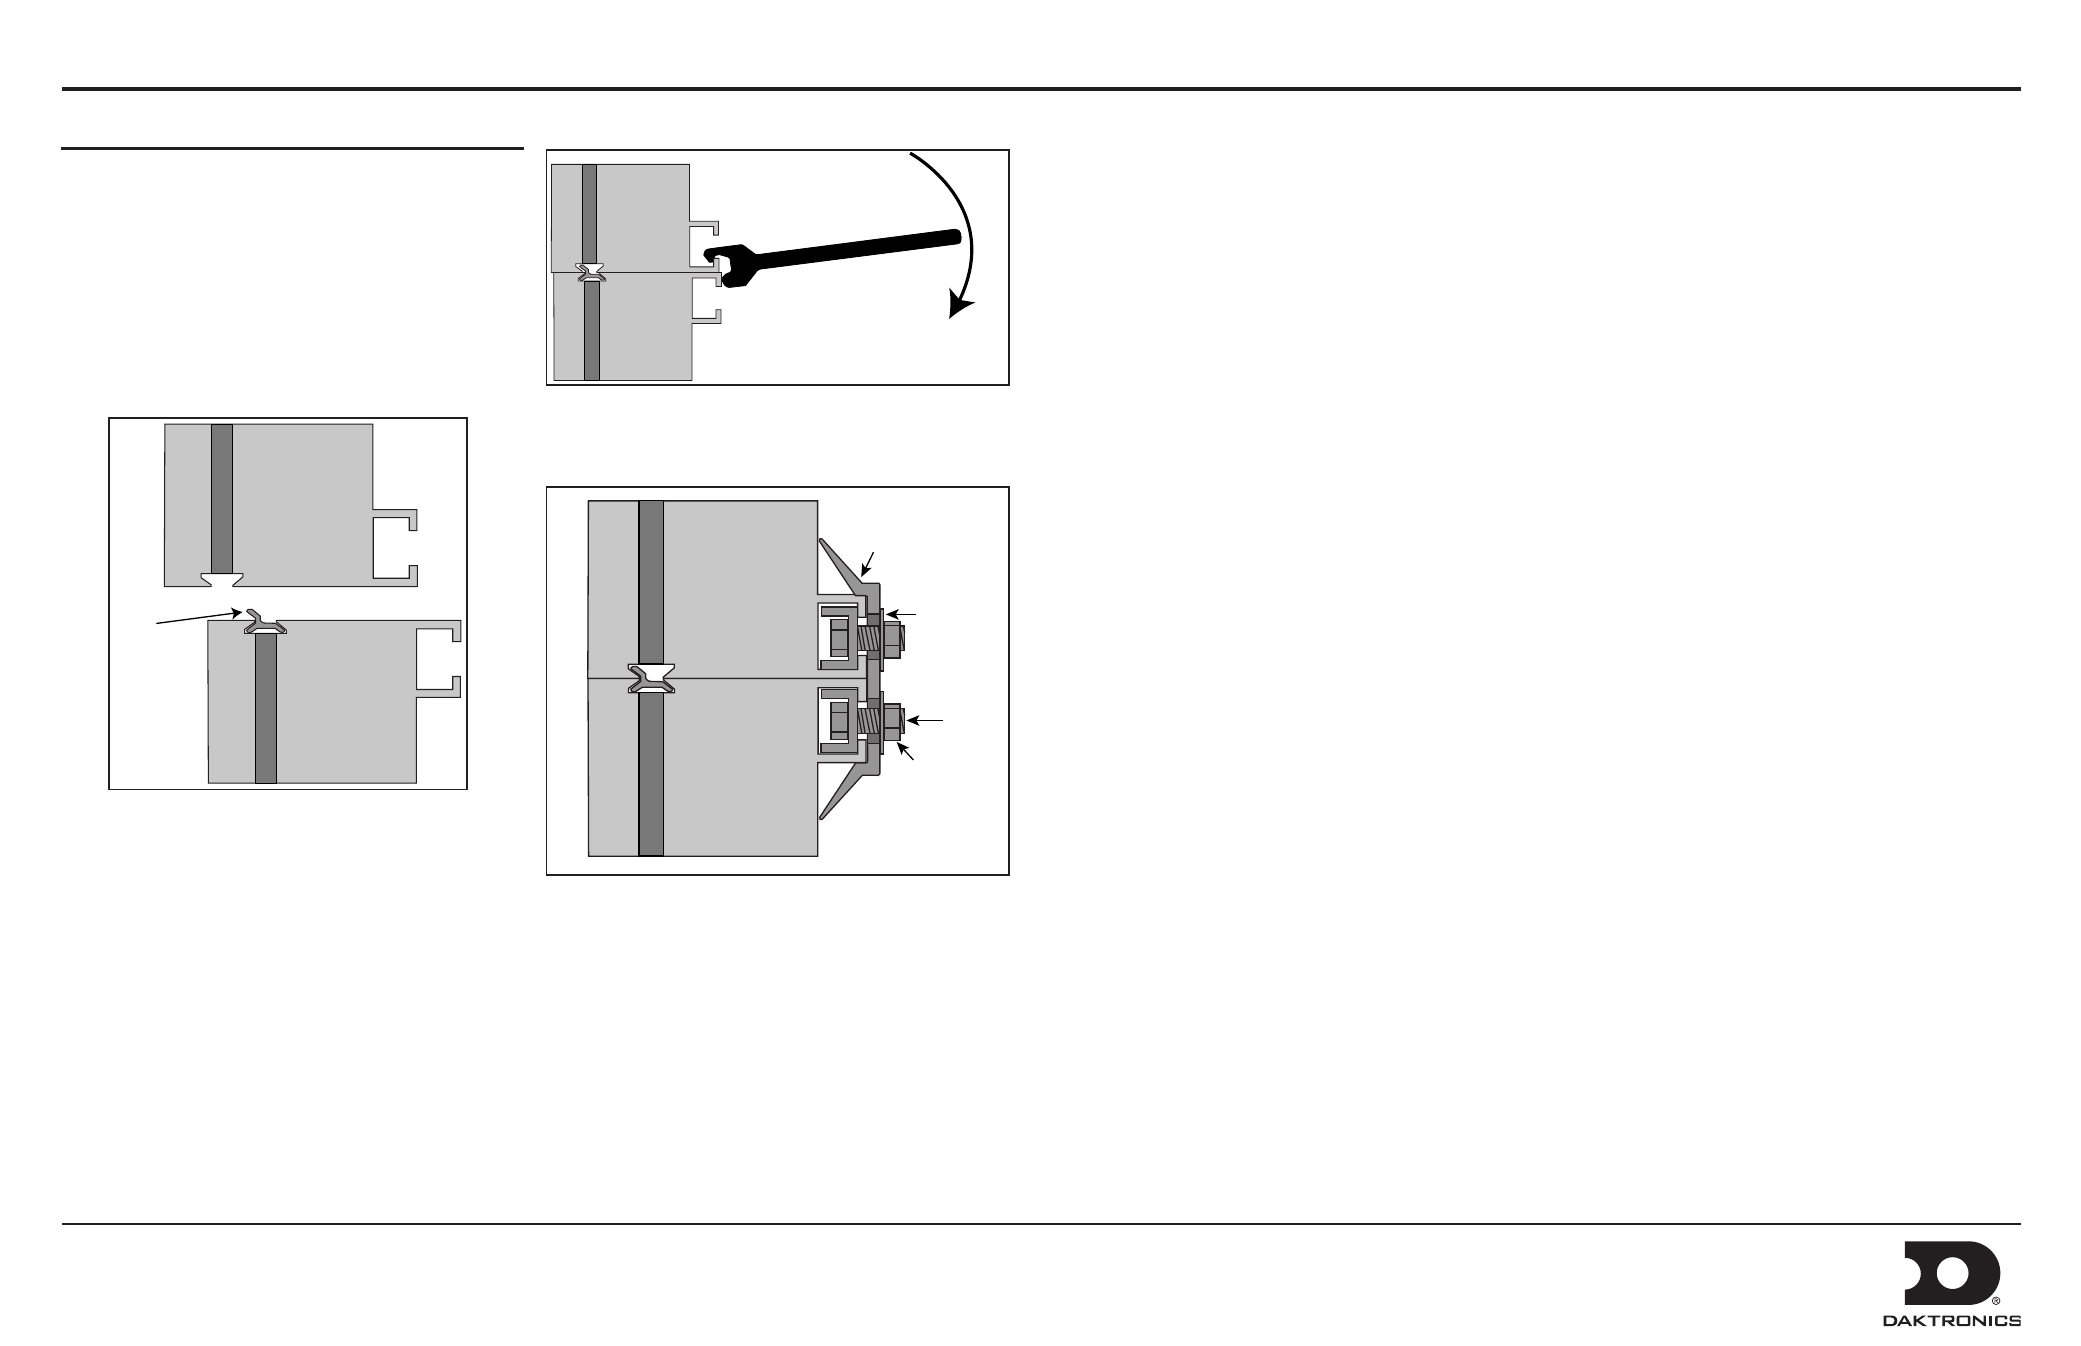
1. Ensure splice key is in channel on bottom section.
2. Attach crane to top section.
3. Unbolt top section from truck.
4. Lift top section and spin 180 degrees.
5. Lower top section until splice key engages.
Top
Section
Bottom
Section
Splice
Key
6. Use splice wrench to draw sections together.
7. Connect splice plates and splice T-clips to both sections.
8. Tighten all nuts on all splice plates and splice T-clips.
9. Refer to Step 1: Display Mounting on reverse side.
Top
Section
Bottom
Section
Splice
Plate
Bolt
Nut
Washer
Display Face
Top
Section
Bottom
Section