Flush mount installation figure a figure b – Fli Audio FI5COMP-F3 User Manual
Page 6
6
FLUSH MOUNT INSTALLATION
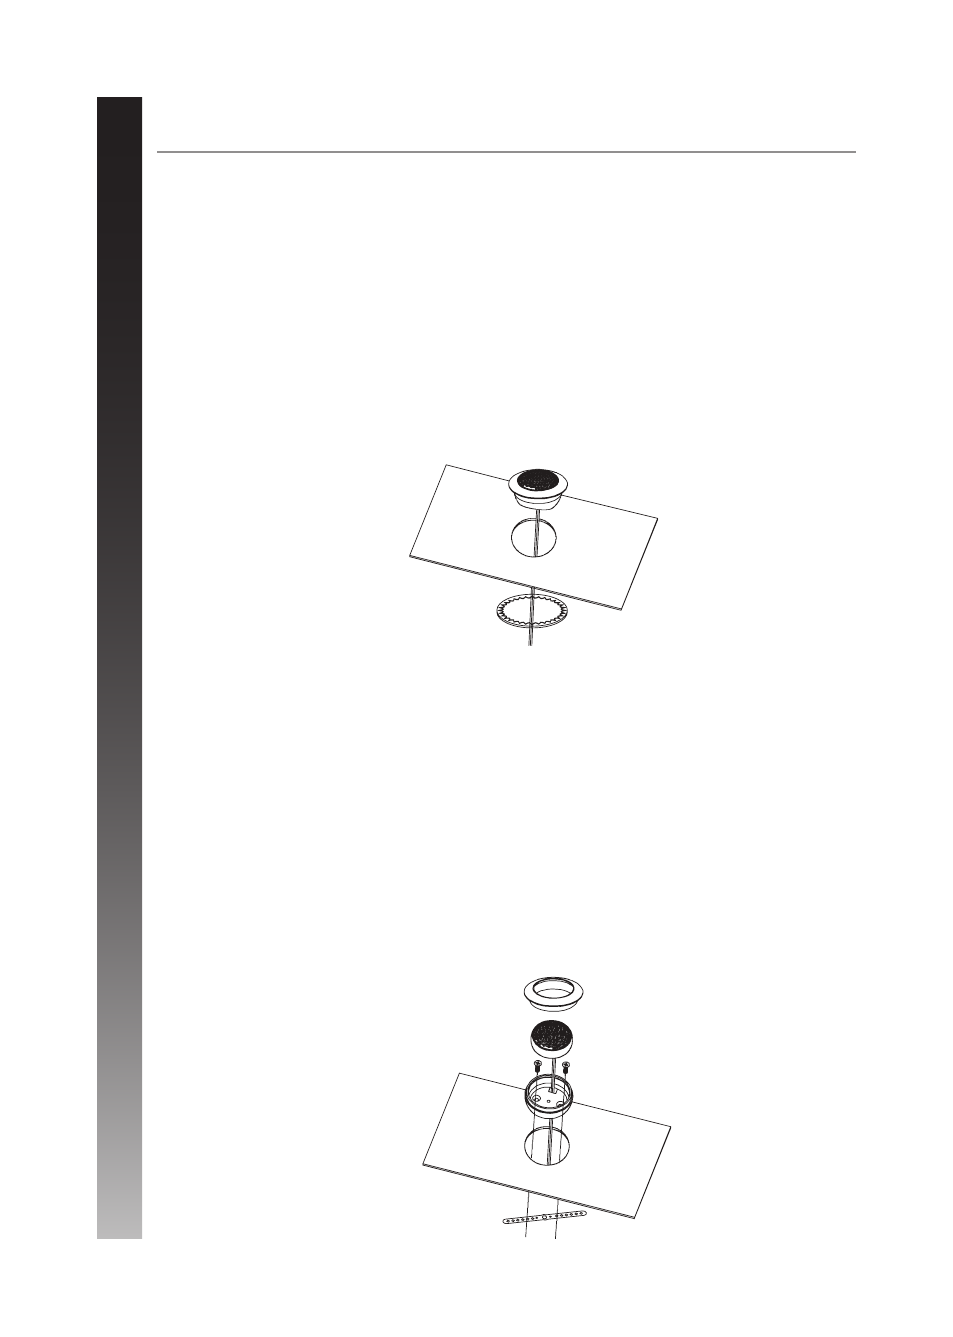
FIGURE A
FIGURE B
For ease of installation there are two ways of fixing the tweeters in place.
The first requires the use of the metal ring provided. (
See Figure A)
• After finding a suitable position for the tweeters place the cut out template for the tweeter in position
and mark around it.
• Before cutting the holes double check that no brake, fuel lines or wiring harnesses are likely to get
damaged.
• Ensure that the tweeter when fitted will not catch on any moving parts such as door / window handles.
• If mounting in a door check that the window can still be fully lowered before installing.
• Cut out the hole carefully.
• Place the entire tweeter into the cut out hole.
• From the back push the metal ring over the rear of the casing until it is tight into the cutout hole.
The second requires the use of the metal strip provided. (
See Figure B)
• After finding a suitable position for the tweeters place the cut out template for the tweeter in position
and mark around it.
• Before cutting the holes double check that no brake, fuel lines or wiring harnesses are likely to get
damaged.
• Ensure that the tweeter when fitted will not catch on any moving parts such as door / window
handles.
• If mounting in a door check that the window can still be fully lowered before installing.
• Cut out the hole carefully.
• Position the metal strip fixing strip centrally, behind the cut out hole.
• Using the fixing screws attach the base of the tweeter case to the metal strip.
• Pass the tweeter cable through the hole in the centre in the bottom of the case and the metal fixing
strip.
• Pull the cable tight until the tweeter sits in the base.
• Screw the top of the tweeter casing to the base.
• Caution do not over tighten.