Flowserve TSQVIOM Durco Mach 1 Severe Service Valve IOM User Manual
Page 12
12
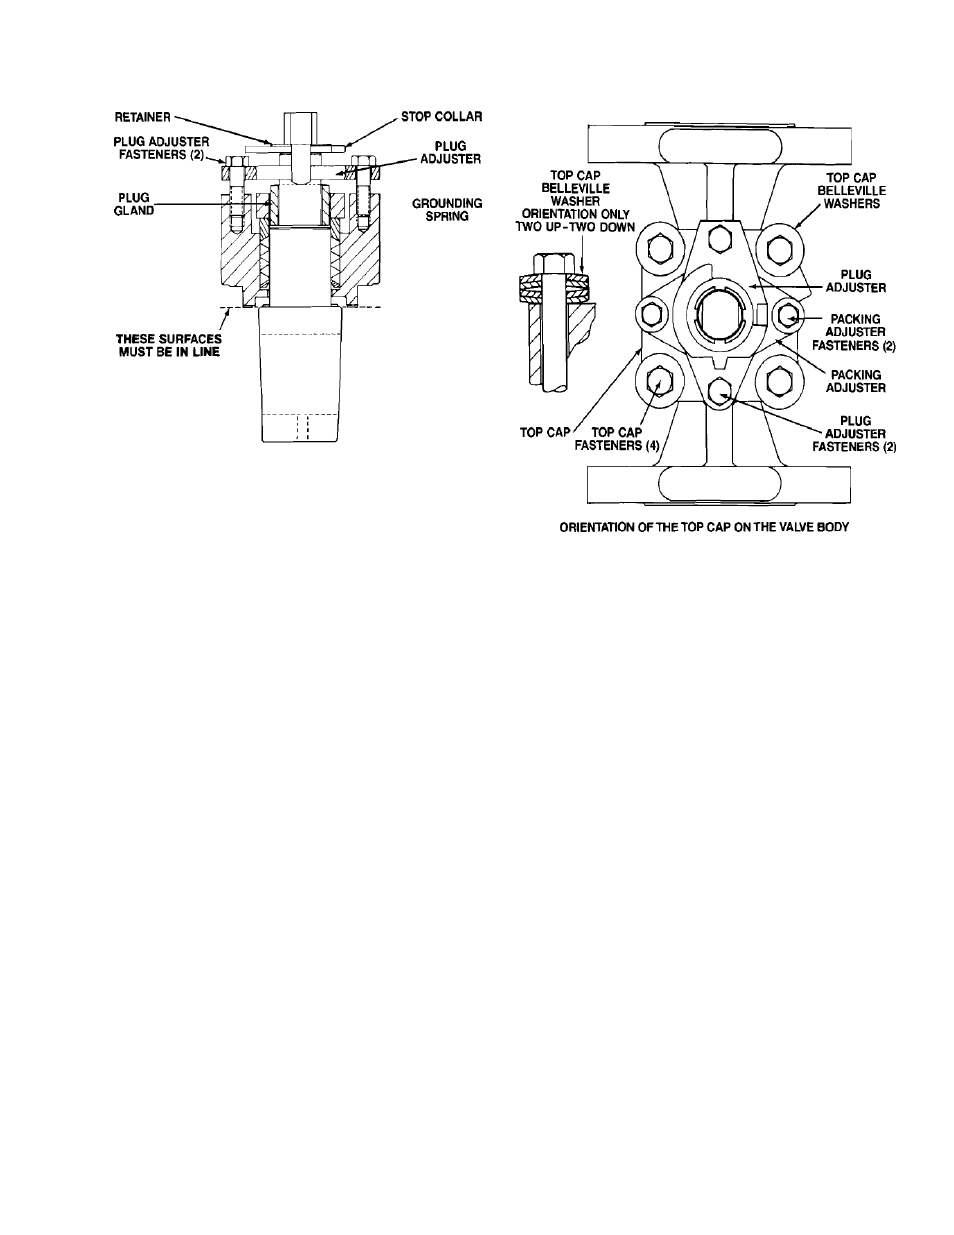
Figure 11
14. Place the top cap gasket into the valve
body flange counterbore.
15. Apply a thin, even film of silicone, or
approved lubricant, to the entire outside
surface of the plug taper.
16. The top works are then placed onto the
valve body and oriented as shown in
Figure 12. The plug is then pressed into
the sleeve with the aid of an arbor press
or c-clamp until the top of the plug
adjuster falls ¼’’ below plug adjuster
fasteners. The press must provide
sufficient force to depress the plug,
allowing the gasket surface of the top cap
to bottom against the gasket counterbore.
The valve must remain in the arbor press
for steps 16 thru 19.
17. The top cap fasteners with four optional
Belleville washers each (Figure 12 for top
cap Belleville washer orientation) should
be installed at this time. Do not tighten the
top cap fasteners more than finger tight.
18. Tighten the packing adjuster fasteners
in a manner such that the packing
adjuster does not "tilt". The torque on the
packing adjuster fasteners should be per
Table 3. (Fig 12).
Figure 12
19. Tighten the top cap fasteners in a
crisscross fashion to values listed in
Table 1a or 1b.
20. At this time, remove the valve from
press or c-clamp.
21. Loosen the plug adjuster fasteners
and operate the plug several times.
22. Tighten the plug adjuster fasteners
per Table 2. Install stop collar and
retainer ring.
23. Operate the plug several times. It
will be difficult to turn at first, but will
then loosen and turn freely.
24. Pressure testing of the assembled
valve should be done at this time. Any
additional valve adjustment that might
be needed to hold the specified
pressure should be made at this time.
The valve is now ready for installation