Flowserve LPC Compact Actuator Series User Manual
Page 13
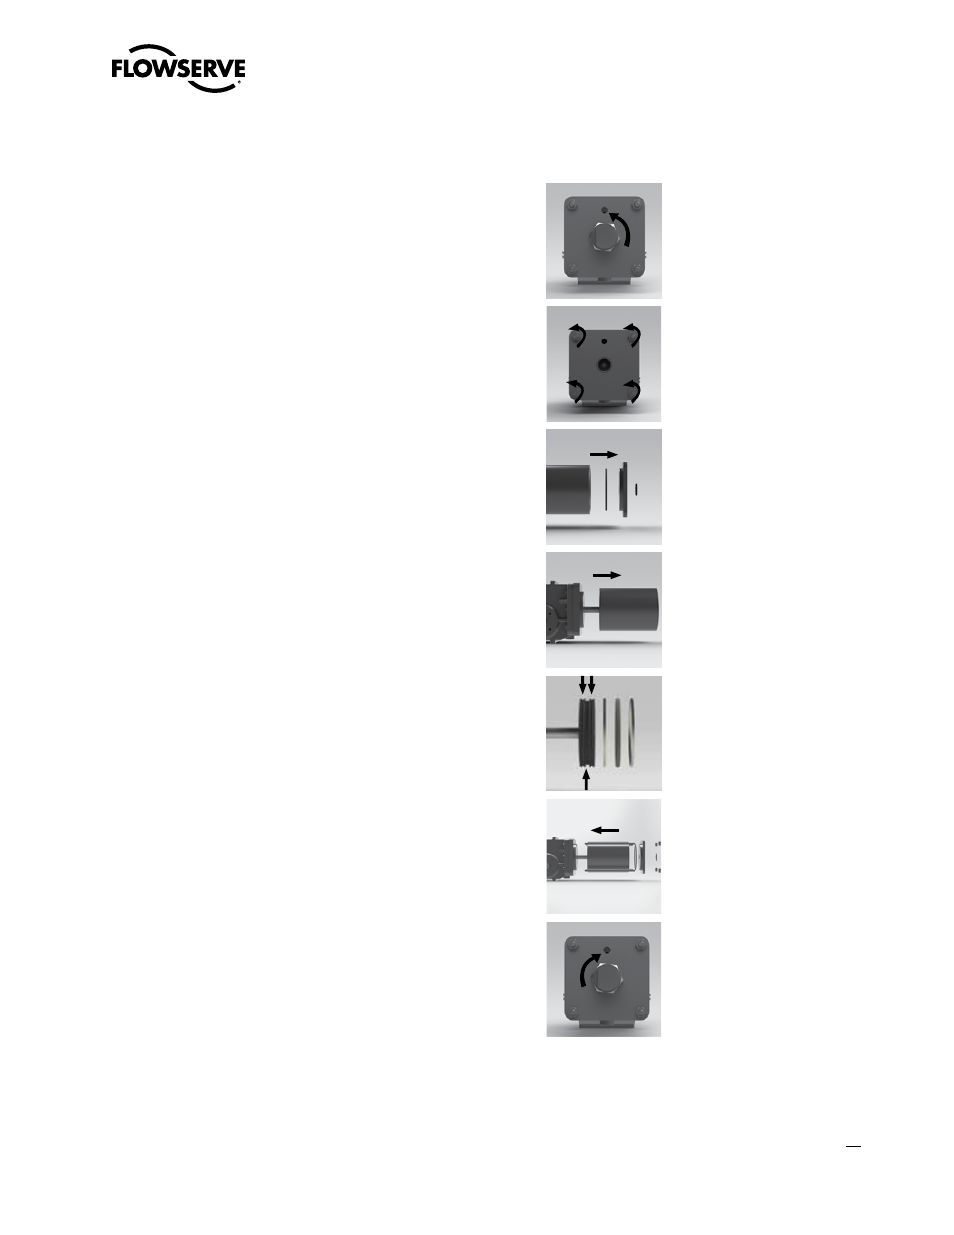
Standard in-field maintenance
Perform the following steps with reference to Figure 15:
4.2.1
Unscrew and remove the travel stop of the pneumatic
cylinder (19). For removing the stop, refer to the indications
given in paragraph 2.3.
4.2.2
Remove four tie rods (16) positioned on the cylinder by
unscrewing the nuts (18) on the sides of the End Flange and
unscrewing the tie rods from the adaptor flange (26).
4.2.3
Remove carefully the end flange (23) from the can (17).
Remove the two o-ring (21 and 22) from the end flange.
4.2.4
Finally remove the can (17) without damaging or scratching
the inner surface.
4.2.5
Remove the o-ring (25) and finally the two guide-tapes (36)
from the piston (15). Clean all the surface of piston and flanges in
contact with these components with a clean rag and solvent
compatible with o-ring material (for information contact Flowserve).
Brush the o-rings grooves with a light oil film and install the
new o-rings. Spread a thin layer of oil on the bottom of the guide
tape grooves and install a new guide tapes. Clean the internal
surface of the tube and lubricate with a protective oil film.
4.2.6
Reassemble the parts of the cylinder with reverse procedure as
described in points 3.2.1 to 3.2.4. The tie rods should be tightened
using a torque wrench, applying a torque in accordance with
specific tables, available upon request to Flowserve After
Sales Department.
4.2.7
Readjust the travel stops as instructed in paragraph 2.3.
NOTE: After the standard maintenance steps, stroke the actuator a few times to check for normal operation.
13
LPC Compact Actuator Series FCD LFENIM0002-00-AQ 07/14
flowserve.com