General information, 1 introduction, 2 instructions – Fluke Biomedical 07-591 User Manual
Page 5
General Information
Introduction
1
1-1
Section 1
General Information
1.1 Introduction
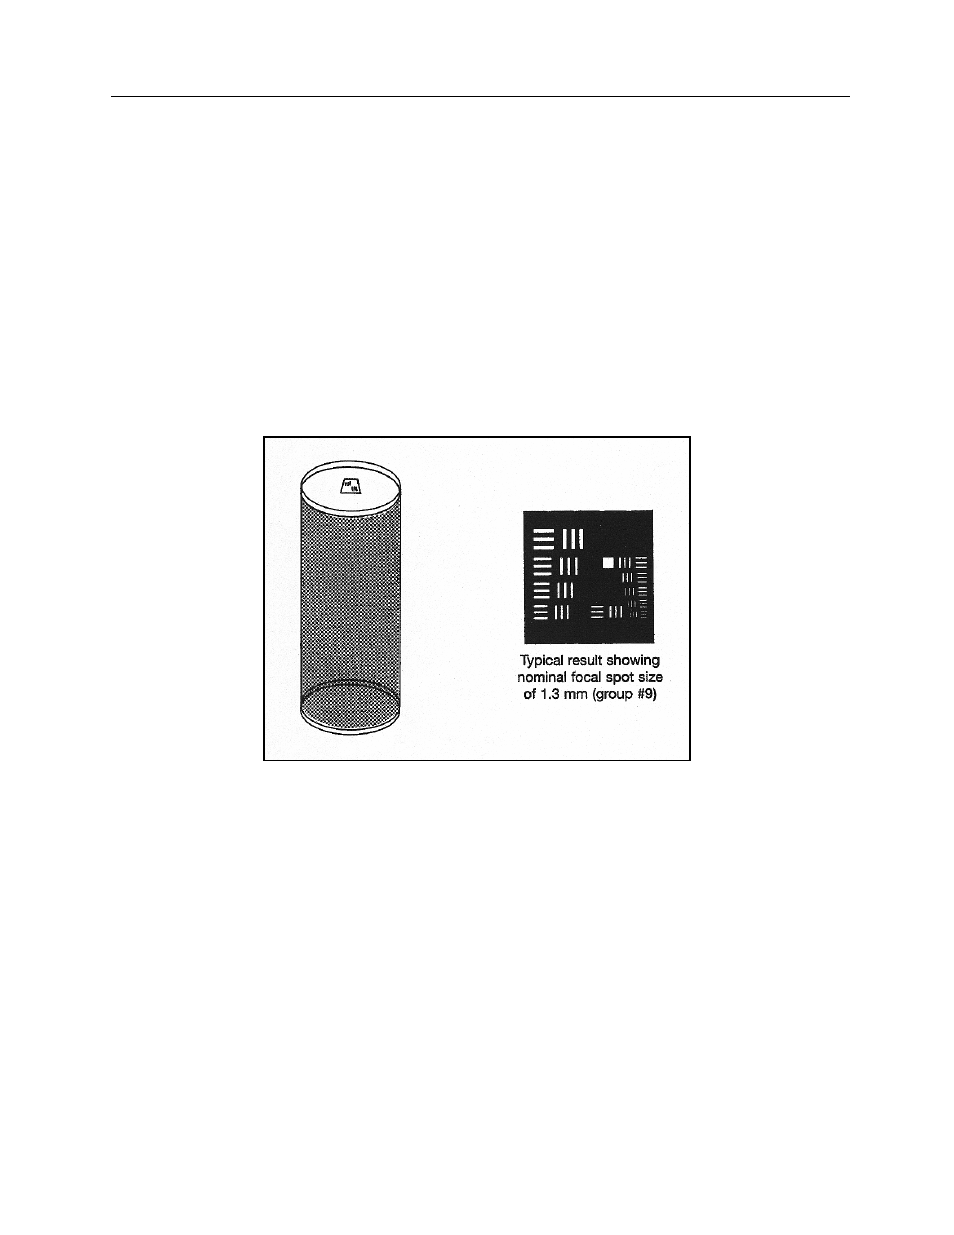
The Focal Spot Test Tool (Model 07-591) provides a simple “pass-fail” test to determine if an x-ray tube
focal spot has been damaged. It consists of a 6” high stand with a thirteen-group test pattern. Each
group has six bars, three of which are positioned at right angles to the adjacent set. The groups diminish
in size from 0.63 line pairs/mm to 2.52 line pairs/mm. By observing the radiograph and using the chart
supplied, showing resolution vs. focal spot size, the nominal focal spot dimension (in mm) can be
determined.
Figure 1-1
1.2 Instructions
When checking overhead x-ray systems, position the focal spot of the x-ray tube 18” from the top of the
test tool. Adjust the collimator so that the x-ray field is within the dimensions of the base of the test tool.
Then set the x-ray generator between 50 and 60 kVp and between 3 and 5 mAs. Place a piece of dental
x-ray film (type BF46 or equivalent) or a non-screened film in a cardboard cassette under the cylinder of
the test tool, and make the exposure with the small focal spot. Repeat with a second piece of film for the
large focal spot.
To check fluoroscopic tubes, place the tool upside-down on the table. Place an absorber such as the
Patient Phantom/Penetrometer (Model 07-706) or the Copper Test Plate (Model 07-708) on top of the test
tool in order to protect the image intensifier. Operate the system in a fluoroscopic mode, and adjust the
fluoroscopic shutters so that they limit the beam to the dimensions of the plate. Place the non-screen film
between the absorber and the test tool. Using 80 kVp and 1 mA, expose the film for 5 to 10 seconds
using the small focal spot.