Figure 6: gxv3275 connect to wi-fi via web ui – Grandstream GXV3275 Wi-Fi Guide User Manual
Page 9
GXV3275 Wi-Fi User Guide
Page 8 of 20
7. The phone will start connecting to the Wi-Fi. The status bar will show Wi-Fi signal strength.
8. Once authenticated, the phone will obtain IP address via DHCP and connect to the Wi-Fi network.
9. After successfully connected, the password will be remembered. When the GXV3275 has Wi-Fi
turned on in the future, it will connect to this network automatically if the SSID is within the range.
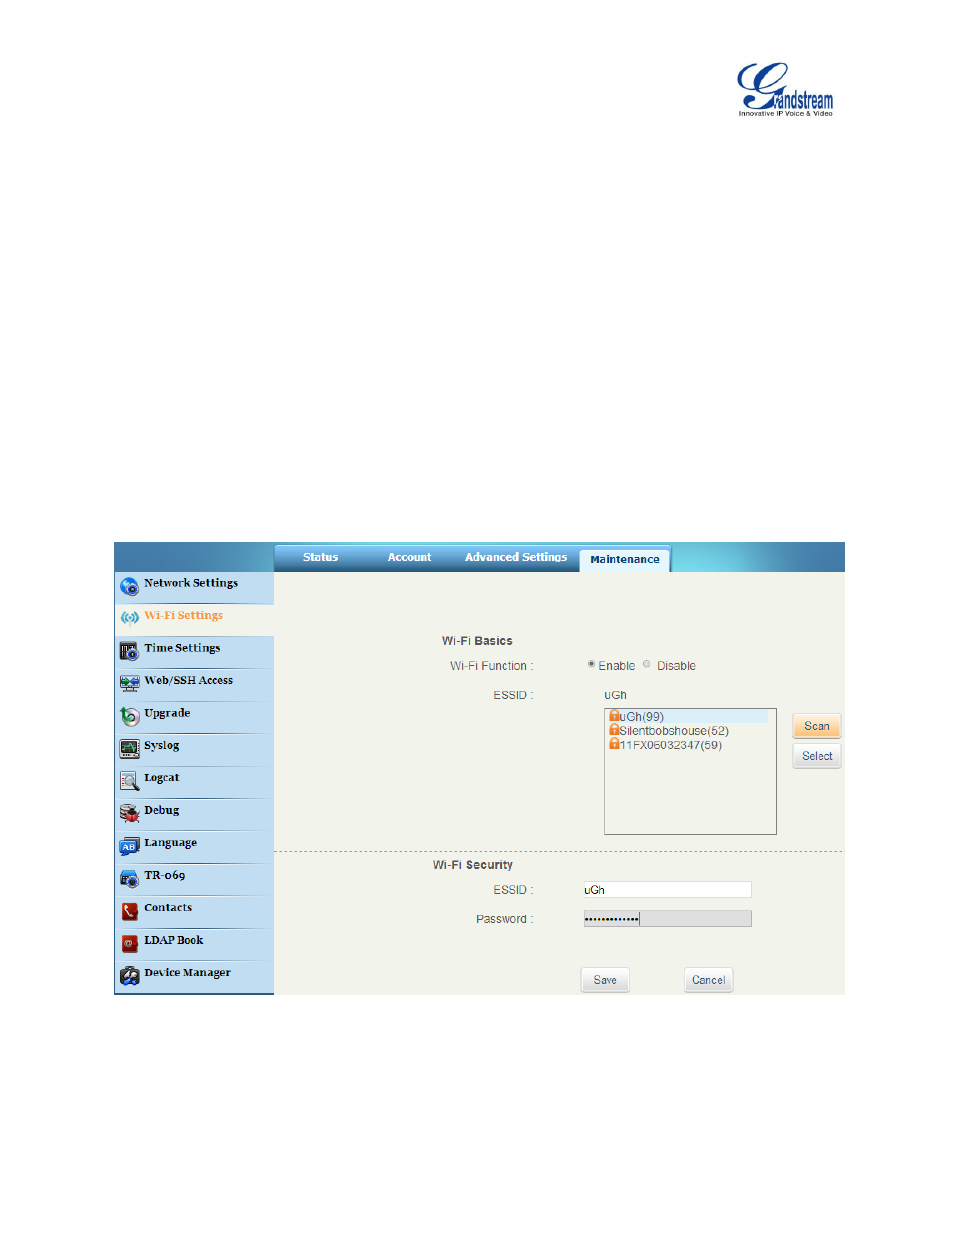
Add Wi-Fi networks from web UI
1. Log in the GXV3275 web UI.
2. Go to Maintenance->Wi-Fi Settings. Click on "Enable" for "Wi-Fi Function".
3. Click on "Scan" to start searching for the Wi-Fi networks within the area. A list of available ESSIDs
will be displayed.
4. Select the ESSID and click on "Select". The ESSID will be filled into the "ESSID" field under "Wi-Fi
security".
5. Enter the password for the ESSID.
6. Save the change.
7. The phone will start connecting to the Wi-Fi network. Please check the phone's LCD.
Figure 6: GXV3275 Connect to Wi-Fi via Web UI