Figure 4: create sip register trunk – Grandstream UCM6100 Busy Camp-on Guide User Manual
Page 8
UCM6100 Busy Camp-on Guide Page 7 of 10
3. Make the same configuration for extension 5000 on UCM2. This extension is for UCM1 to register SIP
trunk on UCM2.
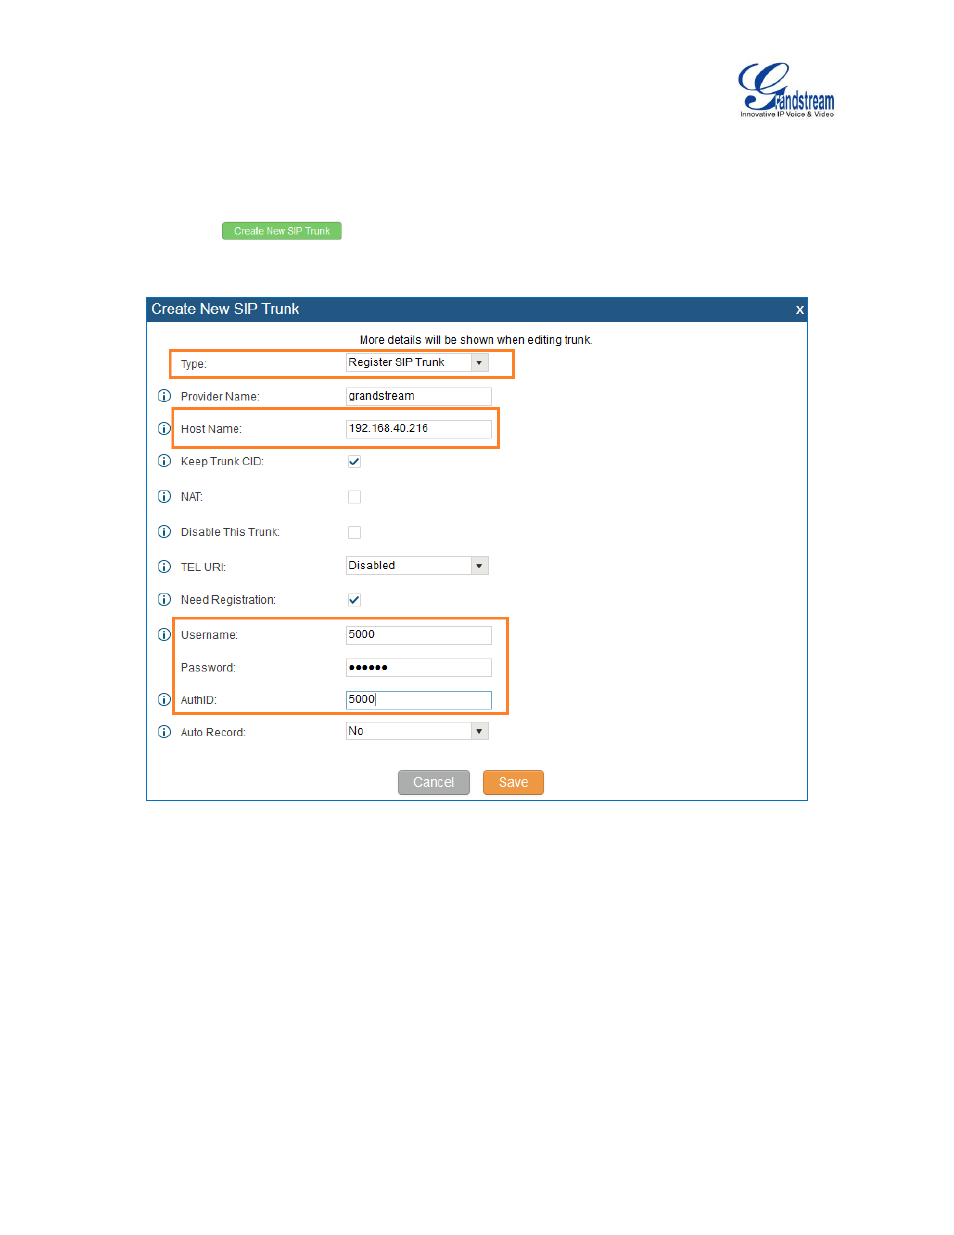
4. On UCM1, create a SIP register trunk and register to the extension 5000 on UCM2. This can be done
by clicking
on web GUI->PBX->Basic/Call Routes->VoIP Trunks. The following
figure shows the configuration for new SIP trunk on UCM1.
Figure 4: Create SIP Register Trunk
Type: Select
“Register SIP Trunk”
Host Name: Enter the IP address of the UCM to register to
Username: The extension number on the UCM to register to
AuthID: Same as Username
Password: The password of the extension number on the UCM to register to
5. Similar to step 4, on UCM2, create a SIP register trunk and register to the extension 1000 on UCM1.
6. Check the registration status of the trunks on web GUI->Status->PBX Status. If configured
successfully, the status for the trunk should show as
“Registered”.