Trunks, Analog trunks, Setup analog trunk – Grandstream UCM6100 series Initial Setup Guide User Manual
Page 16: Runks, Figure 21: analog trunks – create new analog trunk
16
T
RUNKS
A
NALOG
T
RUNKS
Go to Web GUI->PBX->Basic/Call Routes->Analog Trunks to add and edit analog trunks.
• Click on "Create New Analog Trunk" to add a new analog trunk.
• Click on
to edit the analog trunk.
• Click on
to delete the analog trunk.
The UCM6100 series has built in FXO ports which allows it to pull in PSTN lines and provide analog trunk
service. For this example, we will configure an analog line that is connected to FXO1.
S
ETUP
A
NALOG
T
RUNK
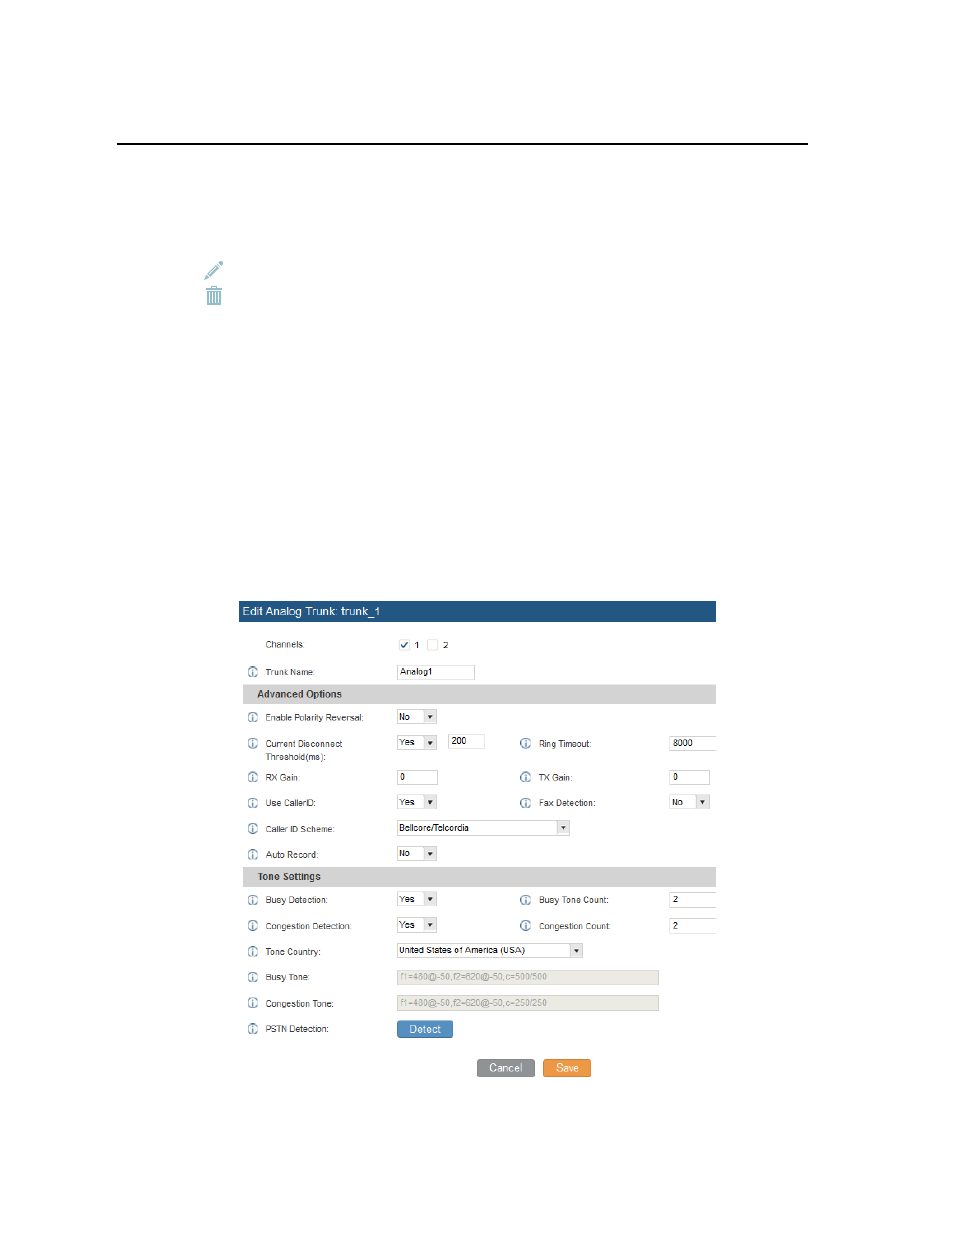
1. Click on “Create New Analog Trunk”
2. For “Channels” select 1
3. Trunk Name is set to “Analog1”
4. “Caller ID Scheme” is set for “Bellcore/Telcordia”. Depending on the provider, users can select
other schemes
5. “Tone Country” is set to “United States of America (USA)” since this tutorial is setup in the North
American region. Users can click the dropdown box to select an option more suited for their region
6. Click “Save” and then click on “Apply Changes” at the top
Figure 21: Analog Trunks – Create New Analog Trunk