Pt2100_p3, Pt2100 – ikan PT2100 User Manual
Page 4
3903 Stoney Brook Dr. Houston TX 77063 | +1.713.272.8822 | www.ikancorp.com | [email protected] | © 2009 ikan Corporation. All right reserved.
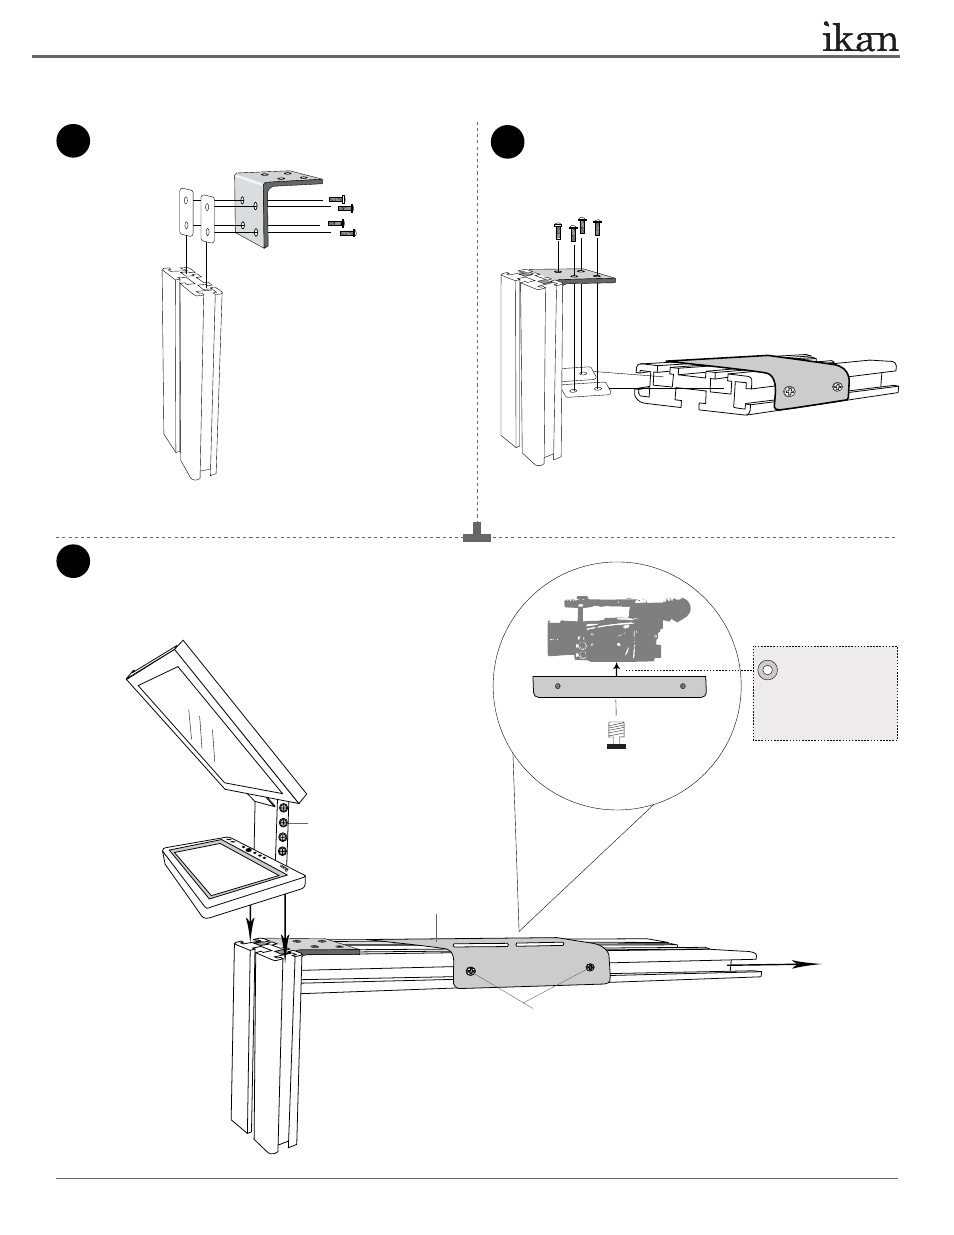
Attach Part-J to
Part-N
. (2 x Part-D and 4 x Part-H are needed
in this step)
5
7
6
Attach
Part-P to the assembled parts.
(2 x Part-D and 4 x Part-H
are needed in this step)
Attaching assembled Part-K, assembled Part-P and your camera together.
> Loosen the screws and slide out the Metal Bracket
through the channels
ikancorp.com
Metal Bracket
Washer (Not included)
** Some cameras may require
an extra spacer, such as a
washer, in order to fit snugly.
Part-F or Part-G
(depends on your camera)
PT2100
8” TELEPROMPTER
Part-J
Part-N
Part-P
> Loosen the screws to allow them
pass through the 8” T-Slot’s channels
on both sides
> Secure your camera on Metal Bracket
> Slide back in the Metal Bracket with your
camera attached, and tighten all screws
ikancorp.com