Kanguru 7-port USB3.0 Hub User Manual
Kanguru 7-port usb3.0 hub quick start guide, Introduction, Setup
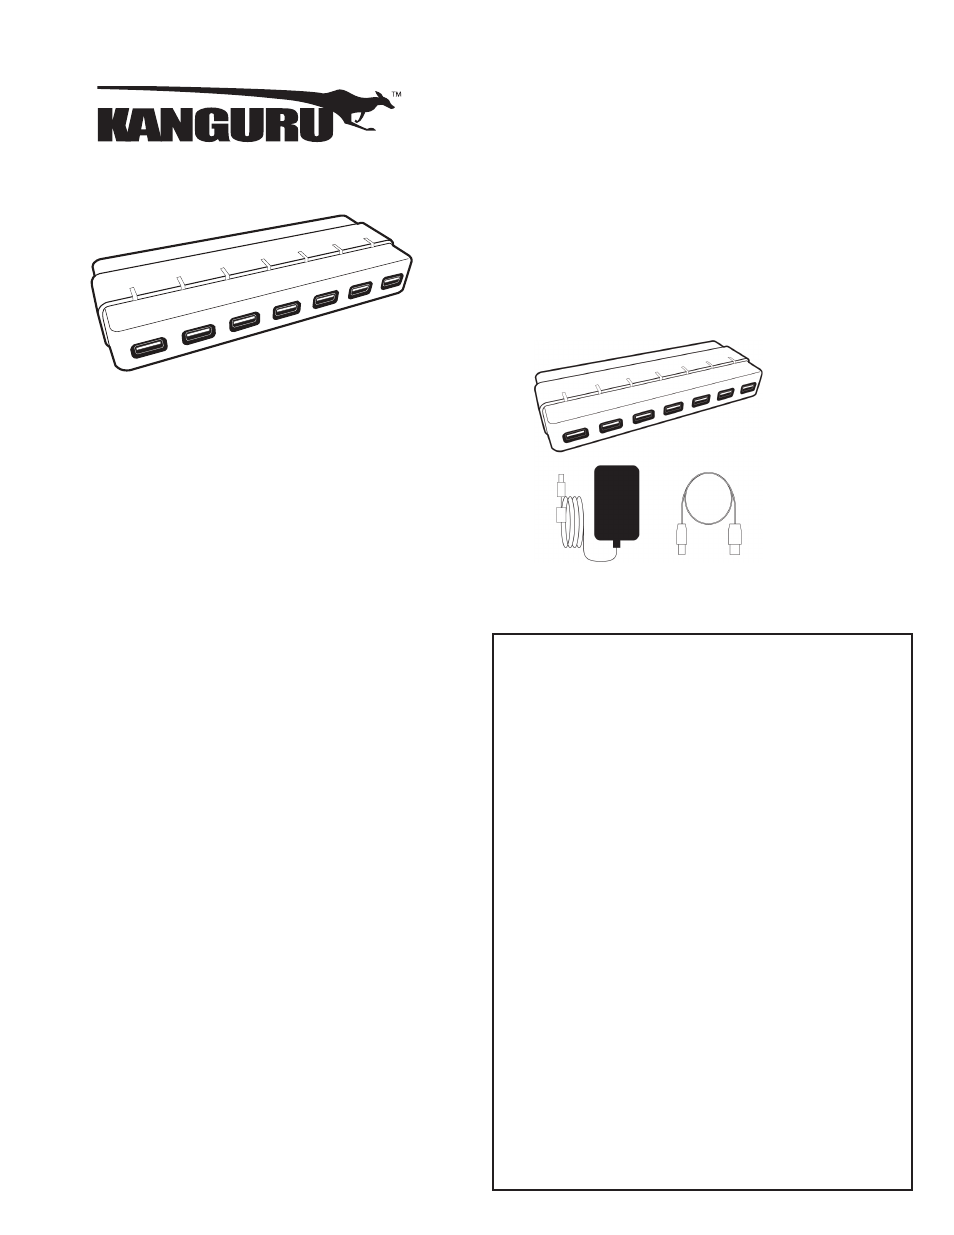
Kanguru 7-Port USB3.0 Hub
Quick Start Guide
05.08.14 vrs. 1.1 © 2014 Kanguru Solutions
Legal terms and conditions available at www.kanguru.com.
Please review and agree before use. Thank you.
1. Introduction
Congratulations on purchasing the Kanguru 7-port USB3.0 Hub. This ultra-
compact hub connects to a USB3.0 SuperSpeed port on your desktop or
notebook computer, allowing you to connect up to seven additional USB
devices to your computer. The Kanguru 7-port USB3.0 hub supports USB3.0
5Gbps devices and is backwards compatible with USB2.0 devices.
Note: If your 7-port USB3.0 hub came with additional software, please refer to
the software’s documentation for instructions on using the software.
Package Contents
Before you begin, please check your package for the following contents. If
you are missing anything, contact Kanguru Solutions at 1-888-526-4878 and
replacement parts will be shipped to you ASAP.
2. Setup
System Requirements
• Available USB port (USB3.0 port required for USB3.0 speeds)
• PC with an Intel® Pentium® processor or equivalent
• 64 MB RAM or higher
• Supported Operating Systems
○ Microsoft Windows Server 2003 / XP* / Vista / 7 / 8
* In line with Microsoft’s End-of-Support announcement for Windows XP,
Kanguru Solutions is ending support for the Windows XP platform. While
our products have been quality tested internally on Windows XP, we cannot
guarantee normal product operation on an unsupported OS.
3. Using Your Kanguru Hub
1. Connect the 7-port hub to your computer using the USB3.0 cable
provided. Plug the B-type connector into the USB-in port on the hub,
and then connect the other end to your computer. Windows comes with
the necessary software drivers already installed. The device driver will be
automatically installed when the hub is connected to the computer for the
first time, no additional drivers are required.
2. Plug the AC adapter pin into the DC port on the hub, then plug in the other
end to an electrical outlet or other adequate power supply.
3. Plug your USB devices into any of the 7 available USB ports on the hub.
The Kanguru 7-port USB3.0 hub must be plugged in through a USB3.0 port
on you computer in order to operate at USB3.0 speeds. If you connect the hub
through a USB2.0 port, you will only be able to operate at USB2.0 speeds.
Note: The USB hub can supply power to low power devices like USB flash
drives. However, if the device you are connecting requires additional power
(i.e. external hard drives, optical disk drives) it cannot be powered by the USB
hub alone and will require a connected external power as it would through
normal use.
4. Safely Disconnecting the Hub
Before removing the Kanguru Hub, make sure that you have safely removed
any USB devices that were connected to your computer through the hub.
In order to do this:
1. Click on the Safely Remove Hardware icon in your taskbar and click
on any drives that are connected to your computer through the hub.
When you receive a message confirming that you can safely remove the
hardware, remove the device from the hub.
2. Once all the USB devices have been disconnected from the hub, you can
safely disconnect the hub from your PC.
5. Technical Support
If you experience any problems using your 7-port USB3.0 hub or have any
technical questions regarding any of our products, please call our tech support
department.
Our tech support is available Monday thru Friday, 9am to 5pm EST.
Phone: 1-508-376-4245
Website:
www.Kanguru.com
Support: support.kanguru.com
Kanguru 7-port USB3.0 Hub
USB cable
AC Adapter