Connection to the mains supply, Welding- and return current cables – Kemppi 2200 Master User Manual
Page 6
MASTER 2200
2.3. CONNECTION TO THE MAINS SUPPLY
Connection of the main s cable and mounting and change of the plug should only be carried
out by a competent electrician.
For the time of the mounting of the mains cable remove handle and casing plate of the machine
MASTER 2200 is delivered equipped with a mains cable without a plug. By change of the mains
cable take into attention the following:
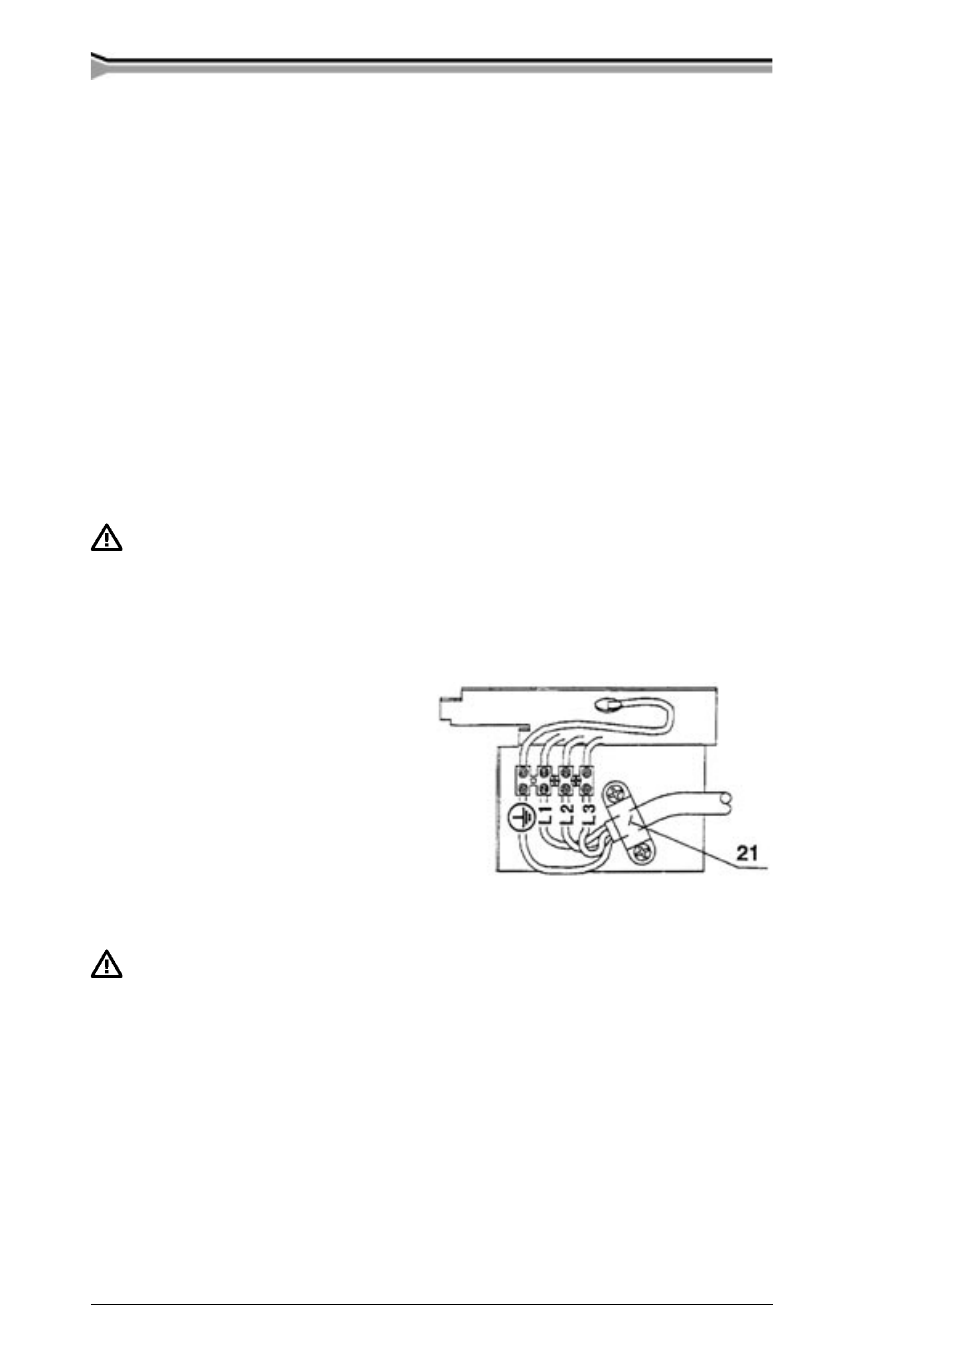
The cable is entered into the machine through the inlet ring on the rear panel of the machine and
fastened with a cable clamp (21). The phase leads of the cable are coupled to connections L!, L2
and L3. The earth protection coloured green-yellow is coupled to connection .
Sizes of the mains cable and fuse ratings for the machine at 100 % duty cycle are specified
in the table below:
Rated voltage
380 V 3 ~
Mains voltage range
380 V -10 % … 415 V +6 %
Fuses
10 A delayed
Connection cable
4 x 1,5 mm² S*)
*) In cables of S type there is a protective grounding conductor coloured green-yellow.
This equipment’s electromagnetic compatibility (EMC) is designed for use in an
industrial environment. Class A equipment is not intended for use in residential location
where the electrical power is provided by the public low-voltage supply system.
2.4. WELDING- AND RETURN CURRENT CABLES
Use only copper cables 25 mm².
Don’t use thinner cables!
Fasten the earthing press of the return current cable carefully, preferably direct onto the
piece of the press should always be as large as possible.
Clean the fastening surface from paint and rust!
3. OPERATION CONTROL SWITCHES AND POTENTIOMETERS
AND THEIR USE
3.1. MAIN SWITCH I/O
When you turn the switch into the I-position, the “ON” pilot lamp H11 on the front panel is
ignited and the machine is ready for use. The cooling fan of the MASTER gets started only
when welding
6 – MASTER 2200/0530
© KEMPPI OY