Legrand E86760 Type A User Manual
Page 2
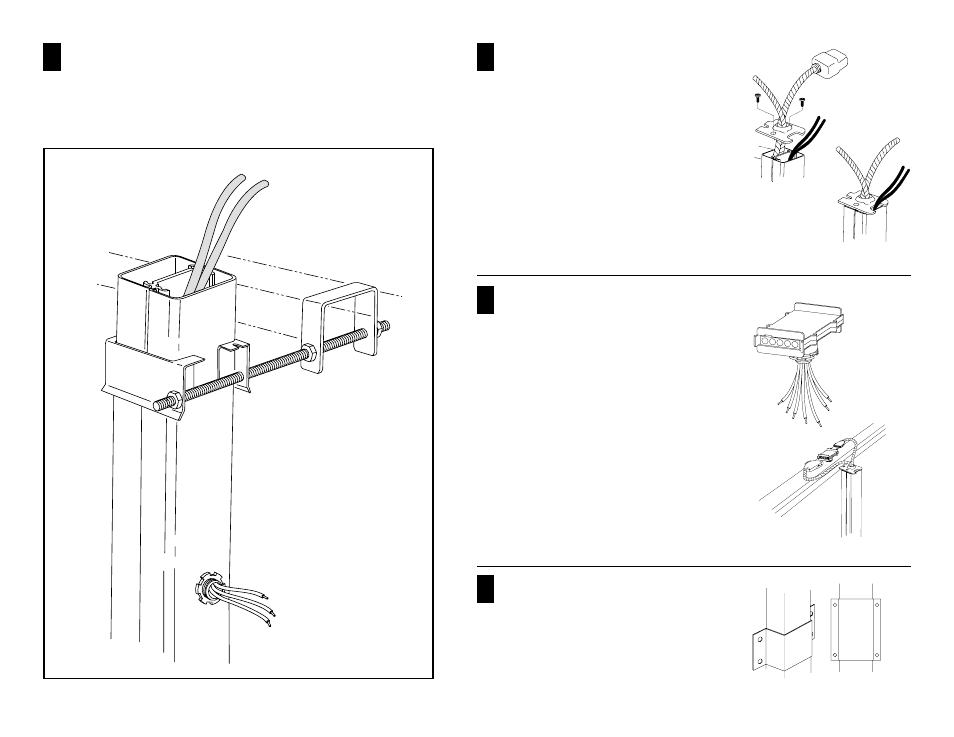
Attach Pole Brace to pole using 3/8" threaded rod (not supplied). Secure
with appropriate nuts; do not tighten. Attach Wireduct Bracket to Wireduct.
Secure the opposite end of the threaded rod to the Wireduct with suitable
nuts. For security, double nutting at the Wireduct end is recommended.
Tighten all nuts after checking that the pole is plumb.
CAUTION: Distance between pole and Wireduct must not exceed 36".
Communications Cabling
Type A and Type B Poles:
Connect factory installed telephone and data
cables in the communications section of the
pole to the building wiring system using
approved methods.
Power Wiring Type A and
Type B Poles:
Tighten the conduit connector and armored
cable into the entrance end fitting. Push excess
wire into pole top.
Power Wiring Type C Poles:
Run power conductors in armored cable from
building branch circuit to pole. Route through
conduit connector (provided) pole cover.
Connect branch circuit conductors to pole con-
ductors using approved methods.
Wireduct Power Wiring:
Run branch circuit conductors through the
Wireduct in an approved manner. Install
the modular whip connector into 1/2" KO in
cover of Wireduct nearest the pole.
Working from the inside of the Wireduct
with cover open, hook the mounting clip on
the lower edge of the hole cut. Tilt and
push the receptacle face into hole cut using
a straight blade screwdriver to compress
and seat the top of mounting clip.
Connect the whip connector pigtail leads to
the branch circuit conductors using an
approved method and carefully observing
color coding, connect green ground wire to
ground screw in pull box. Compress lock-
ing tabs on power whip plug and insert into
appropriate Wireduct receptacles (Type A
only). Receptacle and plug with the orange
dot indicate isolated ground circuit.
Additional Mounting Method for securing
pole to register counter:
Erect pole at desired location. Align four (4)
poles in “U” shaped mounting bracket with
matching holes in the counter vertical
member. Secure with appropriate fasteners
(not provided).
1
2
3
4
E86760 and
E86760WHTDJ shown.
E86763 Not shown one
armored cable.